How to hang a cornice on drywall?

How nice to know that the repair in your home is finally over. The final touches are left, and you can happily invite friends and relatives for a housewarming. The wallpaper is glued, the flooring is laid, the ceiling is completed, the only thing left is to fix the curtain rod and finish the design by hanging the curtains. But here a question arises that did not appear in the head at the earlier stages of repair: how to hang a cornice on drywall? Do not panic, frantically search for a good master and get upset. In this article we will try to understand everything in detail.
to contents ↑Mounting Options
Let's look at what kind of material. Drywall is a universal building material, which is very often used in construction for the embodiment of various design ideas, decoration of premises. He won the universal love of the builders by the fact that from it it is possible to fulfill and recreate absolutely any, even the most daring, idea of decorating a room. And most importantly - it will not take so much time. This is its advantage over all other building materials.
Important! But where there are advantages, there are disadvantages. Drywall also has them. First of all, it is that the material has low strength. Accordingly - this makes him vulnerable to stress.
Based on all the features of the material, fixing the eaves to drywall requires a clear course of action:
- One solution to the problem is to create a system niche. If nevertheless you decide to make the ceilings in the room from drywall, then the ceiling niche for curtains will be the most correct solution.
- If you have a regular metal cornice or plastic, then they can be attached using anchor bolts or dowels. This is another way of fixing the cornice.
Now you should decide which of the above methods is right for you.
to contents ↑Important! Do not forget to think about which cornice you choose, which curtains will decorate your room.
Preparatory work
Now let's figure out how to quickly and easily complete the task.
In order to attach the cornice to the ceiling of drywall, you must:
- Determine exactly which cornice will be attached, its shape and weight.
- Prepare the necessary materials and tools.
- Thoroughly carry out cleaning and soil preparation of the surface for fastening.
The form
Pay attention to the room in which the product will be fixed. Due attention must be paid to curtains. Depending on them, the width of the cornice and its edges will be determined:
- If you decide that curtains that have a decent weight will hang, you will have to perform a ceiling niche.
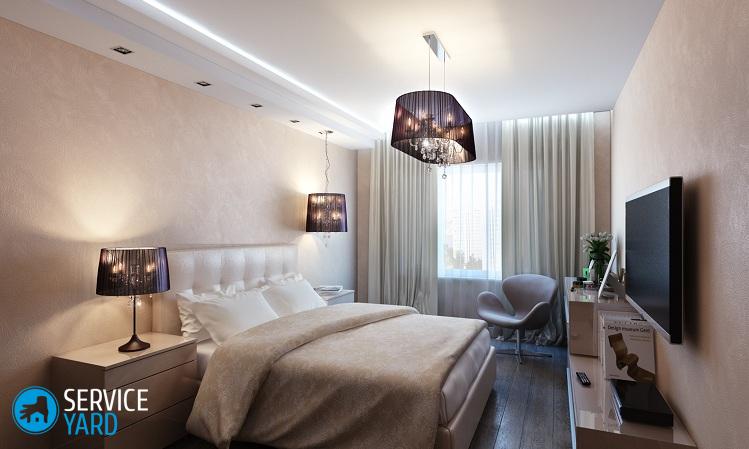
- In the room where the two-level ceiling will be made, curtains will look great on the entire width of the wall. Therefore, in this case, it is worth giving preference to the ceiling niche. Its presence will be convenient for proper fixing of the cornice. This, in turn, will hide all the shortcomings and will not spoil the general appearance of the room. In this case, the niche will be like a camouflage element for the tire along which the runners of the entire suspension system move.
Important! The presence of a niche will be an additional decorative element and will help maintain the integrity of the suspension structure. In addition, in the presence of a ceiling niche, the room visually enlarges.All this is due to the fact that the cornice and all fasteners are hidden. You can also hide electric drive devices there.
Materials for work
Before you hang the cornice on a drywall wall, you should draw a sketch or drawing of space in advance. All this will allow you to start work correctly, prepare the necessary amount of materials and reduce the likelihood of errors when performing work.
So, for fixing the cornice you will need the following materials and tools:
- firm chair or stepladder;
- hammer drill;
- roulette;
- level;
- hacksaw for metal;
- screwdriver;
- pliers;
- dowels, brackets, special corners;
- metal profile;
- construction or simple pencil;
- protective glasses.
Important! If you will fix heavy curtains, then anchor bolts will be the best clamp for them. They, in turn, perfectly fix and securely hold the ceiling cornice. Be sure to thoroughly clean the walls and ceiling before starting work.
Calculation of a niche and the implementation of fastening
Performing a niche in a room with low ceilings will reduce the visual reduction of space. All this thanks to the fixation of drywall on the ceiling. What is a niche? This is a box that can be located along one wall and around the entire perimeter of the room.
Important! Recall that it is necessary to prepare a drawing in advance with the desired location of the niche in the room. The shape and depth of a niche can be different. It all depends on the location of the windowsill and the distance from the radiator wall.
Markup:
- First, on the ceiling, it is necessary to note the line for the radiator or window sill. This can be done using a plumb line. Just attach any fabric or your tulle to the ceiling and lower it down so that it does not touch the radiator or window sill.
- Next, indent from the drawn line inward exactly 3 cm, mark another line. This will be a guide for the location of the first row of curtains.
Important! Note that you can retreat a couple of centimeters to one or the other side to form a niche that is suitable in your case.
- To obtain the desired width of the niche, it is necessary to retreat 1-2 cm from the outer border of the curtain.
Mount
All necessary marks are applied. Now you can begin to attach the metal profile. To perform a niche framework, you can use any type of profile:
- Further on the wall, where the line is marked, a profile of PN 27X30 mm is installed.
Important! The profile is attached to the wall with dowels. Holes are made with a perforator. The main thing is to take into account that the mounting step is 40-50 cm.
- In exactly the same way, the installation of the PN profile 27x30 mm on the ceiling is carried out.
- The next profile is mounted near the window opening. It will be located parallel to the first. Its size will correspond to the width of the created box. Only one profile row is fixed to the walls.
- Next, pieces of the PP27x60 mm profile are fastened. They, in turn, will show the distance by which the box will fall. The prepared, cut according to the necessary parameters, sections of the profile are installed on the profile located on the ceiling. In this case, the step will be 40-50 cm.
- On the lower surface of the attached segments, profiles of 27x30 mm are installed.
- Further, one end of the suspensions is fixed on the metal profile fixed at the window. The remaining end is on the profile farthest from the window.
- The next step is to cut drywall sheets. Their dimensions should correspond to the width and height of the existing box. Finished pieces are fixed with screws to a metal frame.
This completes the execution of the box. Then it must be puttied, if necessary - you can use a reinforcing tape. The most pleasant thing remained - the completed construction can be painted and decorated with a plinth, as around the entire perimeter of the room.
to contents ↑Niche-free mount
If you still decided that a niche in your room was useless, or remembered how to fix the curtain rod on drywall after the repair is completed, do not worry. There is a solution to this question.
In this case, the cornice should be attached either to the ceiling or to the wall above the window.
Important! An excellent option would be if at least one of these surfaces is not made of drywall. A good option for fixing is concrete, wood or brick. If one of the materials is present, then unconditionally attach to it. If there are none, then there is no choice - we will mount on drywall. Nothing is impossible.
There are peculiarities in this work:
- First of all, consider the option of having only one tulle or organza.
- If curtains are needed, then limit yourself to a lightweight fabric. At the same time, there should not be more than two rows of curtains (for example, tulle and curtains) on the cornice.
- In order to be safe in a house with small children, it is necessary to consider the option of blinds. They can be mounted directly on the window. Long curtains will be in easy access, which is unsafe for the child.
Step by step progress:
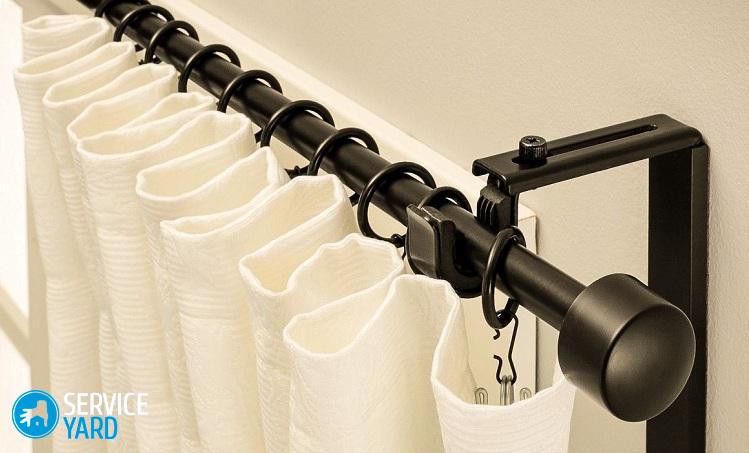
- Before attaching the curtain rod to the ceiling, marking is necessary. Brackets are installed strictly symmetrically. Take a close look at the cornice that will be attached. If there are rings in it, then they must be fixed at the same distance from each other.
Important! If the cornice is long, then it would be reasonable to mount it in the center as well. This action will add strength.
- Also keep in mind that the ceiling cornice must be selected in length longer than the window opening by twenty or more centimeters. It should be located above the window opening from 5 centimeters or more.
- After the marking has been applied, it is necessary to carefully drill drywall with a drill. Next, you need to install the bracket. It is better to install with butterfly dowels, the principle of which is to clamp the drywall sheet from the inside.
Stock footage
On this all the necessary work is done. Now you know how to attach a cornice to drywall, and you can start decorating the room with curtains. And a little hint - it’s better to move the curtains with a special pointer. This is very convenient and reduces the risk of various deformations on the ledge, increases their service life.
 (No ratings yet)