How to assemble a manual meat grinder - photo

A meat grinder is an indispensable device in the kitchen if it has been working properly for many years. To use the tool, you must periodically assemble and disassemble. If a man has no difficulties in this process, then among the wonderful housewives, not everyone knows how to cope with the puzzle. It will help you understand how to properly assemble a manual meat grinder, a photo from this article and detailed step-by-step instructions for this process. It is only necessary to remember the sequence once and then everything will happen by itself.
to contents ↑Types of meat mincers
Meat can be turned into minced meat using various tools: a blender, manual or electric meat grinder. To understand which technique is best for you, you need to know the following:
- Stuffing obtained from a blender is more like a puree and not many like it.
- In an electric meat grinder, you can change the consistency, as well as the degree of grinding of the product.
- Hand-held devices also have such an opportunity, but unlike an electric meat grinder, manual mechanics are designed as simply as possible and produce rather coarsely ground meat. It is such a product that is most optimal for cutlets, dumplings and other dishes.
Important! The mechanisms of the electric and manual meat grinder are similar. So, if you learn the sequence of how to assemble a manual meat grinder, then working with an electric device will also not cause you any difficulties.
 Since a manual meat grinder is present in almost every house, then we will pay more attention to it.
What does a meat grinder consist of?
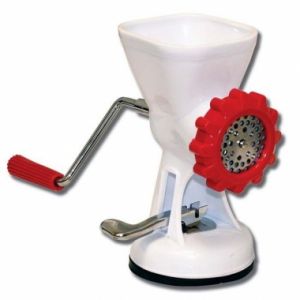
Before you assemble a meat grinder, you need to understand what it consists of. The main parts of a manual meat grinder are:
- case with a bell for laying meat;
- auger shaft - a mechanism that moves the loaded raw materials to the exit;
- a cruciform knife, similar to a propeller, which grinds everything that enters the meat receiver;
- round lattice with holes, the grinding quality depends on the diameter of the holes - the consistency of minced meat;
- lid-retainer that holds the knife and grill on the shaft;
- handle with screw for fastening.
Important! If the device is electric, then it may not have a handle. The remaining parts of the mechanism are universal.
A meat grinder may include various types of grids and knives, but this does not affect the assembly and disassembly of the device. The main difficulty in assembling the unit is to properly install the knife. In order to understand how to install it, it is necessary to assemble a meat grinder and prepare for work. Let's get acquainted with the manual assembly instructions.
to contents ↑Assembly procedure for a manual meat grinder:
- Install the auger shaft inside the housing. This part has a thickening on one side. It is this part that should be outside, since a handle with a fixing screw is attached from this side. If you pre-lubricate the screw with vegetable oil, then the adhesion of all other parts of the mechanism will be better, therefore, the work is better.
- Put the handle on the thickened end of the shaft and secure it with the lock.
- Put a knife on the thin end of the auger: the convex side into the body and the flat side out. If you install the knife incorrectly, then the meat grinder will not cut the meat, but crush it.If the device is equipped with a circular knife, then installing it should not cause difficulties. The cutting edges of the circular knife are clearly visible and naturally should look out.
Important! Use only the knife that comes with your meat grinder, as not all knives are universal and interchangeable.
- Attach the grill to the screw so that the cut on the grill aligns with the protrusion on the housing.
- Secure the entire structure with the locking cap by screwing it onto the thread around the grill. The grill after fixing the lid should be fixed.
- Fix the assembled unit on the table and the device is ready to work.
to contents ↑Important! Most housewives store the meat grinder in assembled form, just to fix it on the countertop before work. But after you successfully grind the meat, all the parts separately need to be washed, dried, and then properly assemble the meat grinder back. The assembled appliance cannot be washed, since the remnants of the uncleaned minced meat will begin to deteriorate, which means that the machine will have to be washed anyway, but now more thoroughly.
Dismantling and washing the meat grinder:
- Loosen the fixing screw that holds the handle of the meat grinder counterclockwise.
- Remove the handle.
- Take the rest of the appliance and place it over the sink so that the contents do not fall out onto the countertop.
- Unscrew the clamping nut by turning it counterclockwise. Use a dry cloth to grip the nut tightly with your hand.
- Remove the grill and knife from the auger shaft.
- Pull the shaft out of the housing.
- Thoroughly clean all parts of minced meat.
- Wash the elements of the mechanism with the gel for dishes or add a little soda to the water.
- Rinse parts with running water.
- Put the parts of the mechanism on a clean cloth or napkin so that they dry thoroughly.
to contents ↑Important! It is better to store the manual meat grinder in unassembled form.
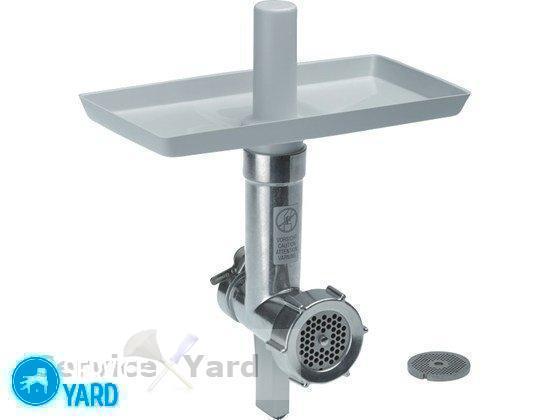
How to assemble an electric meat grinder?
 If you have learned step-by-step instructions on how to assemble a manual meat grinder, and even you didn’t need a photo for this, it will be easy for you to cope with the electric one. It is assembled in almost the same way, only the handle does not need to be fastened.
Important! Each meat grinder is accompanied by an instruction, where there is a picture-diagram that describes how to assemble an electric device. Use it as a hint.
Usually the build order looks like this:
- Insert the auger into the housing.
- Put the ring and cap on the auger shaft.
- Fasten the knife and net as described in the assembly for a manual meat grinder.
- Install the entire structure into the nozzle body.
- Lock the structure with the ring nut.
- Attach the finished meat attachment to the drive by inserting it into the groove of the cover.
- Lock by turning the nozzle counterclockwise until they are in a vertical position.
- Install the loading bowl into the neck of the housing.
- Remove the power cord from the drive bay.
- Connect the device to the network.
to contents ↑Important! During assembly of the device, carefully twist each of its elements. Especially the cover-lock, which tightly presses the knife and prevents it from blunting.
Helpful information
If the design provides for multifunctionality, then other assembly options are possible. For example, if you want to cook cookies, then instead of the usual lattice, put on a ring with curly slots, and do not use a knife at all. Instead, a thrust ring made of metal or plastic is inserted into the housing.
Therefore, when purchasing a meat grinder, keep the instruction manual, as this document contains pictures, diagrams, which indicate the sequence of correct assembly of your device. Until assembly of the unit becomes a habitual, simple affair, it is better to place a similar scheme before your eyes.
to contents ↑Stock footage
If you properly store, use a mechanical or electric meat grinder, then it will serve you for many years, which means that you can constantly delight your household with meat dishes from a natural product and sweet delicacies.
- How to choose a vacuum cleaner taking into account the characteristics of the house and coatings?
- What to look for when choosing a water delivery
- How to quickly create comfort at home - tips for housewives
- How to choose the perfect TV - useful tips
- What to look for when choosing blinds
- What should be running shoes?
- What useful things can you buy in a hardware store
- Iphone 11 pro max review
- Than iPhone is better than Android smartphones


