

How to disassemble a cabinet?
Not a single piece of furniture can stand in one place for several decades in a row, because someone often has to move, and others just get tired of the familiar atmosphere and want to make some adjustments. Naturally, small pieces of furniture, such as flowerpots, chairs, a coffee table, can be manually moved, but when it comes to larger parts of the interior, problems usually arise. Cabinets, for example, must be completely disassembled so as not to damage them during transportation, not to loosen the mechanisms. Of course, you can just wrap the furniture with a rope and try to move or transport it in assembled form, but why risk it? But it also happens that furniture is simply impossible to move outside the room because of its large size. Therefore, now we will figure out how to disassemble the cabinet yourself, so that everyone remains intact - both you and him.
to contents ↑Features of dismantling old cabinets with your own hands?
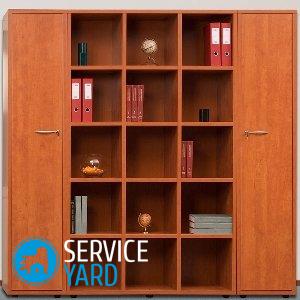
For many years, wardrobes are in great demand due to the variety of colors, good roominess. During repair or relocation, you have to completely disassemble such furniture, because it has many important functional parts and systems, the breakdown of which is simply impossible to prevent, otherwise it will stop working as it should.
Therefore, it is important to understand how to disassemble the old cabinet correctly, to study the structural features, disassembly of all elements. Features of the sequential disassembly of wardrobes are as follows:
- If you plan to disassemble and assemble the product yourself, it is better to write down all the work in stages. This will save you time and achieve the desired result. All parts are recommended to be packed separately so as not to damage anything.
- Before starting work, you need to free the cabinet from all things, get the drawers.
- Then comes the stage of dismantling the doors. It is advisable that someone help you with this, otherwise - you risk damaging the parts. To release the mobile roller from the grooves, you must first open the door, and then slightly lift it up.
- At the next stage, you can pull out boxes, shelves that previously could not be reached because of the door.
- Then the lamps are disconnected from the wires, because most models have a backlight.
- The next step is to work with the guide elements. You need to do this leisurely, carefully, because they can easily be damaged.
- Dismantling the housing starts from the rear wall. It is better to use some suitable tools so as not to break the mounts. Small details must be counted, laid out in packages.
- If there are mirrors on the doors, then you need to take care of their integrity and safety during the movement and transportation over long distances.
The main thing is to do all the work slowly, to allocate more time for it, so as not to accidentally damage the components, as a result of which the functionality of the entire cabinet may be impaired. In particular, it concerns expensive, exclusive models that are not only expensive, but also equipped with special mounts and parts.
to contents ↑Important! When planning the transportation of such a cabinet, take care of suitable transport in advance to preserve its original appearance.
General furniture dismantling scheme
To understand how to disassemble the cabinet and then assemble it correctly, you need to have minimal knowledge, skills. Remember that different manufacturers use completely different fasteners, fittings and parts for connecting partitions and shelves to each other, installing sliding and swinging facades. All of them have their own characteristics, and if you take them into account, then assembly and disassembly will not take you much time.
The general technique for disassembling any furniture looks like this.
Facade removal:
- Removing swing doors that are hinged is easy enough. Use a screwdriver to loosen the screws on each hinge from the side of the side panel. Then the facade can be easily removed.
- Lower support doors are even easier to remove. You need to lift them, before opening the locks on the wheels below, and move the door down and towards you, and then pull the upper rollers out of the upper guide.
- False doors are more complicated because they can be suspended by the guides located above the roof or under the roof.
- Bottom rollers can be located under or above the floor. They are all disassembled in different ways, but the principle is the same: first the door is lifted, removed from the guide from the top of the support roller from the top, then removed from the bottom of the support bar, and for this you need to pull down a little on yourself.
Back wall:
- If the back wall is attached to the cabinet walls and the ends of the shelves with nails, you must first remove it, because the partitions and shelves tightly sit on it.
- If it is fixed in the grooves of the side walls, floor and roof of the cabinet, then it will be necessary to remove it last, after the frame has been disassembled.
Remove shelves
Next, shelves located horizontally between the side walls and partitions are removed. Moreover, they can be mounted on different fittings. For instance:
- Parts assembled with the help of eccentrics must be disassembled with a Phillips screwdriver right under the shelf clockwise. And the shelf is removed by shifting up.
- In the case of using European-style screws, you must first unscrew the screws with a hexagon from the end of the shelf, and then do the same from the side.
- If the furniture is assembled at the corners, you should first open the covers of the plastic parts, and then unscrew the screws.
We remove partitions
Now we disassemble the partitions and sidewalls on the same principle as the shelves.
It is very simple to sort standard furniture - everything is clear on an intuitive level even to beginners. By the way, you can disassemble the built-in furniture yourself, because most often it is assembled with the help of corners, which are easily disassembled.
to contents ↑How to disassemble a wardrobe yourself?
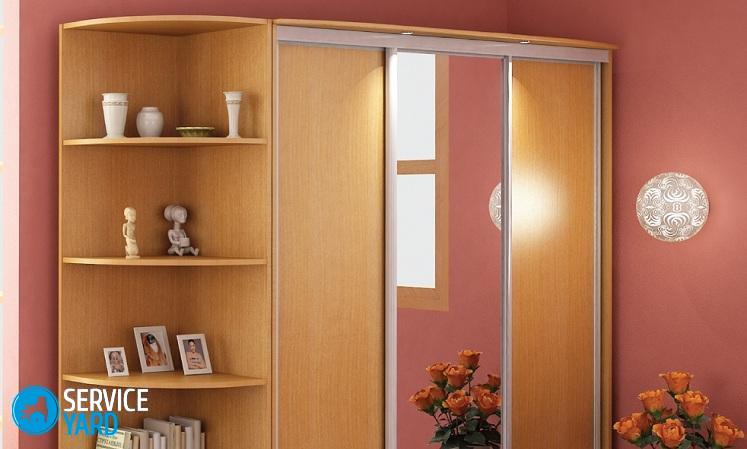
How are sliding wardrobes different from conventional models with swing doors? Naturally, the dimensions and features of the structure and operation of the doors. Therefore, before you disassemble the old cabinet, you need to study in detail each stage of disassembly.
Important! The sliding system makes it possible even for a person of small stature to take advantage of all the advantages of modern furniture. With it, you can store things almost under the ceiling and easily get them. The dismantling of such cabinets is based on the proper disassembly of the door and components, since the frame itself is very easy to disassemble.
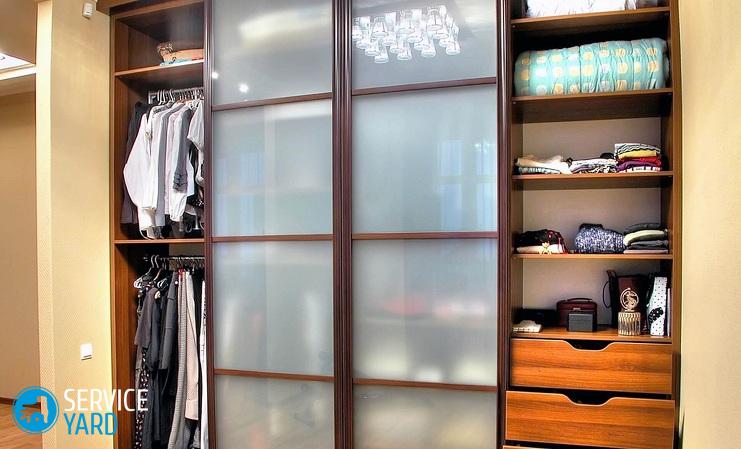
The complete set of any wardrobe looks like this:
- Canvas. They collect it, as a rule, from filler and profiles. They can vary in height, because the moving rollers are installed in the lower rail, and they are much larger in size. The side profiles are quite thick due to the fact that they form them in the form of handles.
Important! The grooves located in them are able to hold sheets with a thickness of 10 mm.
- System mechanisms. The complete set of sliding wardrobes assumes the presence of lower and upper rollers, adjusting screws, self-tapping screws. Also during installation, they are equipped with stoppers or closers, which ensure smooth sliding of the wings and their retention in the closed state.
The step-by-step dismantling of the door of the wardrobe is to remove each mechanism and part separately:
- Closer. As a rule, they are used in premium models to achieve a smooth ride and to protect the flaps from sudden movements. To remove the closer, you need to unscrew it, but do not rush to disconnect it from the canvas. It is better to leave it on the box in order to thereby facilitate its assembly in a new place.
- Locks or locks. These elements provide the closest fit to the walls of the cabinet casement. If stoppers are installed, a slight force can be felt during closing. Therefore, if available, you need to do disassembly. Unscrew the bolts that secure them with a screwdriver, disconnect the stoppers.
- The guides in most models are mounted on the frame, so when closing the sash does not rest against the side walls, but stops by means of side stops. In this case, you need to dismantle the stops and roll the canvas out of the rail.
- The lower rollers, as a rule, are equipped with special clamps that block attempts to remove the web. In order for the door to exit freely, you need to turn the flag on the lower rail 90 degrees, and the lock will be removed, and the panel will come out of the grooves simply and easily.
- You must also remove all detected fasteners.
- The sash can be lifted with a screwdriver.
- If it is not possible to remove the sash from the upper guide, it is necessary to unscrew both the upper and lower guides. This will ensure their safety during transportation.
- The sashes should be removed alternately.
Stock footage
It is recommended that you carefully adhere to the instructions, which describe in detail and consistently how to disassemble the cabinet. Remember, the more carefully you disassemble the cabinet, the easier it will then be to assemble it again in a new place.
- How to choose a vacuum cleaner taking into account the characteristics of the house and coatings?
- What to look for when choosing a water delivery
- How to quickly create comfort at home - tips for housewives
- How to choose the perfect TV - useful tips
- What to look for when choosing blinds
- What should be running shoes?
- What useful things can you buy in a hardware store
- Iphone 11 pro max review
- Than iPhone is better than Android smartphones
 (No ratings yet)