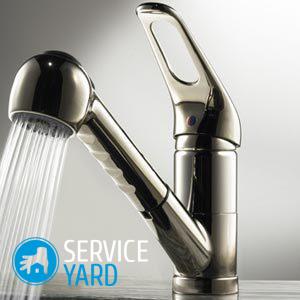
How to disassemble a single lever mixer?

For all the apparent complexity, disassembling a faucet in a bathroom is not such a complicated matter. Therefore, if you are puzzled by how to disassemble a single lever mixer, using the tips from this article you can easily cope with such a task. This will allow you to draw up an action plan and work on a pre-planned algorithm to fix the mixer.
to contents ↑Design features
Single lever mixers are popular for their aesthetic, modern design and ease of use. Another advantage is the maintainability of the device. You can fix it yourself, having a minimum skill in the manufacture of locksmith work. It is a housing in which hot and cold water is mixed. The plate in the housing acts as a lever.
Important! For the manufacture of mixers, materials such as plastic, metal and ceramics are used.
There are 2 varieties of single lever mixers:
- Ball.
- Cartridge.
Ball
The main detail of this design is a metal ball mounted in the body of the crane. There are 3 holes in the ball for discharging hot, cold and mixed water. For this reason, the capacity inside the metal ball is called the mixing chamber.
The ball is in contact with rubber seals. The adjustment rod actuates the structure. With an increase in the area of contacting holes, the water pressure weakens, and vice versa. The design is thought out to the smallest detail, so it crashes quite rarely.
Cartridge
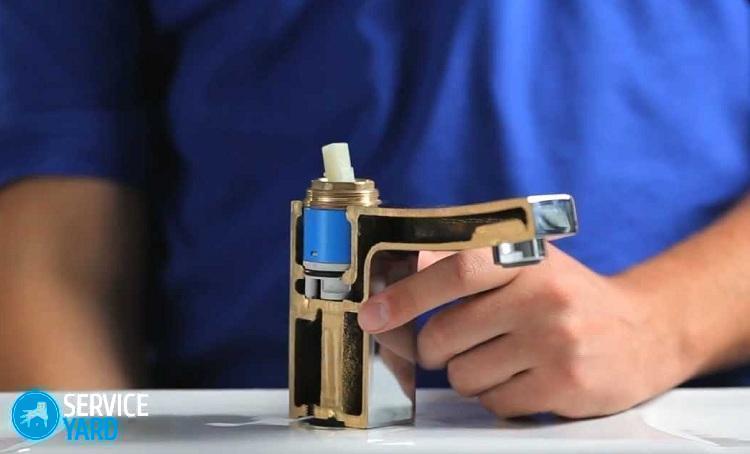
In this crane, instead of a ball, a cartridge with two ceramic plates is used. At the bottom there are 3 openings for discharging water. The upper part of the cartridge acts as a mixing chamber. The position of the joystick changes, and one of the holes in the bottom plate is aligned with the mixing chamber. Due to the use of special silicone grease, the lever movement is smooth.
to contents ↑Important! So that the cartridge does not fail due to the ingress of solid particles into its openings, it is advisable to use special filters.
Benefits:
- Simplicity and ease of use. Using a single-lever mixing device, moving the lever left and right, you get water at the right temperature for several seconds. Regulation of water pressure is carried out by movements of the lever in a vertical plane.
- Long term of operation. Disassembling the bathroom faucet with shower will be uncommon.
Disadvantages:
- Quick wear of rubber seals. In order to prevent breakdowns and blockages, it is advisable to change the seal once every 2 years.
- Some cheap models do not adjust the desired water temperature well due to the small adjustment angle. A similar problem is completely absent in better and more expensive models with a wide angle of adjustment.
Set of tools
To successfully disassemble a single lever mixer, you will need the following tools:
- Screwdriver.
- A set of hex keys.
- Pliers.
- Wrenches (wrench and adjustable wrench).
- Knife.
Before disassembling a single lever mixer in the bathroom, it is necessary to shut off the water at the entrance to the apartment. After that, open all the taps and drain the water. Of course, it is hardly possible to completely drain the water, therefore, to dismantle the mixer, you need to keep a basin ready.Now you can proceed directly to the dismantling of the mixer.
to contents ↑How to fix a cartridge type single lever mixer?
- Remove the plugs using a screwdriver. They are painted in different colors to indicate the direction of movement of the lever to adjust the temperature of the water.
- Using an Allen key, remove the screw that secures the joystick to the adjustment rod.
- Remove the handle from the tap. First remove the ceramic and then the clamping nut on the top plate. The ceramic nut is unscrewed by hand.
- Remove the mixer disc. If the cartridge begins to leak, it must be replaced with a new one.
- Replace the new cartridge. Tighten the nut holding the disc, put on the lever and tighten the screw. The plugs are the latest to install.
to contents ↑Important! When buying a cartridge, take with you an old, broken one. The problem is that different cartridges have holes of different diameters. The latches can also vary. In addition, pay attention to products with silicone gaskets. They are less susceptible to the damaging effects of water.
How to disassemble a ball mixer in the bathroom?
Disassembling a ball mixer is no more difficult than a cartridge. It should be borne in mind that in case of a serious malfunction, you will have to change the mixer completely. If the damage is insignificant, for example, clogging with abrasive particles takes place or the tap of a single lever mixer creaks, it is more advisable to repair it with your own hands.
Dismantling procedure:
- Remove the nut in the spout of the tap.
- Remove and rinse the net with water.
- Install the nut and mesh in the mixer.
If the valve leaks, replace the worn rubber seals with new ones:
- Loosen the screw and remove the lever.
- Remove the connection from the thread, and then unscrew the screw. It is usually contaminated, so wipe it with a cloth.
- Remove the rubber seals and replace them with new ones.
- Remove the ball.
- After replacing the gaskets, reinstall the ball. Secure the gaskets with a plastic nut.
- Install the lever, lock the screw. Be sure to test the crane for operability.
Stock footage
As you can see, adjusting the lever mixer is not particularly difficult. You just have to do everything very carefully, and your crane will work properly for a long time without causing you any discomfort or inconvenience.
- How to choose a vacuum cleaner taking into account the characteristics of the house and coatings?
- What to look for when choosing a water delivery
- How to quickly create comfort at home - tips for housewives
- How to choose the perfect TV - useful tips
- What to look for when choosing blinds
- What should be running shoes?
- What useful things can you buy in a hardware store
- Iphone 11 pro max review
- Than iPhone is better than Android smartphones


