

How to make puffs on curtains?

Today, designers in the interior design not only introduce new and original trends, but also constantly return to the roots. The same thing happened with puffs. They found a new life and “played with bright colors”, thanks to modern fabrics and textures. In the Middle Ages, such window decoration was the privilege of the nobility, as it was very expensive. In the modern world, you can afford it even with a small budget, if you know how to make puffs on curtains with your own hands, without the help of designers and without any special financial costs.
to contents ↑New life of old folds
Puffs - pinches and folds on the fabric, which are performed in the form of drapery made in non-standard ways. The result is a variety of extraordinary compositions that add high cost and gloss to the interior.
Important! Puffs have come to us since the time of Louis XIV. In those days, it was fashionable to decorate with voluminous folds not only windows, but also clothes.
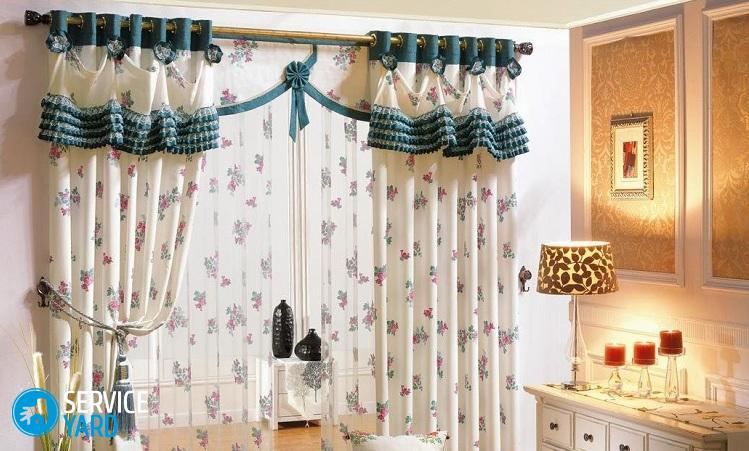
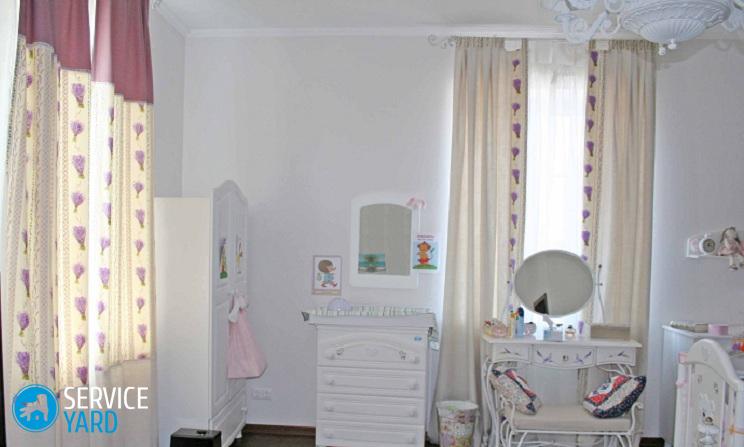
Designing a window with puffs is best when designing bedrooms, cabinets, living rooms or halls.
Using puffs in a modern interior
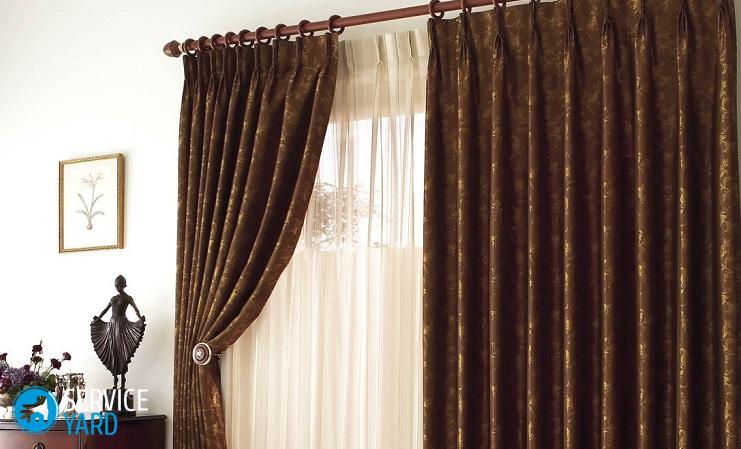
Most often, such decorative folds are used in rooms where the interior is made in a classic style with massive furniture, gilding and monograms.
Very peculiar and extraordinary they look in the Art Nouveau style. In this case, the difference will only be in the design of the fold itself. It can be made more magnificent and airy.
Types of Buffers
There are only two types of such decorative folds: factory production and those that are executed independently. The only difference between them is that manual work requires a lot of time and perseverance. As for factory production, you will receive the finished work as soon as possible.
To date, several buffer configurations are most popular:
- Rhombic;
- Pigtail
- Zigzag;
- Basket;
- Hungarian embroidery;
- English folds;
- “Waffle Pie”;
- Different kinds of flowers.
They got their names due to the shape of the fold, which ultimately turns out.
to contents ↑Important! In addition to decorating curtains, puffs are also sewn onto pillows and blankets.
Self tailoring
If you decide to create puffs on the curtains with your own hands, the result largely depends on the quality and texture of your chosen fabric. Thanks to the huge assortment, you can easily pick up the material, which will not only be ideal for creating decorative folds, but also completely fit into the style of the interior. In order not to be mistaken in the choice, we bring to your attention several recommendations.
Choose fabrics:
- It is best for curtains with folds to choose light fabrics.
Important! Try to pay attention to materials that have metallic overflow. Thanks to this fabric decor, the future crease will “sparkle” in a new way.
- If your choice has fallen on transparent fabrics, then they should be with various impregnations of lurex or other mother-of-pearl threads. Due to this combination, you can create overflows.
- For lovers of monochrome, you should make the fold on the curtain less voluminous. Thus, you can avoid the effect of crumpled curtains.
- Choose contrasting canvases that will combine and emphasize the finished product.
Materials you need
Sewing curtains with puffs is possible without the use of a sewing machine. But despite this advantage, you should stock up on a fairly large number of auxiliary tools:
- Sewing needles (note that they should be quite long).
- Threads. They should be in the tone of the fabric.
- Sewing pins with colored heads.
- Tape for curtains.
- Chalk or special sewing marker.
Important! Chalk or tailor marker can be replaced with a piece of soap. He draws well, while it is easily erased and leaves no residue.
- Tape measure.
- Long ruler.
- If available - sewing machine.
Calculation of the required number of buffers
The number of elements you need depends on the width of the future curtain. To do this, you need to multiply the length of your cornice by 2.5. The number that turned out is the length of the fabric that you will need with a margin for assembly.
Important! Always consider the amount of fabric that will be used to process the side sections. Therefore, you should add 10-20 centimeters to the total footage.
After you have calculated the amount of fabric you need, you can also find out the number of future folds. To do this, you need to divide the width of the curtains to the width of the future element.
Next, we calculate the width of the future lambrequin. It is calculated by summing up the following measurements.
- You need to multiply the height of the buffer element by the future number of rows.
- Calculate the future width of the curtain tape, while adding about 2-3 centimeters for free stock.
- In the end, you should know the allowance at the bottom edge (about 2-6 centimeters) and the width of the hem for the bottom cut (5-7 centimeters).
The main stages of sewing
The general algorithm for creating curtain buffs with your own hands includes the following steps:
- Choice of the scheme of the future pattern.
- Transfer of the finished ornament to the fabric.
- Arrangement of conditional points.
- Tightening threads. It is carried out in the order according to the scheme of your drawing.
Drawing a scheme with subsequent marking
In order to make puffs on the curtains, you should draw a preliminary diagram. Thanks to it, you can transfer the sketch from paper to fabric as correctly as possible. The pattern should consist of dots and arrows (the direction of the thread from one point to another).
Important! Transferring the pattern to the fabric should be exclusively on the wrong side.
During operation, always use a ruler. This is necessary so that the distance between the marks is equal.
There is another option. It is lighter since you are just copying a picture. You need to divide the curtain into several conditional rectangles. Using a ruler and a lamp, use the “tracing method” to transfer the pattern onto the fabric.
Important! Note that when transferring a picture, various errors can occur. You should pay attention to the fractional and weft rows of threads on the fabric. In order for the pattern not to be skewed, the circuit elements must be applied parallel to the threads.
Tacking
After the pattern is transferred to the fabric, you can begin the process of sewing puffs. If sewing is done manually, the work is quite painstaking, so be patient:
- First, make a knot on the thread.
- Insert the thread with the needle at the first point. It should not be stretched to the end.
- The “tail” that you have left must be at least 4 centimeters. Fix the base with a knot.
- The remaining part of the thread should be brought to a point that is located on the diagram at the entry of the arrow.
- We tighten so that the first tail of the thread and the last are connected. After that, they are connected and fixed with the help of several nodules.
Further, all work is carried out with each arrow individually on the entire curtain. As a result, on the front side, fees are formed, which are called buffers.
to contents ↑Important! Such tucks do not have to be done all over the curtain. You can decorate in this way only the top or the edges.
Do-it-yourself curtain puff schemes: original solutions
We bring to your attention a few simple but interesting ideas on how you can decorate a window using buffers.
Original decor with a simple zigzag
For this option, the first thing to do is measure the tissue. To make the calculation, the necessary height of the curtain should be multiplied by the fold factor. The width of the tissue cut is calculated using the same formula.
Important! The universal indicator for all types of fabric is 2.5. Depending on the taste and the volume of the future buffer you need, the coefficient can be changed up or down.
Let's get to work:
- Place your piece face down.
- Divide the width of your cut into an even number of strips of the same width. Start with 15 centimeters. Mark each strip.
- Along the first strip at a distance of 15 centimeters from each other, put dots.
- On the second strip, you do everything the same. The only thing is that the points must be placed between the marks of the first row. You should get a chess layout.
- According to the applied scheme, you need to collect warehouses along the first line. To do this, pass the needle and thread to the first point of the first row and grab the fabric down the line. After 2.5 centimeters should be connected and secured with a knot.
- When you have finished the first row, go boldly to the second. Work the same way.
"Wave"
For this method, you need a transparent fabric and a sewing machine. Thanks to the use of this texture, future puffs will turn out light and airy:
- From the wrong side, markings should be made in the form of parallel stripes. The distance must be the same.
Important! The smaller the bandwidth, the finer the wave.
- Using a sewing machine, sew the front page. Do not cut the thread immediately. It needs to be cut off, retreating about 10-15 centimeters.
- Stitch the second strip in the same way, only now you need to change the direction of the line.
- Further we work according to the same scheme, alternating the lines of lines.
- After everything is finished, pull one of the threads towards you and fix the knot. So you get the wave effect.
Austrian puffs
In order to bring notes of Austria into the interior of the room, you need a piece of light curtain fabric and a sewing machine:
- On the seamy side of the cut, apply strips 30-40 centimeters wide.
- Put a tape on each strip, sew with a sewing machine. The thread should be cut with a margin.
- After the entire cut is processed, tighten the thread. You should get a wave whose height you adjust yourself.
- Form nodes and cut off excess.
Waffle pattern
To create such a pattern, you need a dense and pearly fabric. In this case, you will have to do without a sewing machine:
- On the wrong side of the cut, apply parallel strips 10 to 20 centimeters wide from each other.
- Along each of the bands at a distance of 10-20 centimeters arrange parallel points.
- With the help of a thread and a needle, tighten the first two points of two parallel rows and fix with a knot.
- Pull together the third points of the first and second rows. You should continue according to the same scheme, while working only with odd marks.
- When you have finished work with the odd ones, do the same with the even marks.
How to sew a puff directly on the curtain?
In order to decorate the window with the help of extraordinary folds, you do not have to purchase new ones. You can also make puffs on old curtains:
- On the wrong side, make notes with a special marker and ruler. For example, imitate the cell of a school notebook, with sizes from 5 centimeters. You do not have to process the entire curtain or tulle. 30-40 centimeters are enough for originality.
- Braid should be attached to the top row. First, flush the first marks, after which only odd ones.
Important! To create additional waves, measure 8-10 centimeters while flashing from the tape.
- With the following lines we do the same.Here are just flashing even lines.
to contents ↑Important! This version of the manufacture of puffs can be done without braid.
We sew lambrequin puffs according to the “Braiding” method
In order to create puffs on the pelmet, you need to have a little sewing skills and the following inventory:
- Drapery fabric;
- Narrow and wide braid;
- Long ruler;
- Scissors;
- Special marker for fabric.
Getting started:
- Chart future buffers.
- You need a decorative rectangle or square about 10-20 centimeters in size. They will serve you as a pattern.
- Take the underside of the fabric and make a hem on the sides, then sew the curtain tape.
- On the wrong side, with the help of your patterns, apply a drawing according to the scheme.
- At the top cut, leave about 50 centimeters for the future buffer and 5-10 centimeters for assembly.
- The lower part and sides should be treated with a slanting inlay.
- On the wrong side, sew a wide ribbon according to the pattern.
- Tighten the tape until you get the folds you need.
Making puffs right
There are various ways to make puffs on curtains. You can decorate them both from the inside and from the front, or experiment with fabrics. But in order for you to succeed, you should adhere to several rules:
- Always consider the density and texture of the fabric. It is best to choose light and medium light materials.
- When choosing a fabric, you should always remember that for tightening tight fabrics it is necessary to apply strength and the acquisition of very strong threads. The pulling together of the light tissues will not require much effort, and the pattern as a result will be lighter and more airy.
- Choose plain curtains.
- For the manufacture of puffs, use threads twice as thick as for sewing curtains.
- Get a set of needles with different lengths.
- If you are a beginner, then do not take complex patterns.
Stock footage
In order to design a window with the help of puffs, you do not have to be a noble aristocrat. Thanks to the above recommendations and rules, you can create a decor that Louis XIV himself would envy. The main thing is to have a little patience and perseverance. And then you will succeed.
- How to choose a vacuum cleaner taking into account the characteristics of the house and coatings?
- What to look for when choosing a water delivery
- How to quickly create comfort at home - tips for housewives
- How to choose the perfect TV - useful tips
- What to look for when choosing blinds
- What should be running shoes?
- What useful things can you buy in a hardware store
- Iphone 11 pro max review
- Than iPhone is better than Android smartphones
 (No ratings yet)