

How to make a photo album with your own hands?

We all cherish our favorite memories, regardless of whether we like to be photographed or not. That is why it is not very pleasant if the photographs dear to the heart are stored in dusty boxes, in paper folders. Much nicer would be the fact if the photos were stored in a practical and beautiful photo album. In this article, we will tell you about how to make a photo album with your own hands.
to contents ↑Basic rules for registration
The end result depends on the initial idea. Therefore, before starting work, it is advisable to consider in detail each detail on the product. In addition, we must not forget what the composition of the work and its plot are, especially if you give such a product to someone. So, let's talk about the main points of the design work.
Plot
The plot is called the element of the implementation of ideas. As a rule, they think about this component first. Usually they create albums devoted to family life, weddings, newborns. A self-made album can also be presented to a relative, work colleague or loved one.
Composition
An important role here is played by visual unity. Before you make a photo album with your own hands, you must correctly place all the stickers and photos on the pages, because such a component should also not be neglected.
Composing a competent composition, you must be guided by the following rules:
- Determine where the center of the composition will be located.
- Set bright accents.
- Make sure that the colors on the pages are in harmony with each other and that there is room for signature on them.
- Balance the proportions.
- Choose decorative elements suitable for the photo.
- A certain triangle must be observed: “heading - photo - description”.
Style
Particular attention should be paid to the style of work. Before you design the pages and cover of the photo album, you should decide what style represents your family or loved one.
The main styles include:
- Minimalism. This style involves a minimum of jewelry.
- The lack of decorative elements is also characteristic of the European style. Its main feature is the variety of forms of photographs that are cut out in the form of an object (for example, a heart or a star).
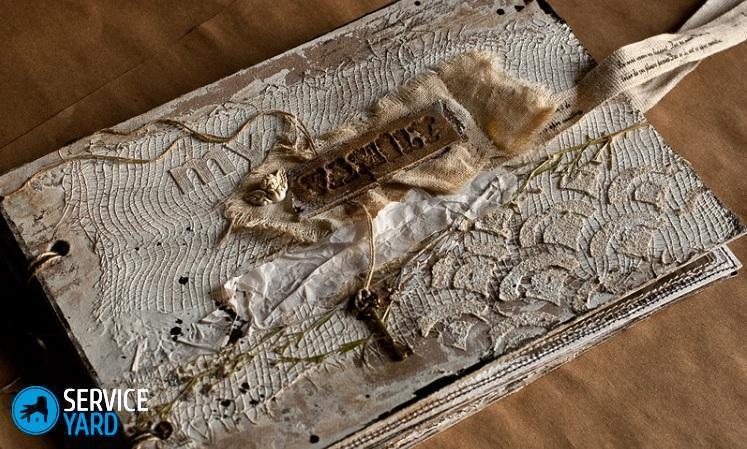
- Vintage style for history buffs.
- Shebby-chic style involves the presence of various cute ribbons and lace. A photo album in this style will be the perfect gift for a little girl.
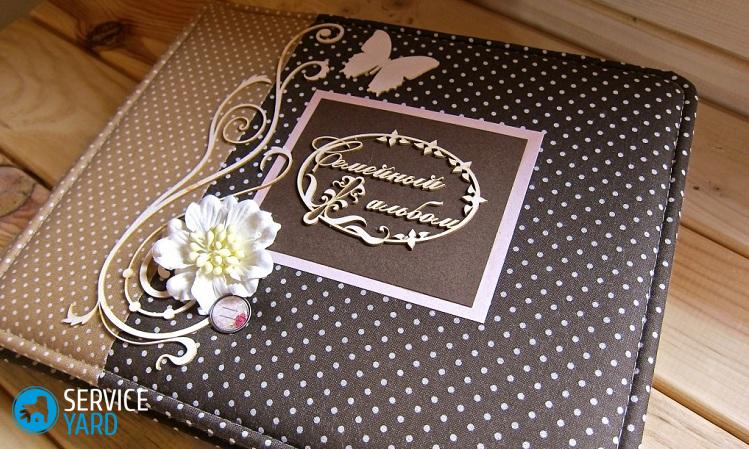
- The American style is full of many decorative elements.
Technicians
The technique of making a photo album with your own hands can also be different, and you can come up with your own.
The main techniques are:
- Stamping. By name, it is clear that such a technique involves the use of different applicator dies.
- Decoupage. Here, a special role is played by drawings, stickers, pictures, ornaments.
- Cropping. The focus is on the photos themselves: they are cropped so that the key moments of the image remain.
- Logging Usually this is the name of the photo, supplemented by original signatures.
- Distressing The key to this technique is paper aging.
Step-by-step production of a gift photo album
In this section, we will talk in detail about how to make a DIY photo album step by step for beginners.
Materials for work
To carry out the work, the following materials will be required:
- Scrap paper.
- Thick cardboard (300 g / m²).
- One-sided adhesive fabric.
- Decorative fabric.
- A little sintepon.
- Satin ribbon.
- Notebook.
- Needle.
- Awl.
Do-it-yourself photo album - a step-by-step master class for beginners
So, let's move on to making the album. In order for the gift to work out well, the following algorithm must be observed:
- The layout of the album. So that the end result only pleases the user, you need to accurately plan each landscape page. Before you start the procedure, you need to plan everything correctly on the template - an ordinary school notebook in a cell of the appropriate size can play its role. There you can sketch an approximate arrangement of photographs and decorative elements.
- Now you can start binding the album for photos. To do this, you need to take cardboard prepared in advance and cut three strips from it, exactly 24 cm high. The width should increase in proportion. After this, it is necessary to fold the sheets so that roots are formed, which gradually increase in size (it is better to draw them before the procedure). In the end, you get a book with a spine. Along the line of this spine, all the details need to be glued together. Next, the firmware is waxed with a cord. DIY photo album framework is ready.
- Now you should pay attention to the design of the pages. This procedure can be carried out using scrap paper. Additional parts can be glued with silicone glue or double-sided tape. The resulting backgrounds are pasted onto the “bare” pages of the album.
Important! It should be borne in mind that volumetric decor should be placed evenly on the sheet, at the same time, it should not deform the pages of the photo album.
Album's cover
The basis of the album is made, the pages are decorated, but what to do with the cover? The cover of the photo album is the face of the future gift, which means that it should look appropriate.
Important! The cover must be processed, observing the size of the binding. Cardboard with a width of 2-2.5 mm is ideal.
Consider the following course of action:
- Prepare two blanks for cardboard covers with a spine.
- Cut pieces of adhesive tissue that match the workpieces.
- Position the spine between the blanks of the covers, while indenting 0.3 mm.
- Fasten the parts with adhesive cloth.
- Cut the synthetic winterizer corresponding to the size of the workpiece, attach it on top.
- This design must be applied to the fabric, which was chosen as an element of decor.
- Leave on the sides three centimeters of fabric. They will be attached to the workpiece using double-sided adhesive tape. Where it is not, fix the structure with glue.
The final stage
Do-it-yourself photo album is almost finished. It remains only to complete the assembly:
- First of all, you need to alternately fasten the double sheets of the finished binding. The first sheet needs to be attached to the cover.
- When the structure has dried, go to its firmware: having opened the album in the middle, you need to outline the places for the holes, then punch them with an awl and flash them with a beautiful satin ribbon.
- Fix corners with special decorative corners. Do not forget about the additional cover decor.
Making a photo album for a baby
Recently, albums for kids are very popular. You can make a photo album for your baby with your own hands is very simple: just connect imagination and accuracy.
Remember that such an album for the baby will be the very first, which means - the most beloved. That is why the whole soul should be invested in the manufacture of such an item:
- As the very first photos, you can use the photo after an ultrasound, discharge from the maternity hospital, the first photo in the hands of my mother, the first steps and much more.
- As a decor for albums for newborns often use booties, ribbons worn by the baby from birth.
to contents ↑Important! Do not forget to add fun inscriptions to your photos, because memories fade over time.Over time, such an album can be supplemented with the first creative work of the baby.
Stock footage
Making and decorating the album with your own hands is a very interesting and fascinating activity. Close people can be involved in this procedure, and then it will also be fun.
- How to choose a vacuum cleaner taking into account the characteristics of the house and coatings?
- What to look for when choosing a water delivery
- How to quickly create comfort at home - tips for housewives
- How to choose the perfect TV - useful tips
- What to look for when choosing blinds
- What should be running shoes?
- What useful things can you buy in a hardware store
- Iphone 11 pro max review
- Than iPhone is better than Android smartphones
 (No ratings yet)