

How to make a paper mug?

An originally decorated decorative mug made of paper on its own is an excellent option that can be presented as a small gift for any holiday or special occasion. In addition, such a product can be successfully used to store various small accessories and cute trinkets. The process of making a paper cup is relatively simple and does not take much time. In no more than twenty minutes, you can create a unique and original thing from paper with your own hands. In this article we will consider in detail how to make a mug of paper or cardboard with your own hands.
to contents ↑How to make a decorative paper mug?
At all times, gifts that were made by hand were considered the best. Even if the first time everything does not always turn out smoothly and beautifully, do not despair, because you can always redo it, the main thing is to have a desire for this. Love and desire to make a pleasant surprise are invested in handmade gifts; naturally, it will be appreciated. If you show imagination and make an effort, then a rather banal gift in the form of a mug can give an interesting and original look.
Before proceeding with the manufacture of a decorative paper mug, you must first prepare the necessary materials and tools:
- a dense sheet of cardboard of a pre-selected color scheme, preferably monophonic;
- a sheet of decorative paper of the corresponding color;
- 3 brads;
- ribbon for decoration, having a satin base, or any other decorative element;
- ruler;
- ball pen;
- paper scissors;
- curly scissors;
- glue stick.
Consider the process of making a decorative mug:
- First, on a colored cardboard, it is necessary to draw a rectangle that has the appropriate dimensions: length - 27 cm, width - 13 cm. After that, it should be cut out.
- From the wrong side of the cut out figure, every 3 cm with a ballpoint pen, draw transverse lines that indicate the fold lines.
- 9 cm from the top edge of the finished workpiece and draw a longitudinal line.
- After that, color cardboard should be bent along the intended lines.
- In the lower part of the rectangle, on the smaller side, cuts should be made that should reach a horizontal line.
- Now on decorative paper it is necessary to draw eight identical rectangles that correspond to the following sizes: length - 8.5 cm, width - 2.5 cm. Cut them out.
- With these rectangles, glue each edge of the future circle.
- Glue the extreme edges of the manufactured product in such a way that you have a cylinder.
- To make the bottom of the circle, it is necessary to fold and glue the protruding opposite ponytails.
- Now we turn to the manufacture of pens. To do this, you can apply the remains of cardboard, from which a strip of 14 by 2.5 cm should be cut. You can trim the edges of the handle with curly scissors - so it will be framed in a wavy version.
- Using brads, you can attach a pen to our product. It is best to attach to the densest segment. When gluing the cup, the double rib serves as such a place.
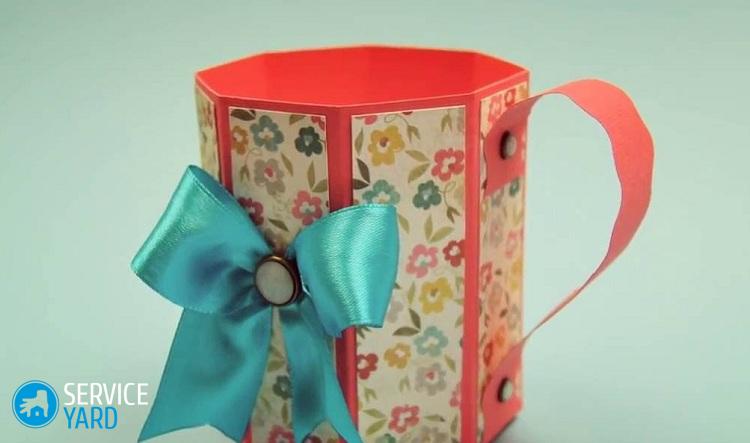
- From a satin ribbon you need to tie a bow, which with brads should also be attached to the mug. If desired, you can add other decorative elements.
Decorative paper mug is ready!
to contents ↑How to make a cup of paper?
To make a paper cup, you need to prepare the following materials:
- paper;
- cup template pre-printed on a computer printer;
- paper scissors;
- glue stick;
- pin;
- pen or pencil.
We will analyze step-by-step steps on how to make a cup of paper:
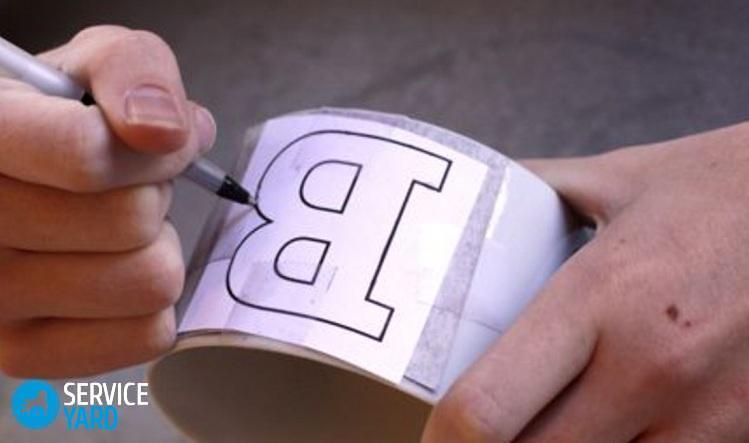
- Make the handle, which is the most difficult element of the cup. From a pre-prepared template, which at your discretion can be downloaded and then printed on a printer, cut out three corresponding blanks.
- Next, a long part needs to bend the edges.
- Now the pens themselves need to bend the edges.
- Then the long blank should be glued with one of the elements, the so-called “squiggle”.
Important! When gluing, traces of glue can be seen, do not worry - when our product is completely dry, no traces of glue will be visible.
- The next step is to glue the second “squiggle”. For the bent labels formed on the other hand, in the future it will be necessary to glue the handle to the future product.
- Now put the pen aside and start cutting two pieces, the so-called “mills”.
- Next, bend the side parts. In the middle part of each “mill” it is desirable to pierce a small hole so that it is relatively easy to align them strictly in the center.
Important! No need to glue these two blanks in the center. If there are certain difficulties, then for convenience you can use the pin, which must be very carefully attached in the center of the parts.
- After that, glue the formed folds onto each element of the “mill” wing. This procedure must be carried out very carefully so that there is no shift in one part relative to another.
- Now we proceed to gluing together all the wings of our “mill”.
Important! If in the process of creativity it turned out that the edge of the product is not quite even, then you can walk along the edge of the future cup with paper scissors and align it.
- After this, it is necessary to make the so-called stand. To do this, cut out small “mills” and glue them in exactly the same way as a large cup.
- As a result of the creative process, three main details were obtained: a pen, a stand, and a cup blank. Now you need to glue them all together. You need to start from the stand, and then go to sticking the handle.
- To make the lid you need to cut two parts, bend the sides at a long workpiece. Now carefully glue both parts together.
The cup is ready!
to contents ↑How to make a cup of cardboard?
Using cardboard, you can create a more durable cup. To manufacture such a product, we need the following materials and tools:
- Paper or cardboard. As starting material, you can use packaging boxes for products for which cardboard of various density and quality is used.
- Scissors for cutting paper and the corresponding knife.
- Glue gun or ordinary glue.
- Paper tape.
- Newspapers for papier-mâché.
- Napkins for decoupage.
- Brushes and paints.
- The cup template to download and then print to the printer.
Consider the step-by-step process of how to make a cup of cardboard with your own hands:
- First, transfer the contours of the cup from the prepared template to the appropriate cardboard, and using a knife, cut the workpiece.
- After that, you need to glue the edges of the cup sections together, then glue the bottom and glue the bottom of the base, the so-called rim, to it.
Important! To prevent gaps that can form in the cup at the places of gluing, it is necessary to use paper tape on both sides of the product. They need to glue the base and squeeze it carefully.
Basically, our product is ready. But if you want to create a beautiful thing, then you need extra time to design a decorative cup in an original way:
- It is necessary to prepare a certain mass of papier-mâché from newspapers and glue. Step by step, you need to glue our product both outside and inside. Choose the thickness of the cup - this plays a role for applying the number of layers to our original little thing.
- When the papier-mâché is completely dry, you can start decorating our product. It all depends on your creative imagination and creative ideas. There are many interesting design methods: you can glue the cup with unusual pictures from glossy magazines, apply the decoupage technique using a creative napkin, apply images made with paints in the form of still lifes and landscapes, or you can simply decorate with rhinestones or an unusually beautiful tinted fabric.
- The handle of the cup should also be decorated accordingly, only after that it can be glued to our product.
At the end of the process, the product should be varnished.
If desired, several cups can be made. Moreover, each personal gift should be decorated in a special way and not be repeated.
to contents ↑Paper mug as a gift for February 23
For men, you can present a decorative mug made by yourself as a gift. Consider another version of such a product.
The following materials must be prepared:
- several sheets of cardboard with pre-selected colors;
- colored paper;
- scissors for cutting paper;
- curly scissors;
- ruler;
- glue stick;
- tea bag label;
- a simple pencil;
- not a pen;
- Scotch.
How to make a cardboard mug as a gift for February 23:
- For example, you need to prepare a sheet of cardboard in purple and cut a rectangle with dimensions of 15 by 20 cm.
- On each side of our figure, step back from the edge of 3 cm and draw with a pen that does not write, fold lines.
- Now you should bend the edges along the planned lines.
- Next, cut two strips: yellow, which has a width of 1.5 cm, and green, 1 cm wide.
- After that, stick these blanks at the bottom of the cardboard.
- Next, cut out several circles from red cardboard.
- Then these elements must be glued on top.
- Now you should bend 1 cm inward on both sides of the workpiece.
- After that, from a golden cardboard with dimensions of 6 by 9 cm, you need to draw up a pen. To do this, you need to bend the cardboard in half, glue it and draw a pen.
- When the glue dries, you can cut the necessary part.
- The next procedure will be the execution of the basis. For this we need golden cardboard with dimensions of 10 by 15 cm.
- Now you need to glue the top of the product and the base. On one side of the mug you will need to glue the handle.
- From the tea bag, you should cut off the label and stick it with tape with the inner surface of our product.
A do-it-yourself mug for the holiday is ready!
to contents ↑How to make an origami paper mug?
The word "origami" in translation from Japanese means "the art of folding paper." Since the advent of paper, origami has also emerged. A very ancient skill of folding figures from paper sheets is the art of creating a holistic composition.
How to make a paper mug:
- First you need to prepare a square piece of paper.
Important! If you have a standard A4 sheet, then you should take any corner of the paper and pull it to the opposite side. Thus, a double triangle should turn out and a single rectangle should remain. It is he who needs to be cut to get a beautiful square sheet of paper.
- Fold the leaf in half diagonally to make a double triangle.
- Bend the right corner of the resulting shape so that its tip touches the center of the opposite side of the triangle.
- Repeat this action with the left corner of the figure.
Important! As a result, both bent corners should form a straight line. That is why you should fold the paper very carefully and carefully.
- Bend the front of the upper triangle so that it overlaps the previously folded small triangles.
- Bend the second part of the upper triangle back.
A beautiful and original origami paper mug is ready!
to contents ↑Stock footage
In this article we told you different ways from which you can choose a more interesting option for yourself to make a paper mug with your own hands for a gift for various events.
- How to choose a vacuum cleaner taking into account the characteristics of the house and coatings?
- What to look for when choosing a water delivery
- How to quickly create comfort at home - tips for housewives
- How to choose the perfect TV - useful tips
- What to look for when choosing blinds
- What should be running shoes?
- What useful things can you buy in a hardware store
- Iphone 11 pro max review
- Than iPhone is better than Android smartphones
 (No ratings yet)