

How to make a ladder with your own hands?
A wooden ladder is a very important and extremely necessary thing in the life of any private house, cottage, country cottage. You can’t do without it in repair, construction, and landscaping matters. Of course, you can buy a metal staircase, but it is much more expensive than woodwork. In many cases, the manufacture and installation of an attached model will be the best solution to the problem. If you choose the right materials, understand how to make a ladder with your own hands, follow the technology, realize the idea will be quite easy.
to contents ↑Strengths and weaknesses of wood
As a rule, wooden stairs are made of coniferous wood. The most popular in this business is pine. There are certain requirements for wooden bars, compliance with which will make it possible to make a quality staircase and extend its life:
- Do-it-yourself ladder made of wood is made of smooth beams. They should not have cracks, knots, cross-beds.
- The selection of material depends on the height of the stepladder or ladder to be done. If the structure is planned to be at least three meters, then the masters recommend choosing bars for it with a section of 40X50 mm. If the ladder is higher, then 40X80 mm. The price of the latest building materials is almost half the price, but the staircase will turn out to be stronger.
Important! The steps of the stairs are also made of coniferous trees. Masters usually choose for them a bar section of approximately 35X40 mm.
- Before starting work on the manufacture of the structure, it is necessary to treat the bars with an antiseptic solution. It is better not to save on the purchase of this drug, because the ladder treated with an antiseptic will serve you much longer.
Design features
First you need to understand the design features and understand the basic requirements that apply to ladders. In fact, this is the simplest type of product, and therefore it will be quite easy to make them with your own hands:
- The design consists of two long strips that are interconnected by steps-crossbars.
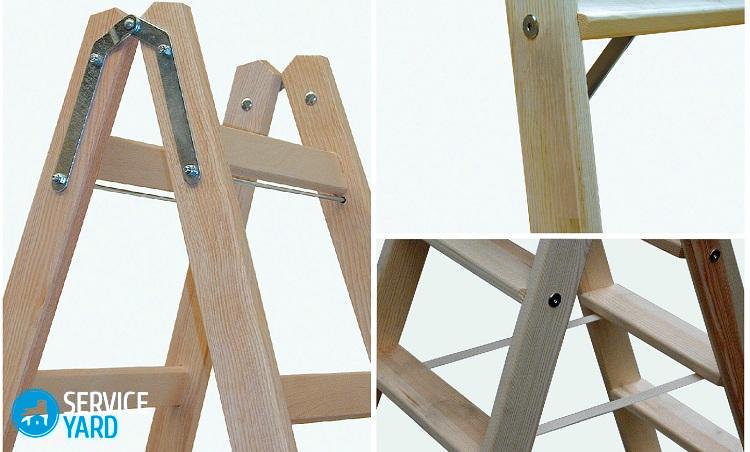
Important! If you make two ladders and connect them together, you get a stepladder.
- The supporting side beams are called bowstrings - they are the support of the whole structure and fasten the crossbars. The latter can be made in the form of strips of the same or slightly smaller section, and also additionally strengthen the steps on them for greater convenience.
Important! The length of the side elements for the staircase can be calculated as follows: measure what height you want the product for and add 30 cm to this figure. It should be noted that for wooden products the maximum height is 5 meters. The average step pitch is 25-30 cm. In order to determine their number, the length of the bowstring must be divided by the distance between the crossbars.
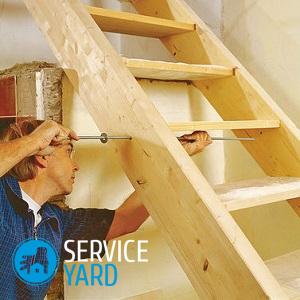
For the manufacture of a robust construction, screeds are a prerequisite.They are metal bolts that are installed in three to four places, depending on the size of the structure: under the lower and upper crossbars, as well as in the middle.
to contents ↑Necessary tools and materials
In order to make a ladder with your own hands, you will need a certain set of materials and tools. First of all, it is necessary to prepare the following:
- Hammer.
- Ax.
- Chisel and chisel.
- Hacksaw.
- Screwdrivers.
- Plane.
Step-by-step instructions for making a wooden staircase
Perhaps our tips will be painted too broadly, but we have prepared this instruction for beginners who first picked up the tools and first try to make a hand-made wooden staircase with their own hands.
Production of support beams (bowstrings)
They should be the same length, for example, exactly five meters:
- From one edge of each bowstring, cut a piece of wood at an angle to create better traction - this will be the bottom of the stairs.
- Now lay two beams on a flat surface so that between their lower ends there is a distance of approximately 65 cm (the width of the ladder below), and between the upper approximately 40 cm.
Important! It would be better to fix the bowstring in this position in any convenient way.
Making “notches”:
- Step away from the bottom of the stairs about 49 cm.
- Put cross marks on wooden beams every 30 cm - this will be the frequency of the steps set.
- Next, exactly on the marks, make a gash to a depth of 2 cm.
- Above the mark (5 cm), set the chisel at a 30 degree angle with the blade facing the mark.
- Hammer the blade gradually so that it cleaves a piece of wood, forming a small step in place of the mark.
- So it is necessary to do with all the marks on the bowstring.
Important! It is desirable to treat the grooves with paints and varnishes in order to protect the product from corrosion.
We make steps
You will need wooden blocks with a length of approximately 60 cm (then cut off the excess at the top of the stairs), with side parameters of approximately 40X25 mm.
Cut them with a hacksaw.
Important! There should be about 15 such steps for a structure of 5 m high.
Set the stairs:
- The step is inserted into the groove we made on the bowstring, screwed on with a screw or nailed to the main beam.
- So it is necessary to do with all sawn off steps.
- After that, cut off excess wood on the sides, because the stairs are narrowed upwards, and the bars 60 cm long will certainly be larger than the width of the stairs.
We install screeds
If you want to install them, then you need to:
- In a string under the upper and lower step, drill 2 through holes with a diameter of 10 mm.
- Insert the studs, put on the washer and screw on top 2 nuts that you need to tighten with each other with the keys.
Important! The requirements for attached wooden stairs with their own hands can be different, but many still prefer to wear so-called “safety shoes”. These are rubber pads on the lower supports of the product. They prevent slipping on wet and hard surfaces, thereby ensuring the safety of the builder.
Finish finish
Now we can assume that you yourself made a staircase of wood. It remains to simply polish it with sandpaper, and you can do a production test.
to contents ↑Important! If the angle of use of the ladder is too large, then safety hooks should be used. It can be a metal hook to the top step.
Protective treatment of a wooden ladder
Although the product has a good appearance and durability, however, it will not remain so for long if it is not protected with anticorrosive mixtures. After a few months, bacteria begin to penetrate into the fibers and cause rotting of the wood, which can significantly reduce its strength and durability.
In order for the hand-made wooden staircase to serve its owner as long as possible, it should be treated with deep impregnation and varnished on top. A simple algorithm for implementing this task is as follows:
- Open the product by impregnation, with a thin layer. Wait approximately 1-2 hours for the material to dry slightly.
- Open the second layer of impregnation, wait about 2 hours.
- Open with varnish for a tidy appearance. Varnish gives shine.
- Let the product stand for about a day and only after that you can use the staircase for its intended purpose.
Useful tips for making a wooden staircase
We recommend reading these simple, but at the same time useful tips on assembling a side-mounted wooden staircase, which will help to avoid the basic mistakes of beginners. Following the recommendations on how to make a ladder with your own hands without errors, you can assemble a beautiful and reliable design the first time, regardless of your skills in the field of construction:
- The recommended construction height is not more than 5 meters with a string height of the bowstring not more than 70 mm. It is undesirable to make a ladder too high without any special need, because its weight will already be about 25 kg when dry, and it will be difficult to wear it.
- To use the structure in the garden, it is better to replace the “rubber shoe” with a “pin”, which is driven into the ground.
- The place for attaching the steps to the bowstring should be opened with anticorrosive impregnations before the steps are installed, because then the general processing of the stairs will not be able to get that place.
- All parts must be free of chips and cracks - they reduce the reliability of the structure.
- It is necessary to ensure that the layout of the stairs is “mirrored”. Labels must not be allowed to be at different heights. Put all the steps in their place in advance and make sure everything is level.
Stock footage
A staircase is a very necessary item in any household, so learning to do it for any owner will not be superfluous. In this article, we presented you the most simple and affordable option to make a hand-made wooden staircase with your own hands, which even a novice can do.
- How to choose a vacuum cleaner taking into account the characteristics of the house and coatings?
- What to look for when choosing a water delivery
- How to quickly create comfort at home - tips for housewives
- How to choose the perfect TV - useful tips
- What to look for when choosing blinds
- What should be running shoes?
- What useful things can you buy in a hardware store
- Iphone 11 pro max review
- Than iPhone is better than Android smartphones
 (No ratings yet)