

How to make a frame for DIY embroidery at home?
Perhaps the most ancient art of all time is embroidery. It came to us from a long-forgotten era of primitive culture. Today there are a huge number of varieties of embroidery - it can be a surface, a cross, the use of beads and ribbons. The work process itself is quite simple, in addition, in the shops today they sell whole sets that include everything you need, including needles, threads, ready-made color schemes. But despite the fact that everything is described in detail in the sets, they do not have the most important detail, without which it is simply impossible to create patterns and paintings. Naturally, this is a framework. In this article we will talk about how to make a frame for embroidery with your own hands at home.
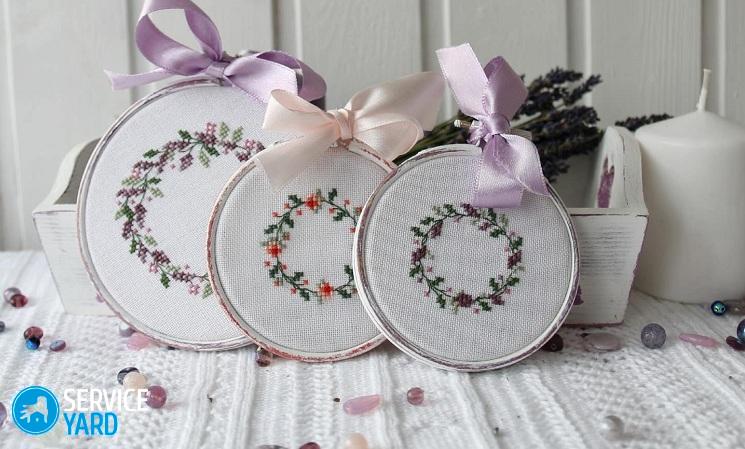
to contents ↑Using the hoop as a frame
Making embroidery in a frame with your own hands using a hoop is no longer a new idea - this is a real classic. This is not surprising, because thanks to this detail the finished work becomes original, attractive, completed. That's just the use of the hoop in this direction requires compliance with certain rules. The main thing is to properly fix the canvas so that the embroidery turns out to be of high quality.
Important! You simply cannot embed it in the hoop, it is necessary to tighten the fabric tightly, then cut off the excess at the edges.
Why should you use the hoop correctly?
- The canvas tension weakens over time, and if the edges are cut too close to the frame, then it will not work to tighten the finished product.
- Such paintings, unlike those that are hidden under glass, must be washed periodically.
- Embroidery with too short edges cannot be returned to the hoop.
Now we will consider how to make embroidery in a frame with your own hands in stages:
- In a circle, cut off the excess canvas, leaving a strip in width slightly less than the radius of the tool itself.
- Step back from the edge about a centimeter, stitch the seam forward with a needle in a circle. But do not over tighten the nodules.
- Take the two ends of the thread, evenly stretch the fabric so that the frills meet in the center and get flat.
- Tie a knot at the end.
Important! Since we use the hoop as a frame, you need to decorate it. For example:
- With the braid - just stick it around the edges on the wrong side.
- You can use ribbons or fabric, as these materials are more practical and original.
- You can crochet a picture.
Show your own imagination and create.
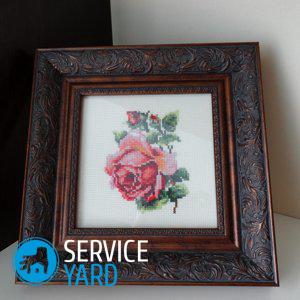
to contents ↑Baguette embroidery design
Probably the best baguette for embroidery is suitable in our case. With your own hands, you can make a chic frame out of it, but first you will have to perform a number of actions:
- First of all, you will have to wash the work in soapy water if it got dirty during embroidery.
- Then, from the wrong side, non-woven is glued to it and ironed. As a result, you get a solid and accurate job.
Important! The color of the non-woven should match the primary color of the finished product.
- As a substrate, many use thick cardboard, but then decide for yourself.
- The frame needs to be made exactly to the size of the picture, and it is advisable to use glass to protect it from above, so that it is less dusty and does not burn out so much.
- The color of the frame should be in harmony with the work - it can be a classic, decoration in gold or wood.
- Also for this often use a passe-partout.
Let's get acquainted with the most famous ways to design embroideries in frames. So, when all the work with the preparation is completed - the picture is washed and ironed, the frame from the baguette is prepared, you can take on the main work.
Use push pins
Take a baguette, a sheet of plywood or chipboard as the basis. Pull the embroidery as tight as possible, then fasten using the buttons.
Important! This is not the best option, because over time, the picture can move apart and just sag on the buttons.
Using threads
This design method is the most popular. To work, you need a plywood sheet or particleboard:
- The product should be pulled on a sheet, at the edges of the canvas leave 1-2 cm free around the entire perimeter to fix it.
- Then, in order to avoid slipping, the embroidery is fastened with pins, on the wrong side of the substrate, the right and left edges are sewn with large stitches.
- Similar manipulations must be carried out with the lower and upper edges.
Important! During the execution of work, it is recommended to monitor the landing of the picture on the front side.
Using double-sided tape
How to make an embroidered picture in a frame using window or double-sided tape - many needlewomen are interested, because you can find it in any house. This option is considered universal due to the fact that it is carried out on the front side, that is, you can always observe the manifestation of any shortcomings.
You can attach pictures to tape several times, and this does not affect the fastening strength.
Important! This is ideal for beginners, as it eliminates the need for marking.
Stitching method
This is not the easiest way, because male strength is required here:
- You need to take a plywood sheet in size, drill small holes around the perimeter at a distance of 1 cm, or use an awl.
- Stitching occurs directly through these holes. First, the corners of the work are attached to prevent slipping of embroidery. Then the product is stitched seam forward with a needle.
- It remains only to assemble the product, lay down the frame and glass, embroidery on the substrate and the structure to clamp metal clips on the sides.
Important! This work looks beautiful, can serve for a long time and without problems. Practice shows that this is the most reliable and fastest way.
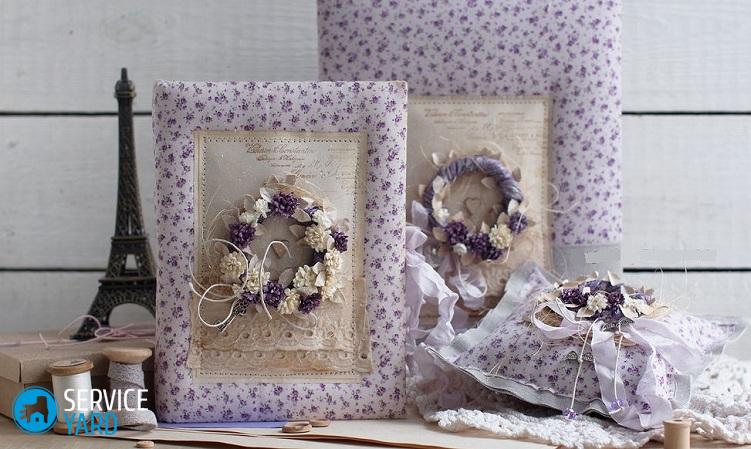
Application of passe-partout for embroidery design
How to make a frame for embroidery using textile mats, we will learn further. There are two ways to create a mat.
First way:
- It is necessary to carefully iron the canvas from the wrong side.
- Then decide how wide you want to make a mat in relation to the product itself.
- Mark the width from the inside out on the canvas, then circle a rectangle about 4 cm wide around the resulting contour.
- Cut corners from a large rectangle.
- Make a copy of the wrong side of the canvas to get a pattern of mat.
- Put the tracing paper on the copy, on it, reshape the outer edge and the outline of the embroidery.
- Place a pattern on the fabric, cut off the excess along the outer edge and cut along the contour inside.
- On the front side of the canvas, place the passe partout, fasten the fabric with pins, carefully sew it and the canvas around the embroidery.
- From the inside, place the subframe, tuck the edges of the fabric onto it and sew the bevel corners.
- Fasten the edges of the material with duct tape, insert it into the frame.
The second way:
- Glue one side of the cardboard and the wrong side of the fabric with glue.
- Move the cardboard onto the fabric, make sure that it is centered, leaving equal parts on all sides.
- Press the cardboard firmly against the fabric, check that all the bubbles come out.
- Corner trim carefully, leaving small allowances.
- Pull the material onto the cardboard starting at a point near the corner.
- Iron the fabric with your hand.
- Inside the diagonal cut the fabric, starting from the corners, so that you get the letter X.
- Leaving a few centimeters on each side, cut a rectangle.
- In addition, glue the outer corners with glue and smooth them with your fingers.
- Leave the mat on for final drying.
Stock footage
Here are such a large number of embroidery design options that exist at the moment, and each of them is good in its own way. Even a novice craftswoman is able to complete all the work described above, having designed the fruits of her needlework beautifully and originally.
- How to choose a vacuum cleaner taking into account the characteristics of the house and coatings?
- What to look for when choosing a water delivery
- How to quickly create comfort at home - tips for housewives
- How to choose the perfect TV - useful tips
- What to look for when choosing blinds
- What should be running shoes?
- What useful things can you buy in a hardware store
- Iphone 11 pro max review
- Than iPhone is better than Android smartphones
 (No ratings yet)