

How to make polymer clay earrings?
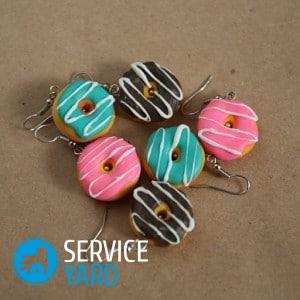
Polymer clay is a very common material among hand-made masters. It is used to make various jewelry and even hair accessories. From it you can make earrings, rings, pendants, bracelets and even Christmas tree toys. It is especially appreciated for its rich colors, ductility and durability. Products from such material are very natural, like real ones. Believe me, with such an interesting accessory your image will be filled with special tenderness and romance! The clay molding brings not only a good mood, but also calms the nervous system, develops a creative imagination. The process itself is quite easy and inexpensive. You do not know how to make polymer clay earrings? Then you definitely come to us! We will help to make original earrings from natural clay at home. Why not? It will come out to you much cheaper than buying a finished jewelry. In this article we will talk in detail about the choice of material for modeling, about how to make earrings from polymer clay with your own hands.
to contents ↑All About Polymer Clay
Of course, you saw beautiful jewelry made of clay, and apparently it really liked. But did you ask yourself questions: what is it, what properties does the material have, and how do beginners work with it, how to make polymer clay earrings at home? We will be happy to answer your questions.
The properties
So, polymer clay is such a plastic mass, which on modeling resembles plasticine. It is the same in appearance and to the touch, but under the influence of high temperature (110-130 °) it becomes solid and can no longer be modified. Therefore, it is often called thermoplastic or thermoplastic.
Kinds
Manufacturers offer a wide selection of different polymer clay - from the softest to the hardest. This is done so that each needlewoman can choose the right plastic for various jewelry, figures, toys, buttons or miniature sculptures.
Important! The market presents a material that is already painted in a variety of colors, colorless or spangled, luminous, with an imitation of stone or metal. Thanks to this choice of colors in which clay is produced, various products can be made from it, combining shades among themselves.
Processing methods
At home, finished products are baked in the oven, and then, if necessary, painted with acrylic paints, glued together or with other materials, varnished.
to contents ↑Important! The highest quality technique is considered, in which it is used colored polymer clay. In this case, the paint will not peel off, and the decoration will be worn for a long time.
Materials and tools for creating polymer clay earrings
Before making earrings from polymer clay, you need to prepare the necessary material. To work, we need:
- Polymer clay of blue, white, pink color.
- Brown polymer clay (with sparkles).
- Polymer clay knife or blade.
- Glass or ceramic tile (for countertops).
- Boats of various shapes.
- Rolling pin or pasta machine.
- Toothpick.
- Gloves or finger.
- Hardware.
- The varnish is matte or glossy.
to contents ↑Important! Tools for making jewelry made of plastic can be replaced with improvised materials: a toothpick, an ordinary plastic kitchen board, a dry knife, accessories from unnecessary jewelry.
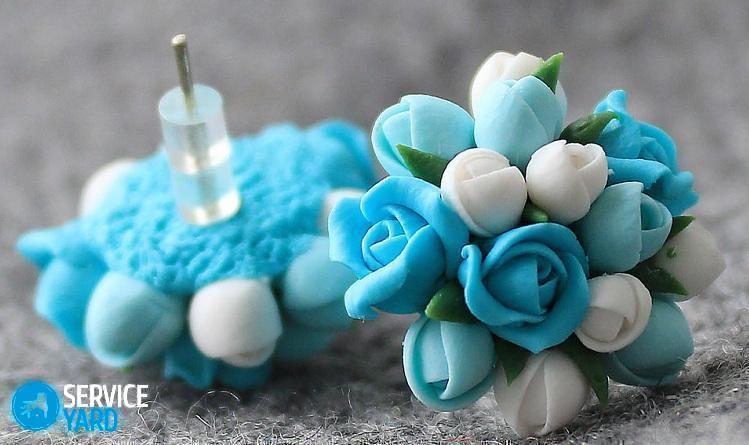
DIY clay earrings - master class
We propose making earrings made of polymer clay in a vintage style. You can buy a ready-made cabochon, but in this case we will make it ourselves.
So, having prepared all the necessary materials, we proceed to the production of earrings from plastic:
- We mix among ourselves three colors of clay: white, pink and blue. As a result of thorough kneading, we get a light purple color.
Important! For the manufacture of flower petals, you can take brighter colors. But in this case, they are rather dull, so we want to create the effect of antiquity.
- From the resulting piece we cut off the smaller one using a special knife. Add a little blue plastic here.
- Cut the half from the last part, add some more blue plastic there. As a result, we get the color transition from dark to light.
- Between the fingers we squeeze a small ball of the darkest shade. With the thumb and forefinger, we do a rolling until a flat circle is obtained.
Important! When sculpting petals, be sure to use gloves so as not to leave marks on the plastic and not spoil the final result.
- We turn the resulting circle into a tube.
- Now we take a medium shade of plastic, in the same way we turn off another petal.
- We wrap the first bud with a petal. By this principle, we attach 3 petals of the same shade, and leave the most extreme ones with the lightest.
Important! Try to form petals with thin edges. So the flower will look more natural and natural.
- Next, add a little pink to a piece of light purple polymer clay, constantly stirring until the color and egg shape are completely uniform. In this way we create the core of the flower.
Important! You can make colored clay yourself at home. To do this, add a little coloring powder and mix thoroughly. This is an order of magnitude cheaper than buying ready-made polymer clay. We want to save? Of course yes!
- Using your fingers, we create oval petals and attach them to the finished base.
- The remaining petals are also attached to the core.
- Now form a rose bud. To do this, we turn off the dark plastic like a rose, which was mentioned above.
- Next, we sculpt a large petal in order to wrap the entire half of the bud at once. The second wrap the rest of the rose.
- Now we finish our rose. To do this, take the rose by the edge at the base, twist until it becomes thin and graceful,
- Now we make some more pink buds using a different technology. Roll out the circle, giving it an elongated leaf shape. In this way we make four petals. We connect each of them over the edge, and firmly pressing it, turn four leaves into a tube. As a result, we get a gentle closed bud.
- Now we roll a small ball out of brown plastic.
- Using a special knife, we cut the ball into two parts to obtain two cabochons.
- Next, we form cabochons with our fingers - the basis for our earrings.
- In order for the roses to attach well to the base, cut the tail with a knife.
- We fix all the flowers made to the cabochon, fixing the bottom with a toothpick.
- From green plastic we form petals of various shapes. Their number and size is up to you.
- From the same color we form thin flagella.
- We place the leaves on the flowers, and the flagella between the buds.
- We check whether everything is in place, whether the shape of the cabochon is like. If not, then gently tweak with a polymer clay knife.
- Now we send the workpieces to the oven until completely solidified.
- After cooling off the almost finished jewelry, drill a hole and thread a metal eye. The choice of metal is up to you.
Important! Do not forget that if you decide to cover the finished decoration with varnish, then we dress the fittings after applying it and completely drying the surface.
These earrings are perfect for the spring look of a tender girl. We hope that this master class on making polymer clay earrings is very useful to you!
to contents ↑Stock footage
Often after a cold winter, we all want spring warmth, bright colors and floral aromas. So why not add these shades to your airy look. An original and beautiful polymer clay jewelry will emphasize your femininity very well. You will spend a minimum of time and money on the manufacture of a whole masterpiece of needlework. And plastic flowers will be like real ones. Agree that a thing made by yourself is much nicer to wear than bought. In such a wonderful accessory, you are not ashamed to go to any social party or event. Be sure that your image will not be left without attention!
- How to choose a vacuum cleaner taking into account the characteristics of the house and coatings?
- What to look for when choosing a water delivery
- How to quickly create comfort at home - tips for housewives
- How to choose the perfect TV - useful tips
- What to look for when choosing blinds
- What should be running shoes?
- What useful things can you buy in a hardware store
- Iphone 11 pro max review
- Than iPhone is better than Android smartphones
 (No ratings yet)