

How to make insoles for shoes with your own hands?
If your favorite shoes look good on the outside, and on the inside they have worn out and become completely unpresentable, then you need to change the insoles. They can be made with one's own hands, because often we just do not have free time to make such a small purchase, especially if the insoles are not sold in the store near to your home. You can make them from materials that are in almost every home. We will consider this moment in our article. Stay with us and you will learn how to make or print a DIY insole template for winter for shoes.
to contents ↑What to make insoles?
Now we will consider the different materials that are used to make the shoe lining.
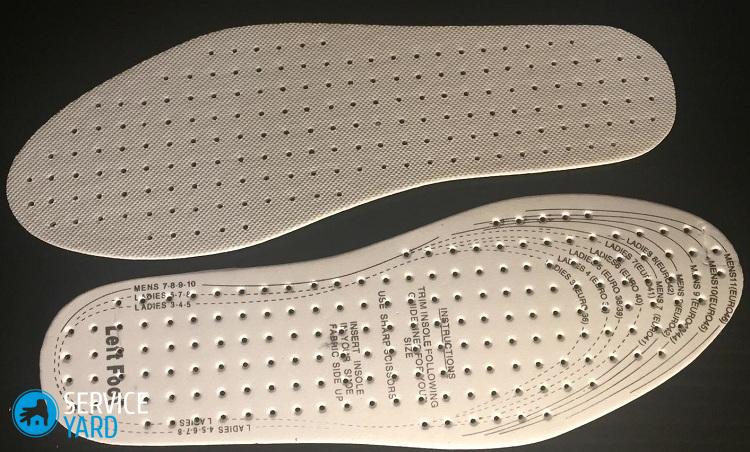
Thin insoles
Thin insoles are a must for shoes, sneakers and spring boots. What should thin insoles be made of?
- Such a product is cut out of the most accessible material - from cardboard, it is possible from carbon fiber. The main thing is that it be soft. You understand that such a device will not last long, but since it is inexpensive, you can make it as much as your heart desires.
Important! Absolutely any fabric can be glued to such shoe litter so that the foot is comfortable enough.
- We process stripping feminine sanitary pads. This method is simple but effective. Such insoles are perfect for those people who have very sweaty feet.
- You can make insoles using a cork in rolls, which is similar to a self-adhesive film, but more dense and heat-resistant. The thickness of such a material is controlled by layering one another.
- Shoe inserts are also quite easily made from an old cloak or other thin material. The cut material must be glued to the place of the old insole and carefully aligned over the entire wrong side of the shoe.
- From old jeans, you can make excellent hygienic shoe litter, as natural cotton allows the skin to breathe, and the legs will not sweat that way. To create such a product, it is necessary to cut 2-3 parts and sew on a typewriter, increasing the density and durability of the material during wear.
Now you know what to make insoles of for your favorite shoes. We will deal with the second option for the cold season.
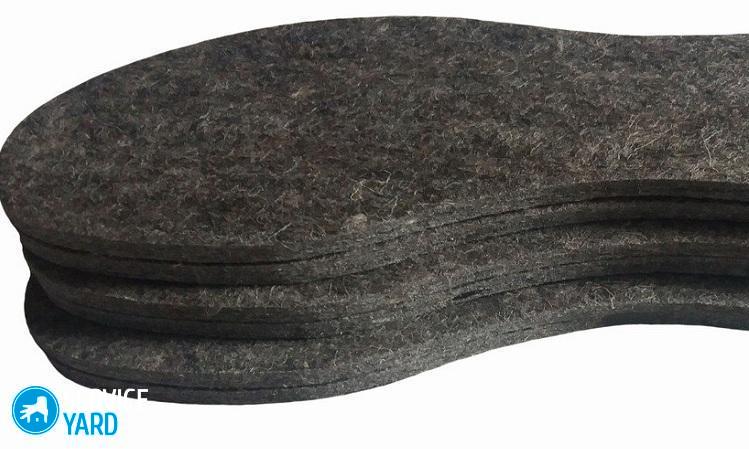
Thick insoles
Thick and warm shoe linings are not needed for shoes, sneakers or other shoes that fit snugly on the foot. But indispensable for winter leather and rubber boots, which simply need internal insulation.
Do not rush to run to the store, but make high-quality insoles with your own hands using such improvised materials.
- Based on the previous lining, we cut exactly the same using a sheepskin. This may be an old vest from a winter jacket or other product. On the back of the insole, you need to glue a polyethylene lining of the same size, and then sew the end.
Important! The criterion for choosing the material for the manufacture of insoles is the free space inside the shoe. If space permits, then insoles can be made from the thickest and most voluminous material, if not, use thinner options.
- We take an old worn drape coat or sheepskin coat and cut out two identical products of the same shape - right and left. We sew parts together - so the insoles will be denser and warmer than single-layer ones.
Important! If the made warm insoles with your own hands seem uncomfortable and prickly to you, then put on top a layer of a more pleasant fabric, for example, artificial suede or cotton.
- The classic and standard method is the use of felt.
- Feel free to use old winter leather boots. In this case, the insole will not get wet, it will last a very long time.
Important! If you need to make a lining for winter rubber boots, then to save more heat, glue the foil from the bottom of the insole, and so that they do not get wet - a layer of plastic tablecloth. So your legs will always be warm and dry, which is extremely important in bad weather.
- Take linoleum of the required size and glue a lining to it, for example, from a sweater or other warm product.
Important! For this method, you can use different materials - old unsuitable socks, boots or a fur product.
- Use a piece of unnecessary carpet. Having previously attached and outlined the previous insole, cut a new one according to the finished template.
Important! If it so happens that you do not have old insoles for removing a new pattern, then simply draw a pencil around the sole of the shoe on a piece of paper and cut it a bit around the edge so that the template fits inside.
We shared the available ways to make insoles with our own hands. In any case, it is up to you to decide what to make insoles from. Consider a few more options that you will definitely like for its simplicity.
to contents ↑How to make insoles in 15 minutes?
In our master class, you can quickly and efficiently make insoles that do not need to be processed on a sewing machine.
Leather
We will prepare the necessary materials and tools:
- Skin or skin substitute.
- Chalk, soap or white pencil.
- Clay “Moment”.
- Scissors.
- Protective gloves.
Important! For the manufacture of such litter in shoes, use genuine leather, not artificial. Such material is softer, and the legs will not smell and sweat unpleasantly.
Detailed action algorithm:
- We take an old insole or from other new shoes, apply it to the skin and draw a white pencil around the border.
- We turn a piece of leather on the wrong side - we will continue to work with it.
- We cut out the necessary insoles for shoes with our own hands from leather and put them into shoes.
- Check if the dimensions of the new lining are suitable. If it is larger, then you can bend the edges on the side of the shoe from the inside or gently trim the excess material. We perform such manipulations until the shoe litter ideally lies in our shoes.
- We apply the “Moment” glue along the entire length on the wrong side of the leather material.
- Carefully glue the shoe lining starting at the heel.
- Carefully press and straighten over the entire surface.
That's all the work! New leather insole ready to use.
From cardboard
Making shoe litter out of cardboard is very easy and affordable, and most importantly - cheap. Today we will look at two simple ways to make insoles from such a material.
Method One:
- We take prepared cardboard and the selected material.
- We attach the sole of the shoe to the cardboard and draw a template for the future product.
- We make two blanks from the lining material for the insole, which should be larger than cardboard blanks in size.
- We sew fabric linings to each other and turn them on the front side, given that there should be cardboard inside the linings.
The second way:
- We put our foot on a thick Whatman paper or cardboard.
- Outline with a simple pencil.
- We do similar manipulations with the second leg.
- Next, cut out a sketch of the future product.
- We put the blanks in shoes, if necessary, we cut off the excess material.
- We are doing the same work with the second lining of cardboard.
From yoga mat
Maybe you have a yoga mat and you don’t use it at all? Then apply it in a profitable business. From it you can make insoles for shoes.
According to the scheme, we will go through all the stages of work:
- Take your shoes, place them on the smooth side of the rug, and draw chalk around the edges of the sole. After drawing one pair of insoles, we mark the second. As a result, we should get 4 insoles: two right and two left.
- We glue the same pairs together.
- Leave the shoe lining to dry.
- After the glue has completely dried, you can safely put insoles in your favorite shoes.
That's all, the work is ready!
to contents ↑We make orthopedic insoles
What can shoe insoles be made for those people who suffer from flat feet?
Important! For them, this is not a whim or a fashion accessory, but a daily use item. Such a device will help return the joy of movement to the patient, eliminate discomfort and increase self-confidence.
The process of making inserts for people with foot pathologies is quite complex and time-consuming. The specifics of the work requires special knowledge and preliminary training. If you still decide to make such linings with your own hands, then we will certainly help you.
For work, we need the following materials:
- Ordinary insoles.
- Medical cotton wool.
- Medical bandage 4-5 cm wide.
- Patch.
- Thick fabric.
The process of manufacturing insoles with arch support:
- We take any pair of shoe litter purchased. The choice depends on the type of shoes for which you make this product. For winter boots you need an insulated version, for shoes and sneakers - thin insoles.
- Now put your foot on the insole and draw a line with the pen between the big and the next toe.
- After that, we make a cotton ball and fix it on the marked mark with a band-aid.
- Now we are engaged in the most important part of all the work - instep support. To make it, take a roll of a bandage of the specified width and attach it at the arch of the foot.
- After that, we fix the bandage with a band-aid, without shifting from the location of the bandage.
- From a dense fabric, cut out a template for the outside of the arch support, using the parameters of the previous shoe lining. A piece of old jeans is well suited for these purposes.
- Sew the fabric to the insole with arch support. The product can be flashed both with a machine and manually.
- With the second shoe litter we carry out exactly the same manipulations.
That's all! Homemade orthopedic insole is ready!
The undoubted advantage of such products is the low price and availability. But the effectiveness of the result can be checked only in the process of wearing. It is especially advisable to make linings with instep support for children suffering from this disease, since the leg is growing rapidly, and buying new insoles is very expensive.
Important! If you suddenly become uncomfortable, then at any time you can put the insole in the right direction.
Recommendations for the manufacture of medical insoles:
- Choose the thickness of the medical bandage that will be most convenient for you.
- Homemade arch supports often do not coincide due to the fact that the structure of the left and right foot can be different. In this case, you need to choose a comfortable size for each foot.
- Such a device can be rearranged from one shoe to another only if the shoe sizes are the same.
to contents ↑Important! Before you start making orthopedic insoles with your own hands, you should definitely consult an orthopedic doctor.
Stock footage
Now your legs will always be protected, and the shoes will last for more than one year, thanks to the new knowledge and skills. We wish you new inventions and be healthy!
- How to choose a vacuum cleaner taking into account the characteristics of the house and coatings?
- What to look for when choosing a water delivery
- How to quickly create comfort at home - tips for housewives
- How to choose the perfect TV - useful tips
- What to look for when choosing blinds
- What should be running shoes?
- What useful things can you buy in a hardware store
- Iphone 11 pro max review
- Than iPhone is better than Android smartphones
 (No ratings yet)