How to make a bath yourself?
How to make a bath yourself? At first glance, such a question seems absurd, but, in fact, the independent production of a bath is a very real and uncomplicated process. One only needs to get acquainted with the main aspects of the work, take into account some nuances, spend money on materials and allocate time. As a result, a brick or concrete bathtub, made by yourself according to your own design, will show off in your apartment. So, we will begin to understand the theory of how to make a bath yourself.
to contents ↑DIY concrete bath
Modern plumbing stores offer their customers just a huge assortment of fonts made of various materials. However, not all buyers are attracted to the design or cost of the finished product, so some think about a reliable and original design for bathing - a concrete bath.
Important! Before you engage in creative work and implement a conceived idea, carefully consider the general layout of the bathroom. It will be much easier to do this if you use special programs for bathroom design in 3D.
Advantages of the concrete font:
- Such a detail of the bathroom will not only be able to fit in with dignity and become a decoration of the interior of the room, but will also help to save the family budget, since its construction does not require a lot of financial costs.
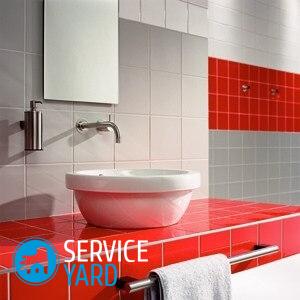
- The concrete bathtubs are lined with either plastic or ceramic mosaics, although in the case of designs with right angles, even the most ordinary tiles can be used.
- The service life of the structure is quite large, it can be on the order of several decades.
- The process of erecting a concrete bath with your own hands is simple and takes relatively little time.
Important! The biggest advantage of a concrete bath is its unique strength. But think about how appropriate it will be in your chosen style of the interior of the bathroom, how it can be competently decorated for a certain direction. The following ideas come in handy here:
How to make a concrete bath yourself? Stages of construction:
- First of all, it is necessary to engage in the development of a drawing of the bathroom and the purchase of the necessary materials.
- At the next stage, prepare the base and install the formwork.
- Next, form the walls and bottom of the bathroom.
- Give the design for the adoption of bathing procedures the desired shape, plaster the structure.
Important! The plastering technique completely depends on the material of the cladding, so you should immediately decide on the materials that will be used for the cladding.
- The last stage of construction is to venerate the font.
So, we proceed directly to the construction of a concrete font.
How to make a concrete bath with your own hands? Procedure:
- Thoroughly clean the place where you plan to install the font. After that, several layers of primer are applied to the bare concrete site.
Important! Such a procedure will guarantee a reliable and high-quality adhesion of the floor base and the walls of the room to the bathroom being built.
- Next, you should form the frame of the future font. To do this, use metal rods with a diameter of approximately 7 mm. They create a single structure for the floor and the outer wall.The frame must be attached to the supporting walls.
Important! If your bathroom has a small area, then a concrete bath is best placed between the opposite walls. Thus, the load-bearing walls will be part of the constructed bathroom, and you will have to build only one external wall. This will not only reduce the time to complete the work, but also save the cost of purchasing construction materials. A good option is also the construction of a corner bath by the same principle. In this case, the corner of the room will serve as the inner walls of the bath. The outer wall can be made in the form of a semicircle.
- Next, build the formwork from the boards. To form the walls of a concrete bath, you will need flat bars or OSB sheets, wooden panels, a special mounting wire to create a solid frame and metal reinforcing bars.
- Create a skeleton of the bathroom from all of the listed materials. It should turn out to be durable and must not have cracks.
Important! Slots will facilitate leakage of concrete mix from the formwork, which will significantly reduce the quality of installation work. You can increase the tightness of the font frame by resorting to using a dense construction film. She should lay the bottom and walls.
- Make a solution of cement M-400 and sand in a ratio of 1 to 3. Add water to the mixture in small doses, constantly mixing the composition. The consistency of the finished solution should resemble homemade sour cream.
Important! Before filling, it is necessary to determine where the technological holes will be located. Consideration should be given to the availability of space necessary for good siphon service.
- To supply and drain water, it is necessary to install plastic pipes before the moment of pouring concrete mixture. Immediately you can mount and connect a siphon to the sewer network.
- Filling is best done starting from the bottom of the structure. The entire skeleton of the bathroom should be completely covered. Next, we form a font wall from the solution.
Important! To form the walls of the bathroom, the solution can be made thicker.
- Finish the fill by tapping the formwork in different places. To do this, use a small hammer.
Important! Tapping helps to evenly distribute the mortar throughout the formwork.
- The construction should be left for three days.
Important! For a longer period, there is no need to leave the concrete structure. During this time, the material will fully get stronger for the implementation of subsequent work.
- After 72 hours, the formwork should be removed and the plastering of the bathroom should be done.
Important! The dismantling of the formwork must be done very carefully, since the concrete has not yet become completely monolithic.
- Plastering should be carried out according to the rule of small geometric dimensions using a construction trowel. At this stage of work, the surface is leveled and the font is given the planned configuration.
Important! If in the future the font is planned to be treated with paint or liquid acrylic, then plastering should be carried out using a special reinforcing mesh. In addition, special additives should be added to the plaster mixture, which will provide the solution with the necessary plasticity and strength.
- After the bath has been given the necessary shape and all the walls of the structure have been leveled, it should be treated with a primer. After these works, it is necessary to leave the structure for 10 days for the final hardening and drying of the mixture.
- Before starting the facing work, a primer should be applied to all surfaces of the bath, preferably in two layers.
to contents ↑Important! With rounded corners, a do-it-yourself mosaic bathtub will look great. First, the mosaic is mounted on a fiberglass reinforcing mesh, after which, with the help of a notched trowel, an adhesive is applied to the concrete bath and the part of the mosaic is mounted, slightly pressing it into the surface.After installation, all parts of the mosaic are taken for grouting tiles, using special compositions.
DIY brick bath
Brick baths are rarely built. Their construction is carried out in the following cases:
- If you plan to combine a bathroom in the bathroom.
- If the bathroom in your house is large and allows you to install a spacious bathtub or even a pool.
- If the owner of the house wants to implement an exclusive design in the bathroom, and he needs an original font for this.
Before you make a bath from a brick with your own hands, you need to seriously think about how this idea will be successful. After all, a brick font has several features that you should know before its construction.
Important! In addition to the font itself, other furnishings should be conveniently located in the bathroom. Browse our publications, and decide what you will need and what you can refuse without sacrificing your comfort:
Features of the brick bath:
- The construction of such a structure necessarily requires knowledge of the basic rules for laying bricks.
- The process of building a font takes a lot of time, especially in cases where the bathtub is planned to be complex.
- Caring for a brick bath is an order of magnitude more difficult than caring for an acrylic, cast-iron or concrete product.
Important! Of the advantages, we can distinguish the durability of the structure and the low cost of its construction. Also, due to the fact that such bathtubs have a greater depth than analogues from other materials, the brick font is more comfortable and convenient to use.
How to make a brick bath yourself? Procedure:
- First you need to install all the necessary plumbing communications.
- Next - take measurements of the room and start preparing a design for a brick bath. Order all the necessary materials.
- Prepare a solution for bonding by mixing 1 part of cement M400-500 with 4 parts of sand.
- The laying of the structure is best done in half a brick, using the prepared masonry mixture for this.
Important! Some craftsmen, in order to save money, advise to carry out the construction of a structure with a thickness of a quarter of a brick. You should not listen to such recommendations, since the thin walls of the bath may not withstand the pressure of the water being drawn into the font.
- The next stage of work is to waterproof the bathroom. A similar procedure is recommended to be carried out using moisture-protective solutions of the surfaced type and bituminous coating compositions. Waterproofing materials are best applied in two layers. It is forbidden to use roofing material for waterproofing a brick font. It is not at all suitable for such purposes.
Important! Typically, tiles are used for finishing bathrooms, since it is the most practical and allows you to implement various creative design ideas. To choose a good quality material, browse our overview of tile collections and manufacturers.
The final stage of building a bath with your own hands from brick and tile is directly gluing the tiles or mosaics.
to contents ↑Important! Before you start facing work, it is necessary to apply a primer to the protective compounds. Thus, you will provide high-quality and reliable adhesive fastening of the cladding.
Do not forget to consider the location of the lamps so that the room is comfortable and contributes to a pleasant bath. For this, we have already prepared a selection of recommendations, how to make light in the bathroom.
Stock footage
Making a bath with your own hands allows you to realize your design fantasies. You can make a similar design from concrete or brick, however, each of these materials has its own specifics of working with it.The information from the article will help to understand the nuances of the self-construction of the font and decide on the best material for implementing your ideas. Do not be afraid to experiment, because in the end you will get an exclusive reliable bath, which all members of your family will admire.
- 3D Bathroom Design Program
- Loft style bathroom design
- Provence style bathroom design
- Classic bathroom design
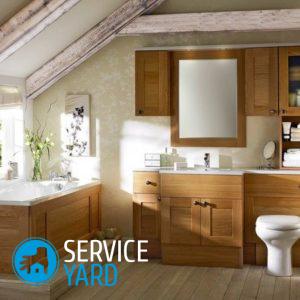
- Wood bathroom design, how to do it quickly and efficiently
- Washing machine in the bathroom - design
- Ceramic tiles - fashion collections and the best manufacturers
- DIY glass shelves
- Light in the bathroom
- DIY bathroom furniture
 (No ratings yet)