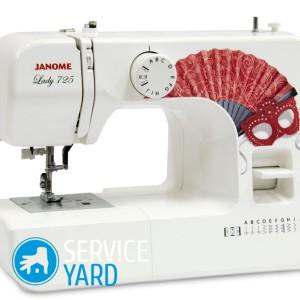
How to lubricate a Janome sewing machine?

The sewing machine is the main working tool of the needlewoman. So that it lasts a long time and does not cause trouble in operation, it is necessary to carry out the procedure of adjustment, cleaning and lubrication in a timely manner. This is usually done according to the attached instructions, which must always be stored next to the appliance. After that, all the details begin to function more harmoniously, and the workflow is fun. All the subtleties and nuances of how to lubricate a Janome sewing machine are presented below.
to contents ↑Why lubricate
If you do not clean and lubricate the sewing machine in a timely manner, then it may fail. Namely:
- the details will creak;
- noise will appear;
- the threads will break;
- seams will become uneven and tightened.
To avoid this, you need to know how and where to properly lubricate the Janome sewing machine.
This is necessary for:
- long term of operation;
- neat stitches;
- getting an easy move;
- providing a soft ride;
- easy settings.
What do you need for work?
To carry out the procedure at home, you will need:
- 100 g of engine oil for lubrication (can be purchased at a specialized or hardware store);
- medical syringe;
- special brush to remove dust and threads (often included);
- soft cloth to remove excess fluid;
- screwdriver;
- tweezers;
- film.
Video action algorithm
Do not use any oil other than machine oil for the lubrication procedure! First you need to pre-prepare the sewing machine. For this:
- Remove dust from parts of the appliance, including under the platform.
- Get rid of dirt in the lubrication holes.
- Wipe with cotton wool soaked in alcohol and liquid paraffin.
Important! If the unit has not been used, it must be stored under a hood or cover.
Consider an algorithm for lubricating a Janome sewing machine. The work must be guided by the instruction manual.
Step-by-step algorithm:
- Disconnect the appliance from the power supply and free it from the threads.
- Spread the oilcloth on the table and put the machine there.
- Unscrew the screws and remove the plastic case according to the instructions. To prevent confusion during assembly, stack them on signed paper sheets.
- Brush the “backbone” by removing all dirt.
- Pour oil into the syringe, lubricate all parts and friction parts indicated in the attached documentation. Usually photographs are presented there, so it will not be difficult to figure it out.
- Blot excess oil with a cloth.
- Assemble the housing.
- Refill the sewing machine and sew a few stitches to make sure the seam is clean and free of oil marks.
- The procedure is completed.
Features of the lubrication procedure
A common mistake is that the oil should be applied as much as possible. In fact, this is not so. During operation, dust accumulates inside the device, falling there together with the fabric. For this reason, problems with web advancement may appear. Contamination creates an additional load on the device drive. A large amount of oil applied during care contributes to the accumulation of dust, thread, scraps of fabric. Forming lumps, the mass accumulates in a certain place, which leads to congestion and malfunctions.
to contents ↑Important! There is no definite recommendation on how often to lubricate parts. It all depends on the frequency of use and brand of the sewing machine.On average, you need to carry out this procedure at least 1 time per quarter.
Stock footage
With timely prevention and proper use, your electric assistant will serve you in good faith for a long time.
- How to choose a vacuum cleaner taking into account the characteristics of the house and coatings?
- What to look for when choosing a water delivery
- How to quickly create comfort at home - tips for housewives
- How to choose the perfect TV - useful tips
- What to look for when choosing blinds
- What should be running shoes?
- What useful things can you buy in a hardware store
- Iphone 11 pro max review
- Than iPhone is better than Android smartphones


