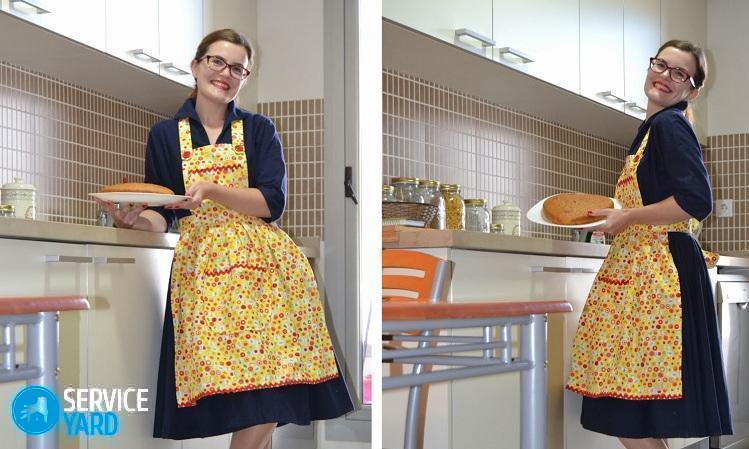
How to sew an apron? Grade 5 is a good time for such undertakings.

Learning the basics of sewing is not only very interesting, but also useful. After all, in order for your result to be as good as possible, you need to learn a lot. Learn how to make the simplest product in all canons. The apron pattern for the fifth grader does not contain any difficult moments - that is why it is necessary to start studying sewing art with this product. You will learn about how to sew an apron in a labor lesson (Grade 5) from this article and photos.
to contents ↑Types and Features
By their purpose, aprons are kitchen, school and special. For decoration it is better to use appliqués, embroidery, stitching or braid. By type of cut, these products are divided into:
- One-piece.
- On the belt.
- With a bib.
Important! For various peoples, an apron is part of the national costume. As a rule, it is decorated with braids, embroideries, ribbons, stitching and other decorative elements; different pictures also look good. Its apron can be attributed without a bib. It is a fabric rectangle with an attached belt.
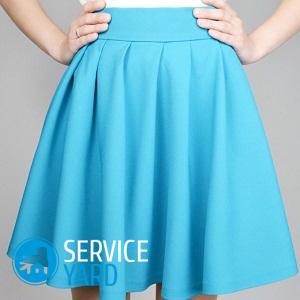
It is simple and easy to sew not only an apron, but also other things that definitely will not be superfluous in the wardrobe of a schoolgirl. For example, we picked up some interesting ideas,how to sew a skirt fastwhich you can also practice at home.
to contents ↑Working process
First you need to choose the right material for sewing.
Important! Fabric consumption: from 1-1.4 m (depends on the location of the coupon on the fabric).
For work, you should prepare the listed materials, tools and sketches:
- Tailor chalk or a bar of soap.
- Ruler.
- Tape measure.
- Scissors for fabric.
- Threads of the desired color.
- Needles.
- Safety pins.
Cutting products
Before cutting the fabric, it is necessary to decorate the fabric - check for shrinkage and iron with steam, while observing the temperature regime.
After that, the fabric is laid out on a table or any other flat surface, so that it would be convenient for a beginner needlewoman to make an apron pattern on paper - grade 5 is the time to start sewing various things in the “technology” lesson. The lines should be drawn on the inside of the fabric.
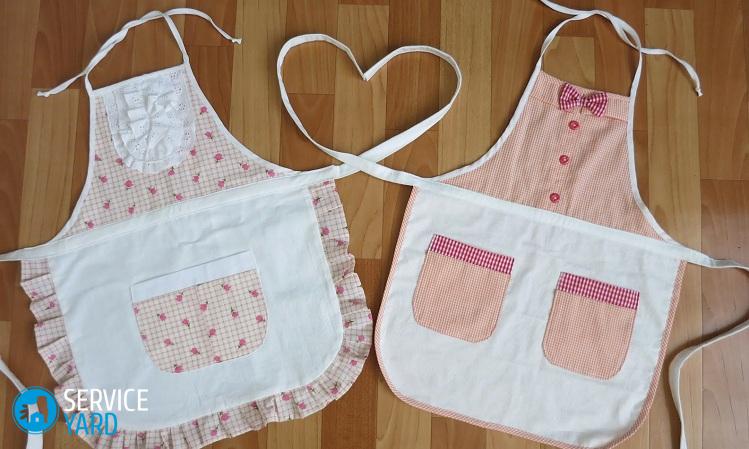
The apron will consist of:
- Skirts.
- Bodice.
- Belts.
- Hinges.
- Two pockets.
In certain places, allowances for seams are left, how many mm:
- On the lower, as well as upper and side sections of the hem and bodice - 15-20 mm.
- For turning the belt with a loop - 7-10 mm.
- For pocket cuts (all but the top) - 10 mm, for the upper cut - 30 mm.
Now you need to apply an apron pattern on paper to the fabric and add the listed allowances.
We process the skirt
This procedure is performed as follows:
- Before starting work on the typewriter, the seams are bent and manual basting stitches are made to make the machine stitch easier to lay.
Important! Before starting work on the sewing machine, it is necessary to check the tension of both threads and the length of the stitch.
- The side sections of the skirt of the product are processed. In this case, the machine mode “hemming with closed cut” is used.
Important! Do not forget that it is necessary to put the braces. To do this, at the very beginning and end of the line, use the reverse stroke of the used machine.
- The lower section of the skirt is processed in the same way.
- Next, the stitch stitches are removed, all the seams are ironed with the addition of steam.
We process and sew pockets:
To make your product practical, you can sew apron pockets:
- The upper cut of the cut out part is bent by 10 mm, and then by 20 mm. After that, it is recommended to pin the bends with pins.
- Sew this line on a sewing machine 1-2 mm from the edge, iron it.
- After that, the sides of the pockets are folded by 10 mm and hand stitches are applied.
- In the same way, the lower section of the parts is folded.
- On the skirt of the product, the location of the pockets is marked, they are applied, pinned with pins.
- Next, lay the machine line on the sides and the bottom edge 1-2 cm from the edge.
Important! At the beginning, as well as at the end of the line, machine braces are mandatory.
- They remove the basting threads, remove the pins, and then check the symmetry of the pockets and iron them.
Processing bodice, loop and belt
First of all, it is worth noting that absolutely all sections of the bodice of the product, except the lower one, must be processed in the same way as described above for the remaining parts.
Further, in order to continue sewing an apron, designed for its simplicity of work for grade 5, the following algorithm is followed:
- The prepared part of the loop is bent along in half, face inward, combine all sections and corners, cleaved with safety pins, stitched on a sewing machine with a seam width of 7-10 mm.
- A small gap is left in the middle of the line in order to make it more convenient to turn the loop on the face.
Important! At the junction of the lines in the corners of the loop, it is recommended to put in brackets - this is necessary so that the corners do not spill out when twisting.
- After turning the stitches, the corners are cut using scissors, not reaching the stitch of 20 mm.
- Next, the loop is turned on the face, straightened corners, swept the edge into a split (align the seams with manual stitches), fasten the gap through which the loop was previously turned out with hidden stitches, ironed.
- The desired length of the loop is measured, first one is sewn, and then the second edge of the loop is sewn to the upper corner of the upper part of the product.
- If your machine has a function of sweeping loops, sweep them on the bodice of the product in the upper corners.
- Buttons are sewn onto the apron loop itself. So in the future you can adjust the size of the product by sewing on other buttons or altering this one.
- Further, in order to sew an apron belt, it is necessary to process it in the same way as the bodice loop.
The final stage of product assembly
In order to finish with the manufacture of this product, you must perform the following steps:
- The apron skirt and bodice are folded inside out, combine the lower (cut of the upper part of the product) and the upper (cut of the lower part) sections, combine the side seams of the skirt with the bodice, shear off with English pins, sweep with hand stitches, then sew with a sewing machine with a seam width of 10- 15 mm
- The basting threads are removed, the seam is ironed towards the top of the apron.
- The middle is found on the machined belt, after which it is applied to the bodice, the middle of the belt is combined with the middle of the apron so that the fold of the belt overlaps the joint between the two main parts by 1-2 mm.
- They pin the belt to the skirt and to the bodice of the product with safety pins.
- Hand stitches are laid from the side of the skirt and bodice, stitched with a machine 1-2 mm from the edge of the belt to the side seams of the product.
- The last stage is the removal of basting threads and ironing of the seams with an iron with the addition of steam.
Also check out our articles:
to contents ↑Stock footage
Sewing and making an apron pattern on paper in grade 5 step by step, in fact, is not as difficult as it seems at first glance. During the manufacture of such a simple product, a little needlewoman will learn the basics of working with a sewing machine, which will become the basis for her further training in sewing.
 (No ratings yet)