How to sew a doll on a teapot with your own hands? Patterns

How to sew a doll in the Russian style on a full-size teapot with your own hands? Patterns and an algorithm of actions on a similar topic are of interest to many modern housewives, despite the fact that now they do not use covers for a teapot as often as before. This kitchen appliance has sunk into oblivion with the advent of electric kettles, microwave, tea bags and other innovations. We used to live at a fast pace, have a snack on the run, dine in the arms with a gadget. Few families kept the traditions of Sunday family dinners, evening tea parties, when all family members gathered at the table and had leisurely conversations over a cup of fragrant tea. But it is precisely for such purposes that the cover on the teapot is designed, which should keep the heat inside longer. So the tea is better brewed, and it will not be necessary to constantly boil the kettle. Fortunately, young housewives are increasingly interested in old traditions and return them to modern life. One of them - how to sew a doll on a teapot, we will consider in this article.
to contents ↑A bit of history
Since the cover on the teapot itself has the shape of a hemisphere, and there must be some kind of grab handle on top, then for decoration and beauty, a figure has been made to the cover on top. Over time, and the Slavic tea party was already about 300 years old, the simple cap for the teapot was transformed into an indispensable item of every good house. In the old days, the most popular characters were a young lady in fluffy skirts ("woman"), a cockerel (chicken) or a bear. Sewing a doll on a kettle for the hostess was a matter of honor, she lovingly created it with her own hands.
Important! Often, tea warmers served as a gift to close friends or relatives.
The ancient Slavs with the help of the table divided the hut into a working and residential part. Traditionally, a samovar stood on the table, which at that time replaced the teapot, and a teapot with a heating doll on it.
to contents ↑Important! Do not forget that people of those times attached great importance to amulets, and a similar doll also played this role.
Tea cap rules
If you are interested in this tradition and want to create a teapot heating doll for yourself, then you need to know not only how to sew a heating doll on a teapot, but also how to use it. Do not cover the kettle with such a decorative cap immediately:
- First, you pour tea leaves with boiling water and you can cover the kettle with a linen or cotton napkin. So the tea leaves will fully open.
Important! If you immediately cover the kettle with a cap, the tea leaves will “suffocate” and take on the smell of a broom.
- The heating pad should be worn only when the tea begins to cool.
Important! If you decide to arrange real tea ceremonies at home, you will surely also prepare delicious food for the drink. To do this, you will need high-quality dishes, which you can easily buy using our ratings:
So, we will move on from the history and proper use of such an accessory to tailoring it. How to sew a heating doll on a teapot with your own hands? Patterns and procedures we will consider further.
to contents ↑Sewing workshop with photo
For such a lesson does not require much time or special costs for materials.Usually, all sorts of tissue residues are used for this, which, as a rule, is in every apartment. We women leave every shred, in case “maybe it’s useful”, and then we don’t know what to do with them. We offer one of the useful options for using waste material.
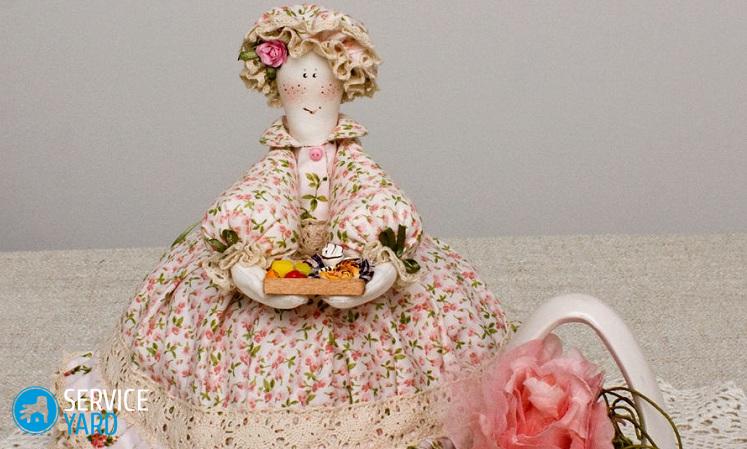
Option 1. We use a finished doll
If you do not want to bother much, then you can go along the simplest way: for the top of this heating pad, take an old children's doll. You won’t need her legs. You will only need to make a multi-tiered bottom and connect it to the wire frame. So, what do you need in order to sew a heating doll on a teapot with your own hands? Schemes and patterns of the simplest product will be considered first of all.
Necessary tools and materials:
- Wire. It should bend well and, at the same time, keep in shape.
Important! A single-core aluminum or copper cable may be suitable for these purposes.
- The old doll.
- Heater (synthetic winterizer, holofiber and others).
- Flaps of bright natural fabrics (for the upper skirt and other clothes for the doll).
- Different accessories for decoration (ribbons, buttons, beads, lace).
- Sewing supplies (threads, needles, scissors, tailor's chalk, pins).
- Sewing machine.
Important! You can sew such a thing and manually, but it will take more time and may not look so neat.
Procedure:
- We measure our teapot. Based on its size, you need to make two rings of wire:
- Lower - more. It should pass freely over the kettle. This will be the bottom of the structure.
- The second ring is less. It will be located above the lid of the kettle. Its size should correspond to the thickness of the doll's body, as it will hold it. This will be the top of the case.
Important! If for this purpose you plan to buy new dishes, then information from our following articles will help you:
- Now we connect the upper and lower rings with separate wire segments, 4-6 pieces will be enough. The design will ultimately look like a lampshade for a floor lamp.
Important! You need to make the frame carefully so that the ends of the wires do not pierce the fabric, fasten the joints with electrical tape.
- From a dense plain fabric (felt, felt, furniture fabric) we cut out the part in the form of a wide trapezoid, which in size will correspond to the wire frame.
- Cut the same part from the insulation.
Important! Remember to make seam allowances.
- We sweep the parts with pins and try on the frame. Correct if necessary.
- Now we sew the top and sides, twist.
- Between the layers we insert the wire base and sew the bottom manually.
- In the center of the structure we reinforce the doll. Since we do not need legs, we leave only the upper part from it.
- We put the doll in order: make a hairstyle, decorate with ribbons, a string of beads will look good on the neck. It remains to sew her an elegant blouse, although you can take it from ready-made doll clothes, if preserved.
- Now we sew a bright upper skirt that will cover the heating pad. How to sew a skirt on a heating pad doll? To do this, we process the edges with a zigzag or overlock at a rectangular flap of the desired size.
- Sew frills on the bottom, braid or lace. We bend the top in order to insert the lace after. You can sew a nice apron in front, then your doll will look like a funny hostess.
- We insert a small lace, put on a skirt on the doll and tighten it tight at the waist.
It remains only to make tea and call the family to the table. Such a doll will ensure the presence of warm tea on the table and a good mood behind it. We looked at the easiest way to sew a heating doll on a kettle. For more skillful pens there is an interesting option.
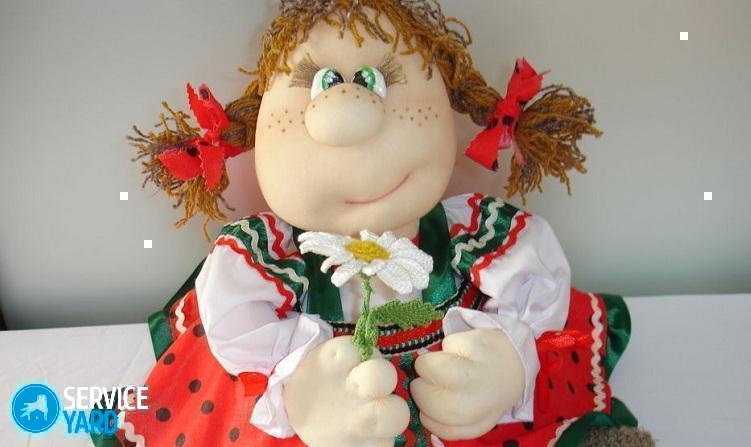
Option 2. Tilda doll
Tilda dolls came to us from the cold Scandinavian lands and became quite popular. Many mothers want to sew such a doll to their baby. They look very cute and are quite suitable for decorating a heating pad.
Necessary materials and tools:
- Fabric for the outside (linen, calico, cotton).
- Fleece for clothes.
- Sewing accessories.
- Insulation (holofiber, synthetic winterizer).
- Woolen threads.
- Decorative elements (buttons, ribbons, lace).
Procedure:
- Take a ready-made doll pattern, which can easily be found on the Internet. We measure our teapot and adjust the pattern (increase / decrease) to the required size. Now transfer the pattern to the fabric.
- Cut the doll’s body out of flax. You should get two identical parts.
Important! Do not forget to leave allowances of 1.5 cm at the seams.
- Attach the details of the body of the doll face to face, now you need to carefully sew them around the perimeter, without touching the bottom.
- Next, twist and stuff the head, arms and upper body tightly with cotton or other material.
- Lay a seam just below the chest of the doll so that the filler does not fall out of the doll.
Important! It is not necessary to tighten the thread, otherwise - the figure is deformed.
- According to the pattern of the skirt, cut the same details from the calico and insulation.
Important! On calico make allowances of 0.7 cm on the sides and 1.5 cm at the bottom. On the insulation allowances should be done only on the sides, below they are not needed.
- Connect the calico and insulation with a stitch, leaving 10 cm unstitched.
- Sew two blanks of the skirt in a circle.
- Turn the skirt through the left hole on the face, and then sew the left part manually.
- Tuck the warm layer inside the doll's body. Now you need to sew the bottom so that the insulation does not fall out.
- Next, sew a fluffy frill of bright cotton into the middle of the hem.
- From fleece sew a dress with a collar. Put it on the doll. Decorate with a belt, buttons, beads, you can sew a beautiful apron.
- It remains to arrange the head of the tilde doll. To do this, sew the woolen threads cut in equal lengths. We make a hairstyle from them (braids, a bun, and the like).
- The facial features of the tilde doll are usually limited to eyes and rosy cheeks.
Important! Eyes can be embroidered with a needle and thread, or you can draw with a cosmetic pencil. Draw cheeks with blush or a soft pencil.
Your tilde doll for teapot is ready!
Important! Communication over a cup of tea will be much more pleasant and interesting if you use original dishes for this. This is easy to do with your own hands. Here are some ideas you can use:
Option 3. Doll from kapron stocking
This option is a bit more complicated in that you have to sew the face of the doll itself, using a thread with a needle, this will require diligence, accuracy and imagination. As a result, you get not the angelic face of a Barbie doll, but a funny face a la “puppet theater”. To sew a doll on a teapot of this kind, it will take a lot of time, so for such an activity free up the whole evening so that you can create without haste.
Necessary tools and materials:
- Wire.
- Kapron stocking (flesh-colored, matte).
- Yarn.
- Sewing accessories (thread, needle, scissors, etc.).
- Glue gun.
- Fabric for clothing and insulation.
- Decor
- Batting or synthetic winterizer.
Procedure:
- We build a wire frame that corresponds to the size of our teapot (how to do it - see the instructions above).
- With a batting cut, close the frame inside and out. We sew the side part. Narrow down this inner cover at the top, for this you need to make folds on the top.
- Now we sew the outer cover. It will consist of two parts. First, we cut out a circle of such diameter from cotton fabric that it fits completely inside the cover. The second part is the outer one, sewn from 5-7 wedges.
Important! The total length of the lower part of the wedges sewn in a circle should be equal to the radius of the lower ring of the wire frame plus allowances. The top, respectively, is equal to the second - smaller, ring.
- We sew the wedges with the sides together. We process the edges and put on top of a batting cover.
- Now we have a round part inside. Manually sew.
- Next, we make the basis for the body and head of the doll. There are several ways to do this:
- The easiest way is to take a plastic bottle with a volume of 0.5 l, but not even, but in the form of a nesting doll. Pull a nylon stocking on it and stuff it with filler, cotton, for example.
- You can go the more difficult way. From the wire, make the frame of the body and arms, wrap the joints with electrical tape, and then wrap it with cotton (sintepon) and tighten with capron.
- We form the head of the doll. To do this, we fill the segment of capron with the filler so that it comes out round.
- We take a long needle with threads to match the stocking. Put a piece of cotton in place of the nose. We form the bridge of the nose with our fingers, mark with the pins of the nostrils. Now we stick the needle into the “nostril”, stretch it to the side of the nose and return to its original position. We tighten the thread a bit until a half of the nose is formed. Tie a knot. Similarly, we do it from the second side. Now on the sides in the same way slightly tighten the bridge of the nose.
- We put cotton balls on the sides of the face to form cheeks.
- Fingers knead cotton wool in the area of the eyes and lips, forming the necessary bends. We take the needle and insert it into the place of the orbit, extend it in the corner of the mouth, then withdraw at the base of the ear and again return to the orbit. Pull the thread so that you like the smile and eyes. We do the same with the second side.
- Next, we form the chin, the base of the nose. To do this, insert the needle under the middle of the lower lip and withdraw under the nose, then move along the lips.
- When the bends of the doll’s face are ready, we glue the eyes, draw facial features with the help of your cosmetics, sew hair from woolen threads, make a hairstyle.
Important! If you want to make the doll long hair, then wind the thread on the book and sew it in the center on a typewriter, and then sew it manually on the doll's head.
- It remains for the doll only to sew clothes.
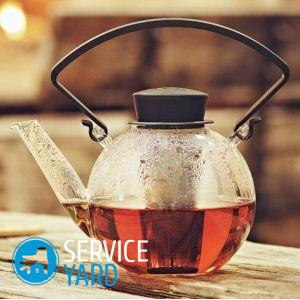
to contents ↑Important! Do not forget to look after the dishes that you will use for the tea ceremony and not only. After all, dirty cups, spoons and plates will not contribute to the comfort and coziness you are striving for. To do this, note the following selections:
Stock footage
Using the information from the article, you can easily sew a heating doll on a teapot with your own hands. Patterns and patterns for this type of needlework, as you see, are simple. For those who are indifferent to dolls, you can offer teapot warmers in the form of animals: rooster, bear, chanterelle. After the first experiments, you can start creating such masterpieces for relatives and friends as a gift, because there is a teapot for brewing in almost every house. As you know, two identical products cannot be made independently, therefore, an original and unique gift with a piece of soul is guaranteed.
- Rating of the best producers of pots
- Frying pan for induction cooker - how to choose?
- Best Stainless Steel Pans - Rating
- Rating of the best producers of pans
- How to choose a teapot?
- Which kettle is better - glass or metal?
- Decor clay polymer clay - master class
- DIY inscription on a circle
- The better to wash the dishes
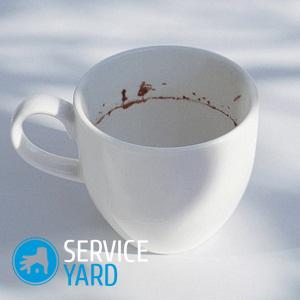
- How to wash a mug from tea plaque?
- How to clean teaspoons from tea plaque
 (No ratings yet)