

How to sew an organizer onto a wall with your own hands - master class
Organizers are great devices that make our life easier and organize things. They are very different in their purpose, material, appearance, color, etc. You can buy a suitable model in the store, or you can sew an organizer yourself. They are convenient to use at home, in the kitchen, in the children's room, in the car and in the country. How to sew an organizer onto a wall with your own hands - a master class on this topic will allow you to do everything simple and easy.
to contents ↑Organizer - a convenient means of maintaining order
This item provides a rational and practical arrangement of things, their storage and functional use.
Organizers will be an indispensable assistant in the following cases:
- In the kitchen - will allow you to conveniently place various little things, as well as sort the spices.
- In the children's room - they will help the child store and stack toys, books, stationery and creative materials. In addition, it will be a convenient device for mom to care for a small baby.
- In the bedroom - the organizer will provide the woman with the opportunity to place cosmetics, creams and other personal care items most comfortably.
- DIY cabinet organizer - perfect for storing small wardrobe items. For example, underwear, socks, tights.
- In the hallway, organizers use it to store keys, mail, and even for shoes.
- In the pantry, garage or in the country - with the help of such devices it is convenient to place tool kits.
- In the car - they allow you to conveniently store various accessories in the trunk, or find their application in the passenger compartment.
And these are not all the options for using organizers in everyday life. There are several ways to arrange such an optimizer for space and placement of things:
- Hang on the wall.
- Hang on the cabinet door or door.
- Place directly in the cabinet, on the shelf.
- In the car on the back of the seats.
Important! The installation of the organizer depends on its design, design, size and material.
Well, then we will consider specific examples of how to sew organizer pockets on a wall and not only.
to contents ↑Bathroom organizer
A convenient optimizer is simply necessary for the bathroom. It is in this room that a large number of the most various objects and trifles, among which you need to clean up:
- Personal hygiene products and items - toothbrushes, pastes, shampoos, gels.
- Cosmetics.
- Men's shaving accessories.
- Cleaning products.
For so many accessories, you need a convenient organizer to use them comfortably and easily. We offer to sew a DIY bathroom organizer.
Materials and Tools
For manufacturing you will need:
- Terry cloth. In our case, such material is used, but you can replace it with any other that you like, or use an oilcloth, which will even be more justified in a bathroom.
- Fabric for the back of the organizer.
- Braid for decoration and reliability.
- Flizelin for giving rigidity.
- Wooden slats - 2 pcs.
- Sewing machine, matching threads, needles.
- Measuring tape.
- Sharp scissors.
Sewing instruction
We start by cutting all the details of the organizer:
- Draw a rectangle on the fabric in the following sizes: width - 42 cm, length - 58 cm. This is the basis of the device.
- Fold the fabric in half, measure 5 cm to the side at the top of the fold. Make a mark.
- Then step back from the top by folding 4 cm down. Designate this place.
- Connect the marks with a smooth line along which to cut the part. The resulting semicircle will serve as a hole for the pens.
- In the same way, make a pattern of non-woven fabric and the reverse side of the organizer.
Important! When cutting parts, do not forget to make an allowance of 1 cm.
- We cut out the pockets. Here you are already guided by your imagination and needs.
Important! Pockets can be the same and symmetrical, and can have a variety of sizes and shapes: narrow or wide, long or short, roomy or small.
It’s easy to sew a DIY bathroom organizer:
- First, attach the interlining to the details of the pattern for structural rigidity.
- Wrap all pockets with tape, and then sew them to the front of the organizer.
- Sew the front of the product to the lining. Stitch the parts from the wrong side, then turn out the base.
- In the upper part of the product, fold 3 cm under the wooden battens.
- We sweep and flash on a typewriter.
- Pass the slats into the holes.
Important! Choose the color of the material according to the style of the interior, so that in the end the product harmonizes with the decor of the bathroom.
The best place to place the organizer in the bathroom is the door or wall of the room.
to contents ↑We organize the space in the closet
If there is often a mess in the closet in underwear, socks and other little things, then in this case, an organizer for clothes with your own hands will help you.
Materials and Tools
For manufacturing you will need:
- Thick fabric.
- Tape for a decor of pockets.
- Sewing machine, matching threads, needles.
- Measuring tape.
- Sharp scissors.
Sewing instruction:
- We are building a pattern. In this case, it will be a 40 by 80 cm rectangle. Two pieces are needed for such parts.
- We connect these two elements on the sewing machine from the wrong side.
- We turn the base and make a line on the front side of the product. Around the perimeter of the rectangle at a distance of 1 cm from the edge.
- Next, cut the strips. We will need 4 such details, from which it is necessary to form 4 lines of pockets. In this organizer model, each strip will be divided into three pockets.
Important! The number of pockets in one row you can do based on your desires and needs.
- Tuck the top edge of each strip, braid it.
- We form two folds for each pocket, which are not fixed on top. In this way we create depth for the branches.
- On a sewing machine we attach each strip to the base from three sides. In addition, we make seams between pockets.
- We trim the lowermost line of pockets in its lower part.
Your organizer is ready! And you can put it inside the cabinet or on its door. To do this, attach the cord to the top of the product from two sides, hang it on the door handle or hook.
to contents ↑Important! This option is also suitable for the hallway to place gloves, children's mittens, hats, scarves and scarves.
Conveniently store clothes
Another master class for DIY clothing organizer. It can be made from a cardboard box. In such a box, lovely ladies will be convenient to store their underwear.
Materials and Tools
For these purposes you need to prepare:
- Shoe box.
- Thick cardboard.
- Paper for pasting. This can be wallpaper, self-adhesive paper, packaging.
- Scissors.
- PVA glue.
- Double sided tape.
Manufacturing process
Next, we act according to this scheme:
- We paste the cardboard box with paper on all sides.
- We measure the dimensions of the box - length, height, width.
- Then, according to the obtained values, we cut out the required number of strips from cardboard, which will serve as partitions.
- We make slots at the required distance, so that then using the strips to form the organizer compartments.
- We try on the received details to the box.
- If everything matches, we fix the partitions to the bottom of the box using double-sided tape.
The result was a convenient organizer that can be placed on a shelf in a cabinet or in a drawer.
to contents ↑Organizer for stationery in the children's room
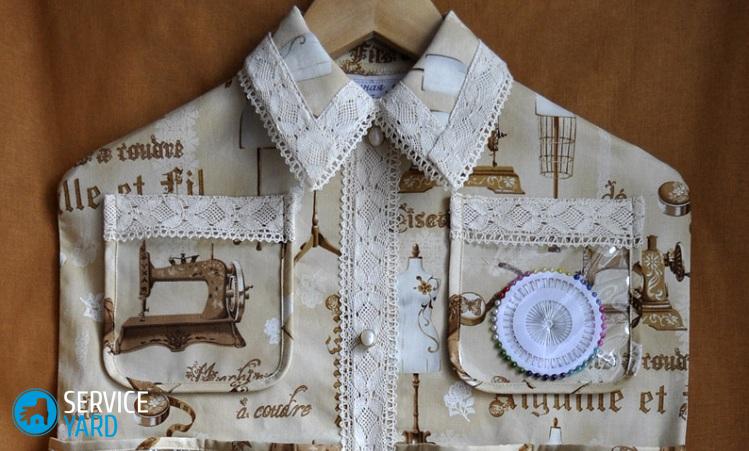
Many items are always present in the room for children, especially during creative classes or school lessons. How to sew the organizer on the wall with your own hands? A master class for its manufacture is described below.
Materials and Tools
For manufacturing you will need:
- Material for organizer base.
- Material for making pockets.
- Cardboard.
- Decor Elements.
- Sewing machine, matching threads, needles.
- Measuring tape.
- Sharp scissors.
How to sew pockets-organizers on the wall:
- Determine the dimensions of the future organizer, and then cut a rectangle of the specified size from the fabric. Of course, the dimensions depend on the number of things to be stored.
Important! Fabric for a children's organizer, choose bright and beautiful.
- Bend the edges of the part around the perimeter by 0.5 cm, stitch on a typewriter.
- In the upper part in the center, fasten the loop, by which the product will be suspended from the wall.
- We cut out pockets from cardboard. Since the organizer is necessary for the stationery, the size of the departments should be very diverse.
Important! In wide pockets it will be convenient to store pencils, pens and felt-tip pens, in a very miniature one - a rubber eraser, in narrow ones - rulers and scissors. In addition, the shape of the branches can also be original. You can arrange the organizer with round pockets, triangular, square or in the shape of a heart.
- On the basis of the patterns obtained, we cut out the pockets from the corresponding material.
Important! Make allowances of 0.5 centimeters at the seams.
- After that, it is necessary to decompose all the details on the basis, think over the composition.
- Sew pockets to the canvas.
Dressing
It seems to be ready, but the last touch remained - decorating the organizer, because this is an accessory for the children's room.
You can decorate the product in the most incredible way:
- Post stickers with your favorite cartoon characters.
- Stitch beautiful and fun appliqués on your pockets.
- Sew pictures corresponding to the filling of the pockets, that is, to separate the image with them under the scissors, etc. By the way, such a system will teach the child organization and independence.
- Use bright buttons, beautiful ribbons and bows, flowers, beads and sparkles.
Important! You can entrust this process to the child, and he will already paint the pockets with paints or pencils to your taste.
Now you know how to sew pockets organizers on the wall in the nursery. Such a product can be used to store books. In this case, the organizer model will have larger compartments, and it will be convenient to place such an optimizer near the child’s bed so that you can always read your favorite book before bedtime.
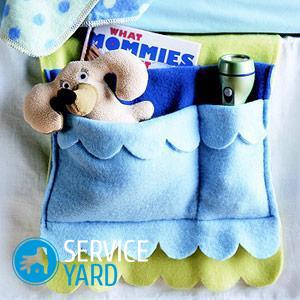
And a practical device is simply necessary for a young mother who is caring for a baby. Comfortable pockets fit perfectly on the rim of the crib. And in the departments you can store the necessary little things - napkins, a pacifier, a comb, a baby’s favorite rattle.
to contents ↑Original ideas for organizing order
Do-it-yourself organizer can have an original idea and no less original performance. Here about such examples and we will tell further.
Old jeans - second life
If there are several pairs of old pants or shorts in your closet, you can sew a fabric organizer onto the wall from their pockets. It is very easy to do:
- Buy fabric for the base of the product. Cut out a rectangle of the right size from it.
- Take pockets from old clothes.
- Place on the base as you like, stitch it on the machine to the canvas.
- At the top, think about fixing to the wall. For example, a loop in the center or two on the sides, a rope, a hole.
How to store documents?
And this method is characterized by unprecedented simplicity. So that the documents always lie in a certain place and do not crinkle, dense files are suitable. These stationery items are sold in stores. Mount such a folder on the cabinet door or wall and place paper in them. The organizer is ready!
Important! This option is also suitable for the kitchen to store your favorite recipes.
And do not forget about the decor - plastic files can be decorated with bright stickers.
Tin Cans - Great Storage Facilities
Waste tin containers can be effectively used as towel holders in the bathroom.
You need the following materials:
- Several cans.
- Acrylic paints in bright colors.
- Satin ribbon.
- Decoupage material: napkins or fabric.
- Glue gun and glue.
- A sheet of plywood that will serve as the basis for fastening.
- A few screws.
Master class on how to sew an organizer:
- We paint a sheet of plywood and cans with a light shade. For example, cream or beige. It is necessary to paint containers from all sides.
- We make cans decoupage. To do this, we apply an ornament to the front of the containers, which can be cut out of napkins, patterned fabric or special cards for decoupage. Glue the decor to the banks.
- Glue the satin ribbon to the top edge of the cans.
- With screws we attach the bottom of the cans to the plywood base.
- The perimeter of the base also draw a satin stripe.
Important! Twisted towels can be placed in such containers. And such an organizer looks very unusual and stylish.
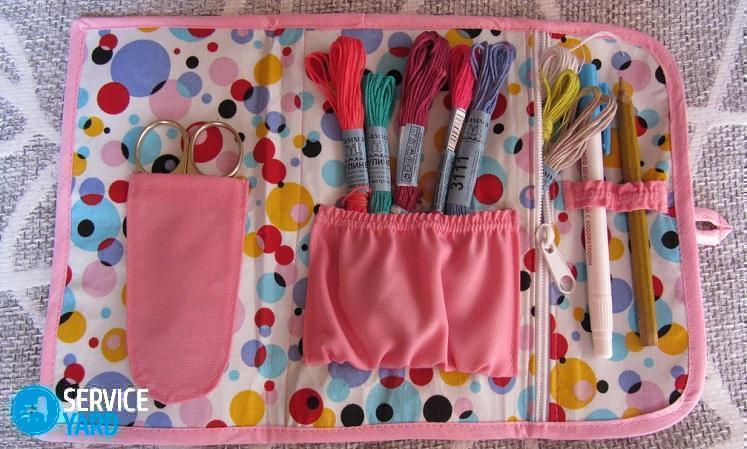
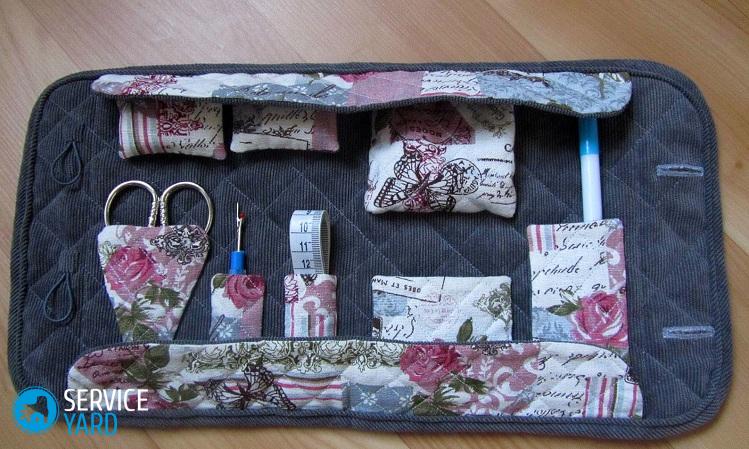
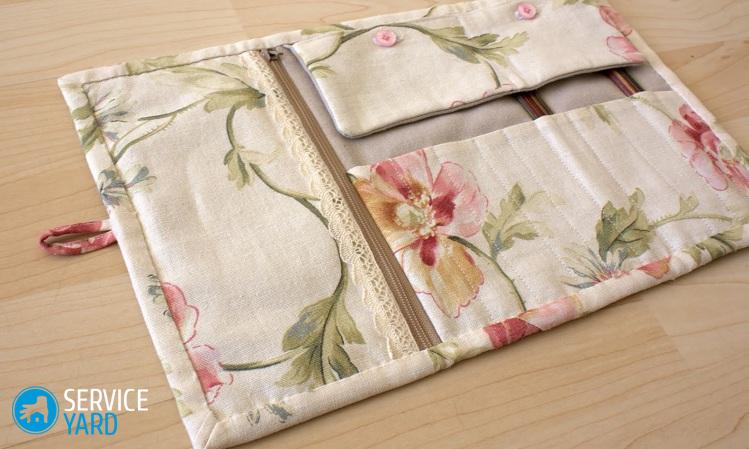
Convenient cosmetic bag
In the arsenal of the female half, there are always a lot of personal care products and tools. These are various brushes and tweezers, scissors, mascaras, lipsticks of many shades, pencils. In order not to search for these items every time in a purse or drawer of a dressing table, you can sew an organizer for them.
It is a strip of fabric with a patch pocket, which is divided by machine stitch into many narrow compartments. Fasten the ties around the edges of the product, and then you can twist such a cosmetic bag into a roll, fixing it with laces. Agree, very compact! And most importantly, not a single important item will be lost.
to contents ↑Stock footage
With the help of organizers, you can restore order anywhere: in the bathroom, in your closet, at your desk or in the car. Thanks to these devices, each thing will take a certain place, and order will reign in the room. Irritability will disappear when for a long time it is impossible to find the right thing. We gave basic information on how to sew organizer pockets on the wall, and following your imagination, you can complement these products with colorful details, original decor and exclusive performance.
- How to choose a vacuum cleaner taking into account the characteristics of the house and coatings?
- What to look for when choosing a water delivery
- How to quickly create comfort at home - tips for housewives
- How to choose the perfect TV - useful tips
- What to look for when choosing blinds
- What should be running shoes?
- What useful things can you buy in a hardware store
- Iphone 11 pro max review
- Than iPhone is better than Android smartphones
 (No ratings yet)