

How to sew a pillow for a newborn with your own hands?
A new man has come to this world, and his future character, and therefore his fate, largely depends on how he is met at home. Caring parents dream of happiness for their baby, but for now ... While they strive to arrange it as best as possible, and most importantly - to provide good conditions for sleep, because it is in a dream that a newborn spends most of his time. In this situation, the condition of bedding, including pillows, plays an important role. How to sew a pillow for a newborn with your own hands, is it needed at all, and what is the best way to make it? Read about it in our article.
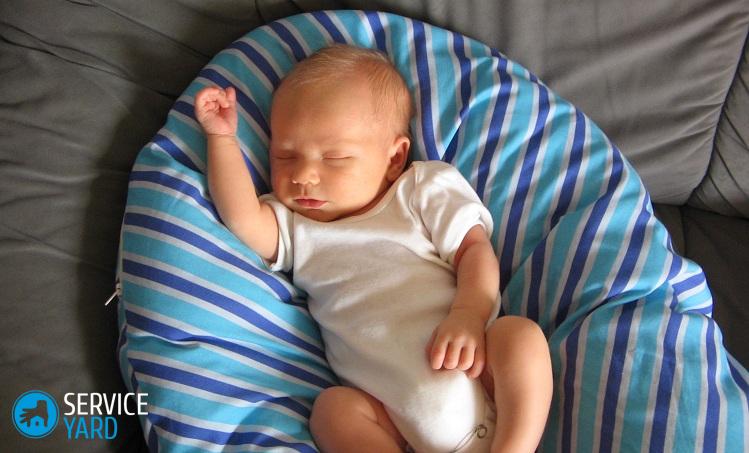
to contents ↑Does a newborn need a pillow?
If you ask this question to your mother, and even more so to your grandmother, you will almost certainly hear the answer that the baby who has just arrived from the hospital does not need a pillow and that at your age you slept on a four-piece bed sheet. They may be right, but only under certain conditions:
- if the birth went quickly and without complications;
- if the child was born strong, healthy and without pathologies of the cervical spine.
Important! Unfortunately, every year the number of children is growing, who have had problems with the cervical spine since birth. So the pediatrician will most likely advise something else - a regular or orthopedic pillow. It ensures the correct position of the head and removes unnecessary stress from a weak neck.
Other circumstances must be considered:
- The skull of the newborn has not yet fully formed, the bones can change shape, that is, if the child sleeps in the wrong position, his head may lose symmetry, and the back of the head can become flat.
- The incorrect position of the spine contributes to the development of scoliosis and osteochondrosis, and it is better to protect yourself from such “gifts” in advance.
to contents ↑Important! Grandma’s advice was true when the children were swaddled tightly - the edge of the diaper passed just above the neck, so it was he who supported his head during sleep. Now this method of swaddling is used relatively rarely.
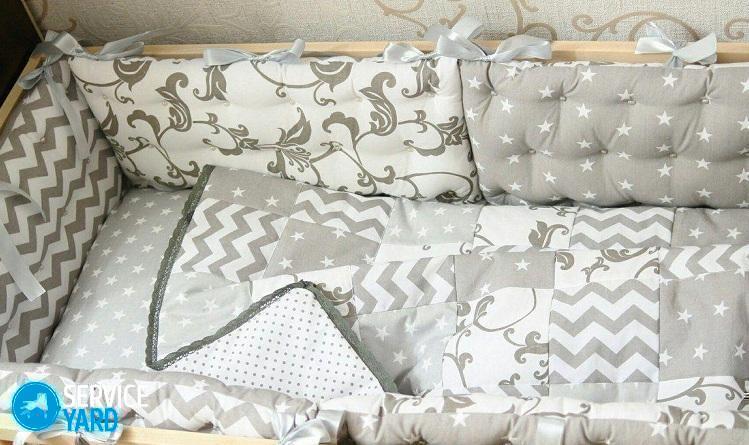
What could be a pillow?
If you need a pillow for a newborn with your own hands, the master class begins with choosing a model. The pillow can be:
- ordinary;
- flat orthopedic;
- orthopedic “butterfly”;
- fixing cushions;
- decorative.
Plain
The usual one is not much different from the adult, well, except in size and materials.
Important! It is better to choose chintz or linen for the top and pillowcases, and for the filler - neutral material like sintepon or holofiber.
Orthopedic Products
If you are recommended a flat orthopedic pillow, it is better to choose something firm and elastic, for example, latex, as a filler. The “butterfly” pillow has a more complex shape - in the middle it has a thin circle, and on the sides there are more voluminous “wings”. For it, you can take two fillers - thinner and thicker, but this is not necessary.
Fixing and decorative
Fixing pillows are rollers. They are placed under the arm or leg, if there is such a need. They are sewn in much the same way as the sides for a bed, only smaller in size. The filler can be any.
Finally, a decorative pillow for a crib can be from anything - the baby does not sleep on it, it serves only for decoration.
to contents ↑Important! For an older child, you can make a didactic pillow, in which individual fragments will be removed.
Material requirements
Regardless of which model you choose, there are certain requirements for materials - as, indeed, for any children's things. Material must be:
- environmentally friendly;
- hygienic;
- easy to wash;
- Do not be afraid of high temperature;
- do not cause allergies.
Outer fabric
For a bedcloth and pillowcases are suitable:
- chintz;
- satin;
- flannel;
- linen;
- teak;
- calico.
Filler
As for the filler, young mothers now practically do not use fluff. This traditional “pillow” material is almost out of use for several reasons:
- for the cover you need a very dense fabric so that the fluff does not knock out;
- the pillow should be sewn with a special linen seam, otherwise - the fluffs will come out through the holes from the needle, and for a novice craftswoman it is quite difficult;
- despite the fact that fluff is a natural material, it causes allergies in many children;
- he lumps into lumps;
- this filler is quite difficult to care for - it is difficult to wash, it must be very carefully dried and periodically sorted.
Important! If you really like down pillows - use syntepuh, which combines the properties of fluff and modern synthetic materials.
Speaking of synthetics. Such fillers are ideal for children's products:
- synthetic winterizer;
- holofiber;
- latex;
- polyurethane.
to contents ↑Important! If you use a synthetic winterizer, it is better to take not pieces and not a sheet, but a piece of clothing with this filler. For example, a pillow can be made from an old jacket, in which the filler is already quilted.
We sew a simple pillow
How to sew a pillow for a newborn? The master class begins with a cut. There is nothing complicated in this, but the most basic tools are needed:
- ruler;
- pencil, crayon or soap;
- scissors.
Important! You can cut a napkin directly onto the fabric, but if you doubt yourself and your hands tremble with excitement, it is better to make a pattern on graph paper. It is simply a rectangle 40-42 cm long and 20-25 cm wide, depending on how much fabric you have.
Then proceed as follows:
- Fold the fabric in half - it is better if the fold line is where the baby’s neck will be. It should be the long side.
- Put the pattern so that one of the sides coincides with the fold line - since the product will not experience serious mechanical stress, it is absolutely the same as cutting it.
- Circle the pattern.
- Make allowances of 1 cm on all sides.
- Cut the part into allowances.
- Cut out a pillowcase in the same way.
Putting a simple pillow
To sew such a model, you need to start with a feather:
- Fold the part in half with the front side inward.
- Sweep and stitch the sides, leave the top open.
Important! If you use syntepuh or other material similar in structure as a filler, leave only a piece of the seam closer to the middle open.
- Corner allowances oblique.
- Turn the workpiece out.
- From a sheet of filler, cut a rectangle so that it fits freely into the bed.
- Insert filler.
- Close the open area of the seam with allowances inward and sewing close to the edge.
The pillow is ready!
We sew a pillowcase
The technology of sewing pillowcases is not much different from the method of manufacturing a bedcloth.
Important! This product should be freely put on the pillow, but do not hang out and do not remove spontaneously:
The pillowcase should not have hard parts and ties. The kid, of course, still cannot move independently, and he is not yet inclined to pull various things into his mouth. But it’s better to be careful and make a pillowcase with a zipper. It is more convenient if the fastener is the full length of the pillow.
Operating procedure:
- Overcast all sections - overlock or manually.
- Fold the part in half upside down.
- Sew side seams.
- Align one edge of the zipper with the allowance so that the dog is on the front side.
- Sew this edge and stitch, and then sew the zipper on the other side.
to contents ↑Important! The pillowcase should be smooth, no decorative elements need to be done on it.
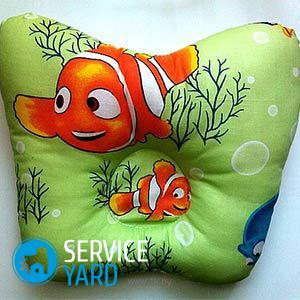
How to sew a butterfly pillow for a child?
Sewing such a pillow is somewhat more difficult than a rectangular one, but nothing is impossible either. First you need to make a pattern of half the product. To do this, you will need:
- a large sheet of paper (better graph paper);
- pencil;
- compass;
- ruler.
Important! The pattern is a trapezoid. If you remember the school course of geometry, then you will immediately realize that the bases of this geometric figure are parallel, but the sides are not. So it will be easier to navigate in the instructions.
It is better to draw a pattern in the following order:
- Draw a vertical line 17 cm long - this will be one of the sides of the future trapezoid.
- To the bottom point, draw the perpendicular to the right at a distance of 11.5 cm - the first base is obtained.
- To the top point, also to the right, also draw a perpendicular to a distance of 14 cm.
- Connect the ends of both bases.
- From the bottom of the original line, set aside 4 cm, and then 3.5 cm - this will be the center of the circle for the head.
- From the center, draw a circle with a radius of 3.5 cm.
- Also, draw a perpendicular from the center to the original vertical until it intersects with the second lateral side of the trapezoid - this will be the most concave point of the wing.
- Connect this point to adjacent corners with convex lines.
- Continue the contours of the wings, for this, divide each of the bases of the trapezoid in half and draw perpendiculars from these points outside the plane of the figure, set aside 1.5 cm on them.
- Connect these points with the adjacent corners of the trapezoid in smooth lines.
- Cut the part along the contour.

Cut
Start cutting with a synthetic winterizer - more precisely, with a quilted piece of it:
- Fold the sintepon in half.
- Overlay the pattern so that the edge where the center of the circle coincides with the fold.
- Contour a part
- Cut the second part in the same way.
- In the same way, cut 2 pieces of cotton fabric, only 0.7-1 cm allowances should be made on all edges.
- Transfer the edges of the circle to chintz by spraying.
Manufacture
So, before your eyes there are four details - 2 of fabric on a synthetic winterizer and 2 of chintz:
- Fold the parts in pairs, with the front side of the padding polyester touching the wrong side of the chintz.
- Sweep both pieces.
- Fold them with the front sides of the chintz fabric together.
- Sew along the entire contour, leaving the section of the seam 4-5 cm long at the top open.
- Turn the product and iron it with a not-so-hot iron (by setting the thermostat to synthetics).
- Add sintepuh or holofiber to the wings so that they are slightly more voluminous than the middle.
- Close the seam.
Decorative pillows
Decorative pillows for children up to a year can be didactic. First you need to sew an ordinary flat pillow. Then, Velcro pieces are sewn to the pillowcase, and then large bright figures are made of dense, non-crumbling fabric. It can be:
- geometric figures;
- flowers
- animal figurines;
- contours of objects.
to contents ↑Important! A piece of Velcro is also sewn onto the back of each figure. When the baby is awake, he can look at such jewelry for a long time, and also try to remove them, which contributes to his sensory and motor development.
Stock footage
Opinions regarding the care of a newborn and raising a child are many. And each mother herself must decide what her child really needs and what is superfluous. If you nevertheless decided that you need a complete set of bedding, now you know how to sew a pillow for a newborn with your own hands and will cope with this task without any problems.
- How to choose a vacuum cleaner taking into account the characteristics of the house and coatings?
- What to look for when choosing a water delivery
- How to quickly create comfort at home - tips for housewives
- How to choose the perfect TV - useful tips
- What to look for when choosing blinds
- What should be running shoes?
- What useful things can you buy in a hardware store
- Iphone 11 pro max review
- Than iPhone is better than Android smartphones
 (No ratings yet)