

Dripping tap in the kitchen - how to fix it?
The constant noise of knocking drops is quite annoying, so it is unlikely that even one person will be calm about broken plumbing. Wait for the plumber from the housing office - often an even bigger problem than the faulty "gander" at the sink. And to call a private master is not a cheap pleasure. So the question becomes urgent: a faucet is dripping in the kitchen - how to fix it? In fact, everything is quite simple if you adhere to elementary rules and recommendations, which are described somewhat below. So without panic, now you will eliminate annoying noise and will sleep peacefully.
to contents ↑What does the crane consist of?
Before proceeding to the main factors that cause breakdown, it is necessary to consider what a standard representative of a single lever mixer is:
- a lever that is designed to supply and adjust the water;
- a rod that serves as a mount directly to the lever;
- a housing inside which either a hinge valve or a plastic cartridge with ceramic filling is placed;
- adjustment ring, adjusting and steam cuffs.
The main reasons for the failure of plumbing
Based on the fact that there are currently several types of single lever mixer in the market of sanitary fixtures, we will consider the most popular causes of breakdowns, as well as factors that affect their appearance.
The most common causes of damage, the consequence of which is the need to repair a single-lever kitchen faucet with your own hands.
Natural wear
The metal ball acts as the main distributor of water flows in swivel mixers. Unfortunately, it may corrode over time. A variety of gaskets and seals also wear out through which water begins to flow.
In order to bring the crane to normal operation, you must replace worn elements.
Clogging
In the event that a ceramic cartridge is mounted inside the faucet, some small debris that could have entered the water supply system or during the installation of the product may be the likely cause of the breakdown.
Important! Despite this, devices with a ceramic cartridge are considered the most reliable, and if installed correctly, they can last quite a long time.
Clogging can also cause deformation of the rubber gaskets that are on the underside of your cartridge.
Mounting defects or loose connections
The clamping nut may well be loosened. As a result, water will leak out.
Case damage
Small chips may be present, as well as cracks in the case of the mechanism itself. They are eliminated with sealant. True, this is just a temporary solution to the problem, and in the near future the mixer will need to be replaced.
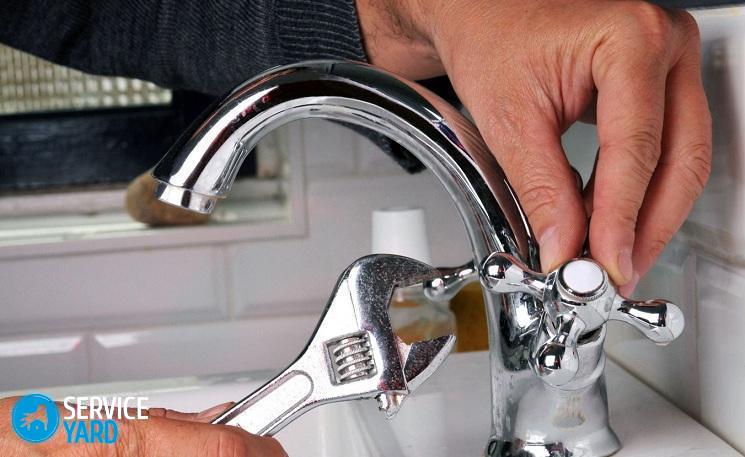
to contents ↑Mixer Repair - The Right Work Order
Before you start repairing the kitchen faucet, turn off the water supply. As soon as the water flow is shut off, open the tap and let all the remaining water drain.
Important! Based on the fact that all work will be performed in close proximity to the surface of the sink, you can cover it with a cloth.It will be quite enough to put any unnecessary rag in the place where the mixer is located.
The following list of actions may vary slightly, depending on the type and model of mixer used. But the general repair process looks something like this:
- To get started, get rid of a special decorative plug that lives on the front of your faucet. It is a pointer to hot and cold water. Under this plug is a fixing screw that must be unscrewed.
- Remove the lever directly. Do not put too much effort, because the mixers are usually made from fairly cheap alloys of metals that are easy enough to damage.
Important! If the lever does not want to give in, you can pour it with warm or hot water for several minutes.
- Under the lever is a decorative dome, which must also be carefully removed.
- After that, remove the clamping nut that adjusts the location of the mixer design.
- Depending on the type of mixer, both the distribution ball and other parts of the articulated mixer can be located inside, as well as a plastic cartridge with ceramic discs inside. In the first case, you must verify the integrity of this ball, find out about the state of gaskets, seals, and also the spring, which is responsible for holding the valve in place. Replace parts as necessary. If you have a cartridge installed, then carefully remove it and go to the nearest store where you should find a replacement for it.
- Leakage can also occur directly from under the spout. In this case, worn seals must be replaced.
- Underneath the cartridge are usually rubber saddles that become unusable over time. Wash away any residual dirt and other debris that has been caught during operation.
- If you need to replace the cartridge, carefully before mounting a new one, carefully clean the seat itself from corrosion and rust.
Important! During installation, make sure that the locking elements are exactly in the grooves, otherwise the mixer will not work properly.
- If the repair process that you performed does not bring the desired effect or partially eliminates the problem, then look for other possible causes of the malfunction.
Consider other possible issues.
We reviewed the standard operating procedure. Now let's pay attention to other reasons why the faucet is dripping in the kitchen, the signs of various malfunctions and how to solve them.
Reason 1
Clogging of the aerator may well lead to the fact that the water pressure will be very different from that in the bathroom. In order to fix the problem, you must remove this element and thoroughly clean it.
Important! If the cause of the malfunction was the occurrence of rust, then this element will have to be completely replaced.
Reason 2
The strong noise of the tap during the passage of water through the pipes may indicate that the gaskets are not suitable in size. Most often this occurs when you cut them yourself. In this case, disassemble the mixer, and then cut the gaskets.
Reason 3
The power of the tap water can also decrease significantly due to blockages in the connecting flexible hoses and water pipes. After you clean the faucet, replace the hoses with new ones. On the old, deposits of various kinds may well form, which lead to repeated damage to the hinge or the cartridge.
Reason 4
If the location of the faucet is a bathtub, and in the process of bathing, the lever for switching the water route drops independently, replace the gasket under the spool.
There is no need to dismantle the mixer for this procedure - it will be enough just to unscrew the nut and remove the hose directly, then replace the gasket and return everything to its place.
to contents ↑Important! The lower gasket is much more difficult to replace, because:
- It is necessary to dismantle the hose, remove the adapter together with the spout itself.
- Then completely remove the switch, cam, valve, and then replace the gasket.
- Assemble all parts, but in reverse order.
Stock footage
Self-repair of the faucet in the kitchen at home, in fact, is quite simple and does not require special skills in the field of plumbing. The only thing you should constantly remind yourself is that such devices do not like self-abuse at all.
- How to choose a vacuum cleaner taking into account the characteristics of the house and coatings?
- What to look for when choosing a water delivery
- How to quickly create comfort at home - tips for housewives
- How to choose the perfect TV - useful tips
- What to look for when choosing blinds
- What should be running shoes?
- What useful things can you buy in a hardware store
- Iphone 11 pro max review
- Than iPhone is better than Android smartphones
 (No ratings yet)