

DIY money tree painting from coins - master class step by step
Have you been saving coins for years? We offer to use this banknote in the manufacture of amazing paintings that can attract wealth and prosperity to the family, according to the beliefs of Feng Shui. An excellent example is the picture of a money tree with your own hands made of coins - you will find a master class step by step in this article in several variations. In this instruction, you will learn all the secrets of creating such a talisman that you don’t need to take care of and water as carefully as a living plant. It just needs to be hung on the wall, which is located in the southern or eastern part of the room. An equally interesting alternative to the money tree can be a painting-amulet with an image of a horseshoe, which can be decorated with coins. Everything in order further in the text.
to contents ↑The painting-amulet “Money horseshoe” 2018 in stages
Our ancestors believed that if you find a horseshoe, then - to great luck.
Important! According to popular beliefs, one blacksmith shod the unclean and made a deal with him that if the horseshoe hangs with its horns down, then it does not enter the house. Therefore, a picture of coins with your own hands is a strong protective amulet that should be in every house, preferably above the door.
We offer u how to make a picture depicting a horseshoe, so that your house always has prosperity and good luck.
Materials and Tools
For work, we will prepare such materials and tools:
- The basis of a rectangular shape (size 250 to 200 mm - depends on how you want to see your creation).
Important! For the basics, you can take cardboard, plywood or a finished frame for a photo.
- Burlap, which exceeds the size of the base by 10-20 mm on each side (270 by 220 mm).
- Wooden glazing beads of curly shape.
Important! The beadings can be replaced with a thin ceiling cornice.
- Thick white thread or jute twine.
- Furniture stapler.
- Acrylic paint in black and bronze.
Important! To make a picture, you can use any acrylic paint - in a tube or balloon. It can be glossy or matte - it all depends on your preference.
- Glue gun with transparent rods.
- PVA glue.
- Sponge.
- Marker
- A small brush.
- Scissors.
Important! For the manufacture of amulets use only natural materials, each of which carries a specific meaning. For example:
- burlap represents wealth and abundance;
- tree - the integrity and strength of the family.
Therefore, try to use natural materials that will direct the energy of the picture in the right direction.
Stages of creating the picture “Money horseshoe”:
- First you need to prepare the foundation. We tighten the rectangular workpiece over the burlap, which we fasten with a stapler or glue gun.
- We install glazing beads, having previously measured and sawed at an angle of 45 °. For fastening we use glue, stapler or small nails.
- Now we make the crown of our tree. We take a dense white thread or jute twine, impregnate with PVA glue to form a dense base for a horseshoe.
- On a rectangular blank we draw with a pencil the selected image - for this it is not necessary to possess artistic talent.
Important! You can draw a horseshoe on a piece of paper, cut it out, and then circle it on a wooden base.
- Next, lay out the thread in any form, starting to glue on the image outline. Here you can experiment, for example, lay out a solid thread throughout the picture, glue it with a zigzag or twist it with a ring. The end result should be a horseshoe made of tightly lying white threads.
- Glue a short horizontal thread to the bottom of the horseshoe to get a full-fledged pattern.
- We are waiting for the base to dry completely.
- Using a glue gun throughout the horseshoe, leaving gaps, glue the coins, simulating a real horseshoe.
- To dry, leave a picture for a day.
- Apply black paint to the surface of the whole picture. Spraying is best done outdoors, in the porch or in the garage, but not in the apartment. Again, let the paint dry well.
- Now we take the bronze paint on the sponge and apply it with light movements on top of the canvas.
That's all the work. The painting-amulet “Horseshoe” is ready to decorate your home!
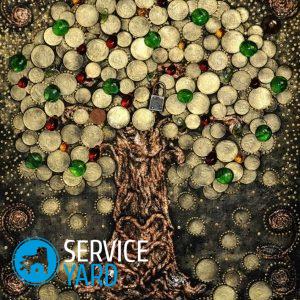
to contents ↑Do-it-yourself coin paintings - Money Tree workshop
An original panel depicting a money tree can be bought in the shop of skilled craftswomen, or you can create such a masterpiece on your own. Why not? The manufacturing process itself is very interesting and fascinating. If you understand the whole system of work, you can easily make interesting pictures both for yourself and for people close to you.
So, we prepare the following materials for work:
- Wallpaper, burlap or fabric.
- Coins.
- Table napkins (3-5 pieces).
- Water.
- Acrylic paints (black, gold and silver).
- Foam sponge.
- A simple pencil.
- Scissors.
- Loose sequins (can be bought at the cosmetic store).
- Frame for paintings or photographs.
- PVA glue (“Moment” glue or thermal gun can be used).
- A rag to remove excess glue.
Step-by-step instructions for creating the “Money Tree” panel:
- Cut out the basis for the future picture. To do this, you need to disassemble the photo frame and attach the back of the plywood to the wallpaper (fabric or burlap), circle with a pencil and cut out the material.
- Using glue, glue the blank to the back of the plywood.
- When the wallpaper is dry, draw a tree sample on top of the base.
- In a plate, dilute PVA glue and water in equal proportions 1: 1.
- We cut napkins into different pieces, the width of which should be 2-3 cm.
- Now we take one strip of napkins and carefully dip them into a container with sticky liquid, trying not to wet it too much, as the napkin may deteriorate.
- We twist the napkins with our palms in the form of tubes, adhering to an angle of 45 °.
Important! Try to roll the strips more tightly so that there are no gaps. Different widths of tubules are needed in the future to form a tree trunk - for the crown and for branches.
- Leave the tubes to dry.
- Apply PVA glue to the drawn wood sample.
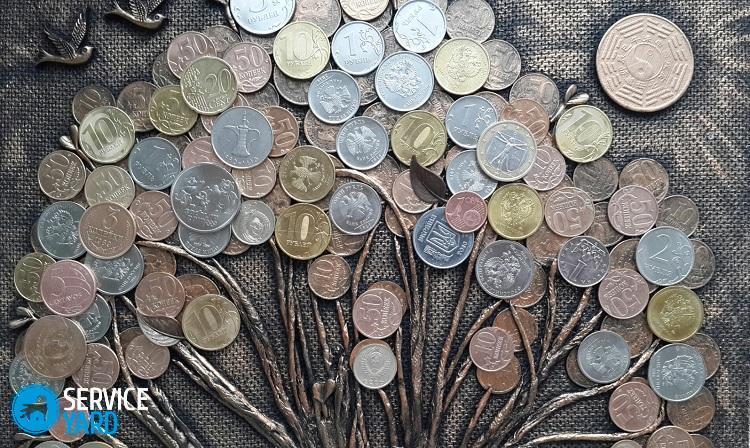
- Now it's time to put the finished flagella from napkins and give a beautiful bend to the tree, forming a crown, branches and roots.
- Glue our coins in a chaotic order with a glue gun or quick-drying glue. Coins can be glued on top of each other to create a three-dimensional image.
Important! Before gluing the coins, they must be degreased with alcohol or ordinary detergent for dishes.
- Using black paint in the balloon, we thoroughly paint over the entire surface of the painting. We give time to dry.
- Now we dip the sponge in silver acrylic paint and once again cover the money tree. As a result, the effect of wear should be obtained, so do not press hard on the sponge by hand. Again, let the paint dry.
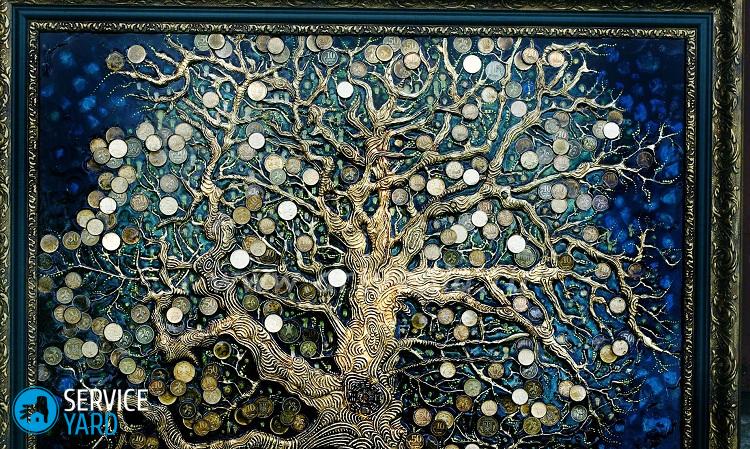
- Blend the golden acrylic paint over the coins without touching the background of the painting.
- Until the last coat of paint has dried out, apply dry sparkles to the surface of all the gold coins.
- Leave the product to dry completely.
Canvas "Money tree is ready." Now you can insert it into the frame and enjoy the work of your author’s idea!
Useful Tips:
- The root of the tree can be made more interesting, for example, colored. To do this, dilute the color paint, glue and water in the container.
- Coins can be painted green, imitating the foliage of a tree - dip a sponge in green paint and walk along the crown.
- In the same way, you can paint the barrel in its inherent brown color.
- If desired, you can cover the coins with white paint, creating a snowy effect, giving the picture a tenderness and special lightness.
What else can be made of coins?
Do-it-yourself painting with trees is not the only option for using coins.
Options for using metallic money in creativity:
- We scatter coins on plywood, insert it into the frame and cover it with glass from above - we get an unusual and stylish panel.
Important! You can depict absolutely any drawings: a goldfish, an elephant or a portrait of a person.
- A great idea is a picture of coins “financial daisy”, in which each petal is lined with coins from different countries.
- Entire mosaic paintings can be laid out of coins, coloring individual elements of the image with different colors.
- Money is used in decorating the room. You can lay out a wall in the bathroom, cover the interior door or decorate the chest of drawers in the room.
- Various fakes - topiary, money bowl and other handicrafts will decorate your apartment originally.
- For the New Year's holiday, you can also use coins, making them a desktop Christmas tree. To do this, glue coins on a cardboard cone and decorate with cotton balls.
Stock footage
Now you will not have a question how to make a picture-tree from coins and not only. Everything is done quite simply and quickly, and most importantly - economically. As you can see, there can be an endless number of design options. It all depends on your imagination. But be sure that your creative work will not be left without attention, it will delight you and guests of your house for a long time. That's right, a penny to a penny, and real masterpieces from coins are created!
- How to choose a vacuum cleaner taking into account the characteristics of the house and coatings?
- What to look for when choosing a water delivery
- How to quickly create comfort at home - tips for housewives
- How to choose the perfect TV - useful tips
- What to look for when choosing blinds
- What should be running shoes?
- What useful things can you buy in a hardware store
- Iphone 11 pro max review
- Than iPhone is better than Android smartphones
 (No ratings yet)