

DIY cereal picture
From which modern craftswomen do not come up with paintings. Of course, you will not surprise anyone anymore with embroideries from satin ribbons or woolen watercolors. But it turns out that you can even make pictures of cereals, and even a child can create them. This is very useful for hand motility, in addition, the process of creating a drawing fascinates, calms the nervous system and brings satisfaction upon its completion. Let's look at a few ideas on how to create a picture of cereals with your own hands.
to contents ↑Preparation of materials
It is very important to choose the right materials. And here several points are important.
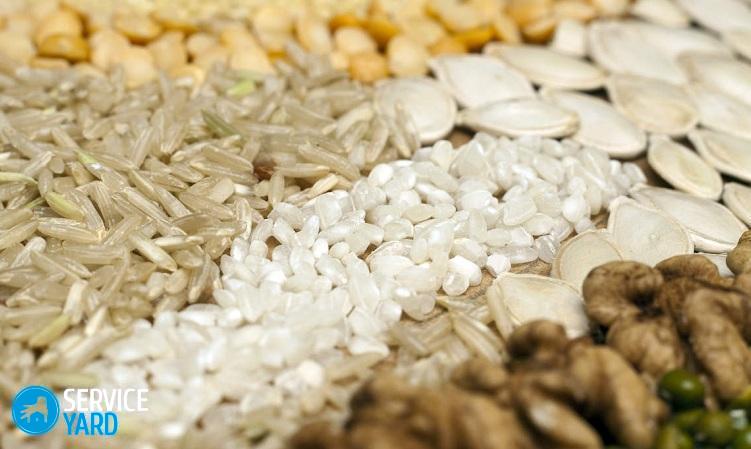
We select cereals
A variety of cereals, such as peas, rice, and millet, are suitable for creating masterpieces. Both macaroni and coffee beans, as well as feathers of birds, twigs, sticks and all other things will be used. Some craftsmen create real works of art, in the end it is not even clear what this miracle is made of.
Each cereal has its own characteristics:
- Rice makes beautiful flower petals, wings of butterflies or birds, as well as clouds, sky, snow and much more.
- Unpeeled seeds look beautiful in combination with cereals to create a sunflower. Animals, insects, and earth are also well derived from it.
- Semolina is difficult to stick, but is suitable for sand, as well as for other more delicate details.
- Pearl barley adds volume to your picture and is suitable for creating volumetric elements.
- Millet groats always look bright and fun, well laid down, suitable for creating individual elements of the picture, as well as for framing it.
Important! If you are painting with children, try to pick up larger material.
How to color cereals?
Before you start creating, cereals must be prepared. To do this, it is sorted out and if necessary, then tinted:
- Put the groats in the technical dishes, add some acrylic paint or gouache.
Important! If the acrylic paint is thick, it can be diluted with alcohol.
- Thoroughly mix the cereal with the dye, then lay it on the paper in one layer so that it dries.
- To prevent it from sticking, mix it periodically.
Important! Staining is not always required, it is better to simply select cereals by color.
Substrate Selection:
- As a substrate, you can use thick cardboard. But it has one minus - if during operation it is deformed somewhere, for example, from glue, then this can not be fixed.
- Glass can be used, but it is heavy and fragile. If it breaks, the picture will be damaged. As an option - you can use plexiglass.
- The best option for the substrate is a light and durable hardboard. It is a solid plate with a thickness of 2.5-6 mm.
Picture frames
You can make any frame to your taste:
- You can take a wooden and varnish.
- You can lay out the tone of the picture from cereals and seeds.
- There are also ready-made frames with or without glass on sale.
Making the foundation
How to make a picture of cereals? First you need to select a picture. You can draw it yourself, or you can print from the Internet using a printer. Those who are confident in their abilities themselves can draw on the basis of a pencil, and those who are not very good can use carbon paper. The drawing needs to be done with thin lines so that they are not very noticeable, otherwise - then they will still shine through the croup. Now you need to pick up cereals and grains for one or another part of the picture.
to contents ↑Important! It is not recommended to use similar colors on adjacent sections of the compositions - they will merge.
DIY groats
How to make a picture of groats with your own hands? For beginners, the simplest pattern is an ornament of geometric patterns:
- Borders can be identified using sticks or twigs painted in different colors. You can use coffee beans for this. All these elements can be glued using the “Moment” glue or hot melt glue.
- Now you need to fill in the drawing, starting from the center. Apply PVA glue with a brush to a small area and begin to lay out the selected material on it. Keep in mind the shape of your cereal. You can correct cereals with a needle or tweezers.
- When everything is assembled, you need to spray the picture with varnish. This will add a mysterious brilliance to the picture, and at the same time save your masterpiece from the harmful omnivorous beetles.
to contents ↑Important! Do not lose sight of pasta. They are on sale in a variety of shapes, and they make amazing paintings.
Children's paintings
Children also like this kind of creativity and it is very useful for them. Therefore, prepare materials, glue, cardboard and pick up a template.
Picture for baby
For a small child, work with pumpkin seeds and beans is best. Instead of glue, you can use plasticine.
Operating procedure:
- Print the picture, stick it on cardboard. Let it be a large flower.
- Cover the surface with glue or plasticine.
- Lay out the petals from the pumpkin seeds, pushing them to each other.
- The middle can be made from small seeds or from beans.
- If you want a color picture, paint your craft with gouache. But it is better to color the seeds or cereals in advance.
- When the painting dries, pick a frame for it.
Winnie the Pooh from cereals and plasticine
You can make a picture of Winnie the Pooh from cereals with your own hands with older children, we offer you a master class:
- Print the picture with your favorite hero. The larger the drawing and the smaller the smaller details, the better.
- Stick it on thick cardboard.
- In small portions we smear plasticine of the desired color. This business can be entrusted to the child.
- Now the background needs to be filled with pre-selected cereals.
- It remains only to pick up a frame and hang a picture.
Owl
Owl is famous for its wisdom, so many children like to decorate their rooms with its image. Or maybe just because she is beautiful. To make an image of an owl, you will need:
- white and black beans;
- peas of two colors - green and yellow;
- rice;
- buckwheat;
- sunflower seeds.
Operating procedure:
- Draw an owl or print a suitable pattern on a printer and glue it on cardboard.
- The pupils are made from black beans, in the middle you can glue one white grain each.
- The whites of the eyes will be from white beans, and glue over the borders with black beans.
- Nose, paws can be made from yellow peas.
- Wings and head will look good from sunflower seeds.
- Fill the rest of the space with rice and buckwheat.
- A couple of feathers can be glued on the chest - they can be made from seeds. Glue them directly on top of the grits.
- A tree branch will look great from buckwheat.
- Green peas will make leaves.
- Make a frame to your taste, based on your interior. It can be decorated with peas or corn, or any other cereal of your choice.
- Varnish the picture and hang.
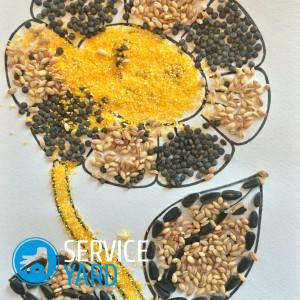
Cereal sunflower
Let's look at how to make a picture of a sunflower from cereals with your own hands step by step:
- Choose a sunflower and transfer it to white paper. Glue the sheet to thick cardboard.
- We start work from the center of the sunflower. Lubricate the parts with glue and sprinkle abundantly with the selected grits. There should be no gaps.
- Put yellow peas in the middle and cover with pepper.
- Corn is useful for the petals.
- And mung bean and green peas are suitable for the stem and leaves.
- After everything is laid out, you need to give time to dry. It is best to put a picture during this period under the press.
- When everything dries, varnish, and our sunflower is ready.
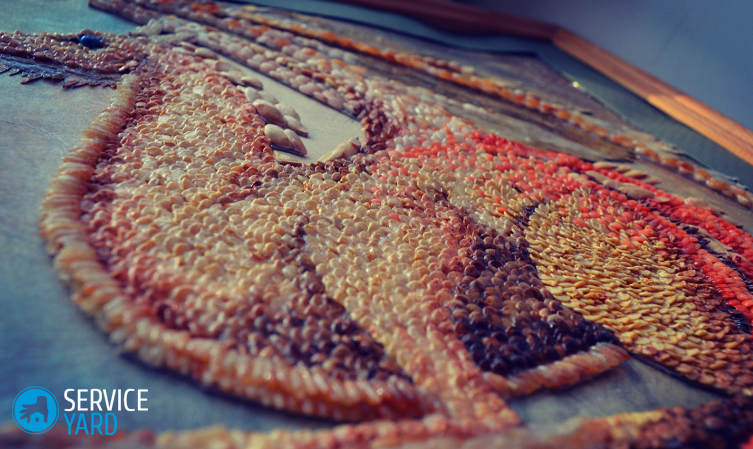
Do-it-yourself contour paintings of cereals
The most difficult and painstaking work is the contour paintings. They are made from rice and spread the picture to the picture. Each detail is painted in the desired shade. A thin contour is displayed, on which glue is applied with tweezers. And then the drawings that need to be corrected with a needle are already laid out.
to contents ↑Important! Such a picture requires great patience.
Stock footage
In this article, we told you the basic rules of how to create paintings from groats with your own hands, and submitted some interesting ideas. Now you can try your hand at simple options and further improve this skill, creating real masterpieces in a more complex technique of execution.
- How to choose a vacuum cleaner taking into account the characteristics of the house and coatings?
- What to look for when choosing a water delivery
- How to quickly create comfort at home - tips for housewives
- How to choose the perfect TV - useful tips
- What to look for when choosing blinds
- What should be running shoes?
- What useful things can you buy in a hardware store
- Iphone 11 pro max review
- Than iPhone is better than Android smartphones
 (No ratings yet)