

DIY heart pattern

The handmade theme has been popular for many years, and every day it is gaining more and more momentum among novice craftswomen. The main plus of this kind of activity is the creation of incredible things from the simplest, seemingly unnecessary materials. This technique makes clothes, jewelry, toys, decorating elements and much more. Handmade is considered a life-saving option for those who want to modestly but tastefully decorate their home or apartment for the holiday with vases, paintings or panels. For beginners, the question arises: how to create a picture of hearts with your own hands? There are a lot of options for creating decorating elements. We will consider some of them in this article.
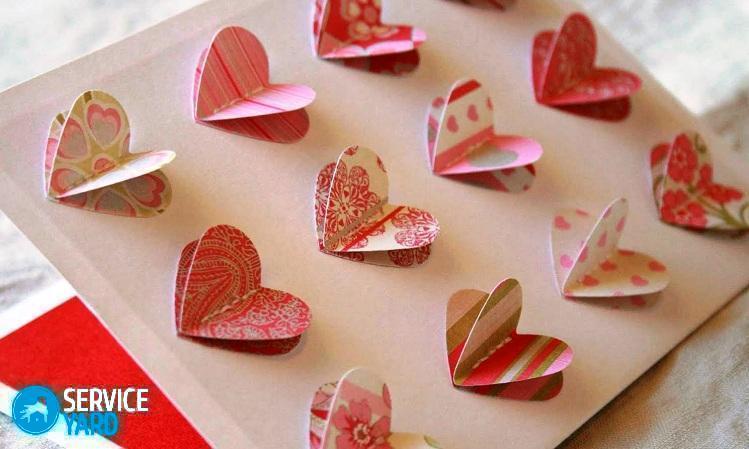
to contents ↑Making a heart picture on the wall
In order to make a picture of paper hearts with your own hands, you will need the following materials and tools:
- Double-sided colored paper in red and pink.
- Sharp scissors.
- A simple pencil.
- Sheets of cardboard.
- Thick white paper.
- Photo frame (choose size as desired).
- Super glue.
- Beads and beads.
We begin to create:
- Cut out halves of a heart of different sizes from a sheet of cardboard (3-4 pieces).
- On sheets of colored paper, bend the edge so that all previously cut templates fit.
- Circle them with a simple pencil.
- Cut the hearts along the contour, but do not straighten them.
- On a piece of white thick paper, draw a big heart.
- We evenly distribute small colored details according to the drawing so that they resemble “Heart flowers”.
- Try to arrange and glue them symmetrically inside the figure.
- Glue colored beads in the middle of the “flower”.
- We place the application in the frame for the photo.
- We hang on the wall.
to contents ↑Important! In order to make the application more contrasting and saturated, you can add sparkles or use beads of different sizes as the “core” of the flower.
Spring mural on the wall
With the onset of the warm season, I want to create a bright sunny atmosphere in the room. It is very easy to do if you have the following in your arsenal:
- Scissors.
- Glue.
- Heart patterns of different sizes.
- Colored paper (green, brown, pink and blue).
- White sheet of paper (preferably denser).
We begin to make panels:
- On a brown sheet of paper, draw a tree trunk.
- Carefully cut it along the contour.
- Glue the barrel to a white sheet of paper.
- According to the patterns, we cut out details from colored paper.
- Around the tree trunk draw an even circle.
- Along the contour of the circle we place the “crown” of the tree, evenly, in a chaotic size order.
- Gently glue our “leaves”.
- You need to fill the entire circle around the trunk.
- From blue and pink paper you can cut small birds, which can also be placed in the composition.
This panel can decorate a nursery or living room.
to contents ↑Important! Colored paper can be chosen in different colors, depending on the imagination or season outside the window.
We make a large panel in the living room
If in your living room there are very few design elements, and you want to diversify the interior a little, then this option of a picture of hearts with your own hands is just for you. In order to make a beautiful design panel, you will need the following materials and tools:
- Designer cardboard in delicate shades (pale pink, beige, lilac).
- Whatman.
- Framing for whatman paper (photo frame).
- Scissors.
- Puncher (preferably in the shape of a heart).
- Glue.
- Templates.
Getting started creating a designer picture:
- From colored double-sided cardboard, we cut out parts of different sizes according to templates.
- We draw a huge heart on the paper (try to draw so that the lines are smooth and neat).
- Glue the parts along the contour of the picture, having previously greased the halves of the hearts.
- Fill the free space with the elements made with the hole punch.
- Allow applications to dry.
- Put it in a photo frame.
- To create a brighter composition, you can apply several small bows from pastel shades of satin ribbons.
to contents ↑Important! Such a large-scale composition can be made not only from patterns of hearts, but also from paper butterflies. As a result, the picture will look very impressive.
Gradient pattern of butterflies
The gradient technique of the panel is a very fashionable direction in creating home-made decorative elements. In addition, to create such beauty you will need a minimum of materials and tools:
- Butterfly patterns.
- Colored paper (milk, lilac, purple).
- Scissors.
- PVA glue.
- A large sheet of white paper.
- Frame.
Getting started:
- Using templates, we cut out butterflies of the same size from double-sided colored paper.
- Spread them with glue.
- We paste the details (from light to dark) along the diagonal of a white sheet of paper in a chaotic manner.
- Put the composition in the photo frame.
to contents ↑Important! Unfilled parts of the picture can be decorated with small butterflies or circles made with a hole punch. Try not to overdo it with the elements, as this composition belongs to the style of Minimalism.
Stock footage
Do you think these are all the options and ideas to make a picture of hearts with your own hands? Not at all. You can take these methods as a basis, and when you hone your skills and develop a creative taste, ideas will come to your mind yourself, one more interesting than the other!
- How to choose a vacuum cleaner taking into account the characteristics of the house and coatings?
- What to look for when choosing a water delivery
- How to quickly create comfort at home - tips for housewives
- How to choose the perfect TV - useful tips
- What to look for when choosing blinds
- What should be running shoes?
- What useful things can you buy in a hardware store
- Iphone 11 pro max review
- Than iPhone is better than Android smartphones
 (No ratings yet)