

DIY plaster paintings
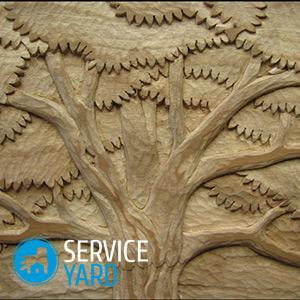
Volumetric images on the walls can become an original decoration of the interior of a room. Unlike moldings (overlay decorative elements), they are created exclusively by hand. Making a beautiful and high-quality bas-relief is a laborious and responsible work, but if you want and have at least elementary modeling skills, you can create paintings from plaster with your own hands. In this article we will talk about this.
to contents ↑Volumetric paintings in the interior
Often, a design technique such as a bas-relief is used to decorate private houses, where there is a fireplace in the layout. Moreover, the decoration can appear both in the form of a picture, and as a pattern that surrounds this fireplace. In addition, such an interior decor will look great in window and doorways, the main thing here is to choose the necessary texture and size.
Important! Aerobatics is considered a decorative relief, which includes the presence of lighting. It will make it possible to make the image more voluminous, creating the effect of 3D graphics.
An important moment of using embossed decoration on the wall is that it is not necessary for him to have different colors, in comparison with ordinary painting. The main thing here is to choose the right lighting, which will make it possible to obtain the highlighting of the image shadows, using only artificial lighting.
There is a misconception that decorating a house with your own plaster paintings is a very expensive pleasure. But in fact, such a decor is quite accessible even for beginners. It is sufficient to clearly follow the guidelines that will be described below.
to contents ↑Create a bas-relief
In order to decorate a room with a bas-relief, you will need the following:
- Sketch of the future image.
- Marker, pencil.
- Plastic sheets for making stencils.
- Masking tape.
- Kohler or paint for gypsum mortars (if you are going to make a colored bas-relief).
- Paint brush.
- Palette knives - plastic or steel blades that are used to create embossed and textured images.
- Clay, plaster, alabaster, gypsum or other plastic material.
Sketch creation
Even if the work will be done with the help of stencils, you will have to make a sketch of the picture in its actual size to check how this picture will be combined with the rest of the design of this room. Perhaps it will need to be corrected - remove unnecessary or add elements that can close the voids.
Important! The finished drawing is transferred to a thin film or tracing paper.
It is better for beginners not to make too large paintings of gypsum with their own hands with a multi-stage relief. Quite original on the wall will look like a single flower or composition of several flowers, berries, fruits, branches with leaves, the simplest contours of birds or animals.
Surface preparation
The bas-relief is made on a pre-aligned and plastered wall:
- To increase adhesion to plaster or gypsum, the wall surface is primed at least twice.
Important! In a room with a high level of humidity, it is better to use an antifungal composition.
- To make the surface of the wall even, you can apply a base of satenghips or acrylic putty on it.
- To obtain a relief surface after applying the solution, the wall should be treated with a roller or spatula with random strokes.
Important! A rather original pattern can be obtained using crumpled paper or film.

Making a bas-relief - useful tips:
- In order to transfer the sketch to the wall, fasten a carbon copy on it, and then attach the drawing on top using masking tape.
Important! Subsequently, the bonding points are carefully overwritten.
- You can also transfer the sketch to the wall in another way. To do this, apply a small layer of the solution on it, attach the drawing, and release its contour using a spatula with a pointed end, a toothpick or a match.
- If you are doing a volume bas-relief, then it is better to screw the screws into the thickest places of the image. They will be able to fulfill the role of reinforcement, preventing your image from crumbling.
- The material for the stencil must be thick. Moreover, the larger your bas-relief will be, the greater the thickness of the stencil for it. It must be removed very carefully so as not to damage the image. Although the damaged bas-relief can be corrected at any time.
Important! Minor blemishes can be eliminated after the gypsum or plaster has completely dried. To do this, go around the edges of the picture with a fine emery cloth.
- More convex images can be obtained by attaching foam pieces or cardboard blanks to the walls, followed by coating with a solution. It will hold much stronger if these preforms are pre-treated with a primer.
- Additional strength to larger image elements can be given with a plaster or ordinary (pharmacy) bandage soaked in a solution.
- Alabaster, gypsum, plaster are diluted with water according to the instructions. The resulting solution is thoroughly mixed.
- The solution is applied to the surface of the wall in several layers. Each subsequent layer is applied only after the previous one has completely dried.
- Convex elements are rolled out with your fingers, and then fixed on the wall, slightly pressed and leveled.
- The last layer of the image is best done from the finishing putty, which is easy to polish.
- Thin veins on leaves and flowers can be done with a medical syringe.
Important! The drawing of small lines, as well as the filling of cracks is done at the end of all work.
- The finished drawing is covered with a primer. Such a topcoat will prevent plaster or gypsum from shedding.
Important! So that the bas-relief does not crack upon drying, it must be moistened periodically with a wet brush.
- You can colorize the image in different ways - both by adding color for acrylic paints to the solution, and by applying paint for gypsum solutions with an art brush. Excess paint is removed with a damp cloth.
to contents ↑Important! You can get subtle color transitions by applying paint to a still wet bas-relief.
Lilies
To make the process of creating volumetric paintings from gypsum with your own hands more clear, you should consider the procedure for arranging such a decor with another example. We offer you one of the most popular options - lilies.
Sequencing:
- First you need to protect the decorated base. To do this, glue the necessary space with a masking tape.
- Cover the base with putty, let it dry completely and apply a primer.
- Using a trowel, apply the starting coat of Marseille wax to the surface of the wall.
Important! This material hardens relatively quickly - on average for 4 hours at room temperature.
- Bend the film and carefully draw the details of the bas-relief. To do this, you should fix a transparent plastic film on top of the working surface over its entire width and length. At the same time, you do not need to fix the lower edge - you should still be able to bend it freely.
- Using a marker, apply a sketch of future “lilies” to the film - buds, leaves, stems.
- After the sketch is fully completed, proceed with applying the Marseille wax under a plastic wrap following the sketch. First use a trowel to work, and then use a spatula.
- The Marseille wax used is white. Therefore, in order to make the created decor more visible, cover it with a suitable composition. For example, you can use water that is lightly dyed with mackerel.
Important! Such compositions can be applied exclusively to a dried surface.
- After tinting, you will immediately see in which places the finishing material needs to be given the outlines of flowers, stems.
- After giving the bas-relief the desired shape, allow the composition to completely harden, then proceed to applying the second layer of decorative finish - acrylic paint.
- In the end, it remains only to apply the finish layer of the finish - either honed or any other composition with the same properties. To do this, armed with a wide brush, apply two layers of precision on the entire wall.
Important! The second layer can be applied only after the first has completely dried.
- To give the composition additional volume and expressiveness, apply a white hint to certain sections of the bas-relief.
Stock footage
Making a picture of gypsum with your own hands is a rather complicated, lengthy and time-consuming process. However, with a careful and competent approach, you can give the interior of the room you need a beautiful and original look.
- How to choose a vacuum cleaner taking into account the characteristics of the house and coatings?
- What to look for when choosing a water delivery
- How to quickly create comfort at home - tips for housewives
- How to choose the perfect TV - useful tips
- What to look for when choosing blinds
- What should be running shoes?
- What useful things can you buy in a hardware store
- Iphone 11 pro max review
- Than iPhone is better than Android smartphones
 (No ratings yet)