

DIY satin ribbon paintings
Decorating your home with amazing colors or making an original gift is always a good idea. In addition, creative work with original materials relieves stress and significantly raises the mood of the aesthetic component of the result. So, do-it-yourself satin ribbon paintings are becoming increasingly popular - such a passage has special value and genuine beauty. To master the technique of this kind of embroidery, you need to remember the basic algorithms and practice a bit, then everything will certainly work out.
to contents ↑Preparatory stage
To start embroidering incredible bouquets, you need to prepare everything you need. Without a careful selection of tools, directly supplies can not do.
What is required?
- convenient location with good lighting;
- hoop;
- high-quality canvas;
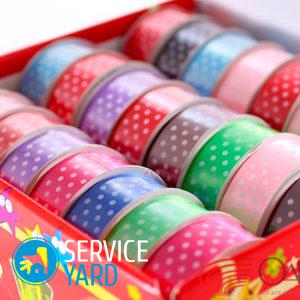
- tapes of different widths and shades;
- threads for embroidery;
- lighter;
- scissors;
- wide eye needles.
All this is necessary for the proper conduct of the process and the finished accurate result.
to contents ↑Simple roses
A picture of tapes is embroidered with your own hands, and for a spectacular result, a simple master class is enough. You should start with simple, but very beautiful roses, without which no volumetric composition can do:
- You should start with 5 simple and fairly long thread stitches. They should disperse in a circle, resembling a snowflake or asterisk. This will be needed to hold the tape.
- Its end must be fixed under the inner part of one of the stitches, and then go in a spiral, throwing a ribbon over one of the stitches, skipping under the second. So weave baskets, alternating the main line with the auxiliary. Move towards the outer edge. You can not use the needle, threading a narrow ribbon between the stitches will be easy without any extra tools.
- The edge must be fixed under the flower with hidden stitches.
Thus, do-it-yourself tapes are embroidered - for beginners, such simple techniques become the most relevant.
to contents ↑Roses more sophisticated technique
Thanks to the twisting of the ribbon in this way, the petals acquire beautiful smooth outlines without creases. It’s easier to master this technique using a wide-eye needle and a narrow satin ribbon:
- It is necessary to make 3 diverging stitches, after which one more is fixed in the center between the others. An asterisk should again come out, through which weaving will be carried out again.
- The only difference is that the weave is done more tightly and with a needle. Twisting changes the appearance of embroidered flowers.
- The tip must be cut, scorched a little so that it does not bloom, secured with several secret stitches with a thread of the same shade.
to contents ↑Important! Pictures are embroidered not only with ribbons, you can make separate volumetric leaves of fabric with your own hands, supplement the picture with beaded stamens or dew.
Original technique for small flowers
It is perfect for detailed branches, fits perfectly into the decoration and additions:
- The ribbon is fixed on the wrong side of the canvas and displayed on the front side.
- The free section of the tape must be punctured several times, creating an accordion on the needle body itself.
- After threading the needle into the canvas, it needs to be brought back to the center of the flower and repeat the procedure.
- This must be done, not forgetting to twist the tape to the required volume of embroidered plants.
Decoration and addition
Compositions do not only consist of flowers, so you need to pay attention to the finish - stems, leaves, baskets and additional elements. Here are some interesting ideas to use here:
- An important point when embroidering stems: they can be either smooth, made in one stitch, or made with small stitches with twisting. This will add extra volume and realistic roughness.
- Foliage can be either embroidered with stitches, creating the desired pattern, or performed separately. A rhombus cut from a wide ribbon under the thermal effect of a lighter flame bends effectively, acquiring a texture. Such a preform is glued, sewn or fixed using composite parts.
- Pictures with baskets made of ribbon - satin or kapron, are made by oneself according to the standard weaving pattern. The basis is made on the basis of stitches - both tape and thread.
to contents ↑Important! Entourage, additional plants, small details, as well as the background in the form of landscapes, are easier to perform in the form of applications, embroidery with threads or beads. Such additions add special charm and value.
Some useful tips
In order for the pictures to always come out thoughtful and look no worse than those sold in decor stores, you should follow a few simple rules:
- Well thought out details will come thanks to planning. The sketch drawn on the canvas is the best start.
- Silk ribbons easily dissolve, after which they lose their shape. So that the passage does not lose its charm, it is necessary to burn the ends and fix them by sewing to the canvas.
- Do not neglect the glue gun - it holds well and does not absorb into the fabric. Separately executed parts can be fixed in this way.
- The picture placed in the frame should not be covered with glass, but to keep the result unchanged, you can cover the work with varnish in the form of a spray.
Stock footage
Pictures, embroidered with their own hands from ribbons, will fit into any interior, and the process will certainly be loved by all family members. After all, this fascinating lesson develops creative thinking, allows you to master new techniques of embroidery and decoration of any textiles in the house.
- How to choose a vacuum cleaner taking into account the characteristics of the house and coatings?
- What to look for when choosing a water delivery
- How to quickly create comfort at home - tips for housewives
- How to choose the perfect TV - useful tips
- What to look for when choosing blinds
- What should be running shoes?
- What useful things can you buy in a hardware store
- Iphone 11 pro max review
- Than iPhone is better than Android smartphones
 (No ratings yet)