DIY computer desk
A computer desk is an incredibly important thing, because a stationary PC or laptop is available in every home, and it needs a place. Agree, making a computer table with your own hands is much more pleasant and cheaper than acquiring a ready-made one in a store. To make it right, you need to know some aspects that we will tell you about in this article.
to contents ↑Choose the type of table
To begin, choose in which room and in which specific place you will place your table. Next, start designing the product itself. But before you start drawing, select a table type. It could very well be:
- angular;
- straight;
- combined.
Important! Having selected the most suitable type of table, you can well equip your workplace with minimal cost and the most comfortable. The build speed of your table also depends on this.
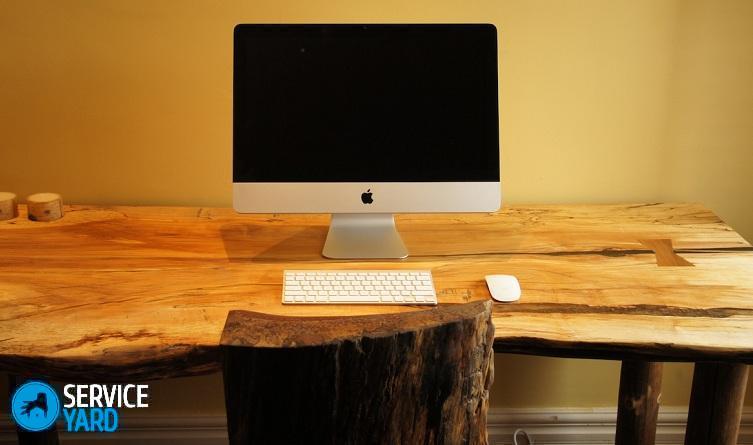
Straight table
Direct table is a classic. It can be compared to an ordinary desk. This option is perfect if you use a computer with some frequency or for professional work, which requires concentration and extreme attention. Having a straight table along a section of the wall with a window is an excellent option for this purpose.
Corner table
This option is suitable for people who spend a large amount of time near the monitor. The materials for such a design will take the least, and it will not occupy a large amount of space. But this table is not suitable for important work. Small space - this means that the office, paper or other tools will always be at hand and interfere.
Important! The corner table has an impact on the human psyche. This fact has been proven by many psychologists, so corner tables are strictly prohibited in offices.
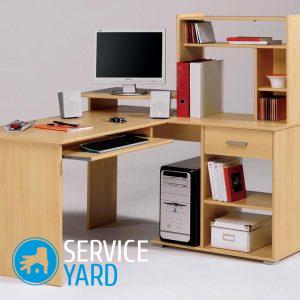
Combined
The combined table is something intermediate between the 2 and 1 options. Such a design is a great option, but takes up a lot of space. The presence of nightstands and shelves allows you to save personal items, folders and documents in such a way that they do not interfere, but at the same time are always at hand.
to contents ↑Detailing and drawings
So, after we figured out all the theoretical elements, you can assemble a computer desk at home. First, calculate the height of the table. The height of the standard table is an average of 75 cm.
Important! If your height is slightly above average, there is a special formula that allows you to correctly calculate the height: Height × 75/175.
Assume that your height is 180 cm. If you use the formula, you get: 180 × 75/175 = 77 cm.
After this, drawings should be made.
Important! Be sure to remember: the quality of the final product depends on how accurately and clearly you make your drawing, and the amount of time and effort spent will be less if the drawing is of high quality. Give him enough attention.
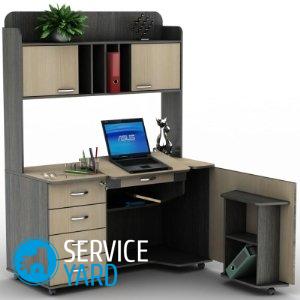
This classic version is easy to manufacture, and to build it, you do not need a lot of material. The proposed design has the following elements:
- place for the monitor;
- extendable shelf for the keyboard;
- a small shelf to store all sorts of little things;
- cabinet for papers, personal items and other details with drawers;
- shelves on top, preferably two, which are used for books, speakers or flowerpots.
As you can see, there is room for absolutely all the components of a computer system, the most important thing is to correctly place all things.
to contents ↑Instruments
Having collected the necessary tool, you can begin to work. You will need this set:
- Hacksaw or jigsaw;
- Drills and drill;
- Screwdriver or screwdriver;
- Grinder machine;
- Chisel;
- Roulette;
- A simple pencil - it’s better to take a soft one, as it is better seen on wood;
- Ruler;
Important! If the place of work will be directly your apartment, remove carpets and other things. In order to collect all the garbage, you need a vacuum cleaner.
At this stage, the preparatory work is ending, you can proceed directly to the assembly of the computer desk with your own hands.
to contents ↑Cut and assemble structural parts
Based on the fact that during self-cutting of laminated chipboard sheets, you may very well form chips and rough edges, it is better to take the drawing that suits you and order the cutting of materials at the furniture factory. On it they can perform edge gluing.
In order to bring this project to life, you will definitely need the following elements:
- 2 side racks with dimensions of 735 × 465 mm;
- 1 central pillar measuring 735 × 380 mm;
- 1 worktop with size 1200 × 580 mm;
- 1 back wall, size 1090 × 290 mm;
- 1 extendable keyboard stand 830 × 380 mm;
- 2 internal shelves, size 450 × 250 mm.
So, when all the elements are cut out, you can easily assemble this direct computer desk. Here is a phased analysis of the work:
- In the central side wall, make holes for the bottom shelf. Measure approximately 50–70 mm from the bottom, and then draw a horizontal line using a pencil and level. Make two parallel holes on this line. It should turn out 2 holes in the central and 2 in the side wall. Then fix the shelf with the help of confirmations, you can use self-tapping screws.
- The same needs to be done for the upper shelf, but the distance from the shelf to the beginning of the board should be 100 mm or more, depending on the required size of the shelf. Measure, then draw a line and drill holes. Attach the top shelf.
- Then fix the back wall. It must be placed at a level with the upper end of the central and side walls. After that, mark the holes and screw the wall.
- Then connect the second side wall together with the back. To do this, create 2 holes in the back wall and screw it to the side with the help of confirms or screws.
- Now it's time to fix the rail for the guide element. From the top of the central and side walls, measure 50 mm, make straight lines. After you mark them, fasten.
- Next, attach the guides to the shelf under the keyboard itself.
- To install the countertop, make holes in the side walls. Dowels will be placed in them. The same holes must be drilled in the countertop. They should not be cross-cutting, but not small. It is important that all openings coincide completely, and the countertop itself sits exactly as it should. You can pre-attach it to the place where it should be, and outline the places for the holes on the countertop, as well as the side walls.
- Lubricate the PVA dowels with glue and insert them into the ends of the frame where the holes are made.
- Install a countertop on top so that the dowels enter the grooves themselves.
- If you want to make an additional shelf on top of the table, you can also fix it with dowels.
Now all you have to do is set up the manufactured table in the place you selected.
to contents ↑Stock footage
Making a computer table with your own hands at home is quite simple. You only need patience, a little imagination and perseverance. Then in your house there will be an excellent refuge for clever equipment.
 (No ratings yet)