

DIY box for a ring
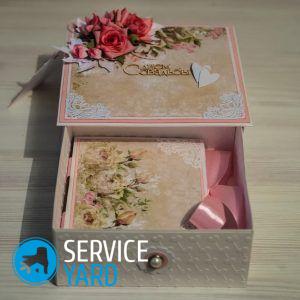
If you decide to give your wife or girlfriend a pleasant surprise in the form of jewelry, then you can’t do without a beautiful gift wrapping. Do-it-yourself box for the ring is very easy, and in the original design. It will be doubly pleasant for your sweetheart, as there is nothing to choose from in specialized stores - all models are almost in the same way. Creating gift wrapping yourself will not be too much trouble and will not take much time if you have previously studied several workshops.
to contents ↑Beautiful DIY gift wrapping
In order to make a box for the ring, you have to stock up on the following:
- Medium Density Cardboard.
- Super glue.
- Corrugated paper or lace.
- Sharp scissors.
- Ordinary knitting needle.
- A little foam.
- Satin fabric is white.
- Fishing line with a small amount of small beads.
- Flowers made of decorative paper.
- Satin ribbon.
- Jewelry.

Getting started creating a jewelry box:
- Using templates (previously downloaded from the Internet), we draw the contours of the future product on cardboard.
- Cut the box parts along the contour.
- Using a knitting needle, mark the fold lines on the cardboard and gently bend them.
- The allowances on the parts must be glued to the inner walls of the future product.
- Decorate the lid and the box itself with corrugated paper.
- In a piece of foam, we make a slot for the ring.
- We decorate the foam with a satin fabric, carefully tucking its edges into the slot for a ringlet.
- We place the foam part inside the festive packaging.
- We decorate the product with beads, flowers and a satin ribbon.
Since the patterns of the lid and bottom of the box are the same, they are performed according to the same principle. Such a box can be made in 30 minutes, if you have everything you need at hand.
to contents ↑Important! Do not overdo the glue, as it can seep through the decorative paper and spoil your creation.
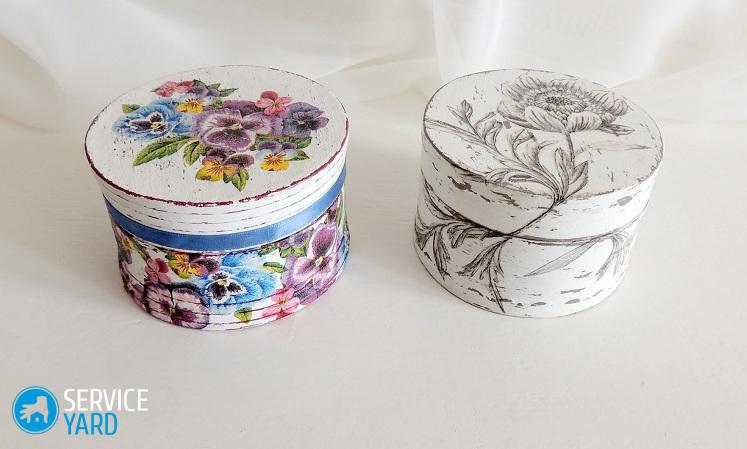
Making a jewelry storage box
Sometimes it happens that there is absolutely no money for a good and really useful gift. In such cases, it is recommended to include imagination and make a box for rings as a gift. Such a gift will be appreciated by any female, as in most cases a favorite pair of earrings or a ring is lost. And such a product is just what you need!
In order to make such a box for storing jewelry and jewelry, you will need the following materials and tools:
- Medium shoe box.
- A piece of bright cotton.
- Contrast fabric.
- Office glue.
- Scissors.
- Thick cardboard.
- Foam stripes.
We begin to create:
- We sew strips from the contrasting material for the lateral parts of the box (we take into account allowances for the seams for folding inwards).
- Glue the fabric strips to the product.
- We sew the bottom of the box in accordance with the size.
- Glue the fabric bottom to the outside of the box.
- From the cardboard sheet, cut out the bottom for the drawer and glue it inside.
- We cut strips out of cardboard and glue them with bright cloth.
- Glue them into the inside of the drawer, creating partitions.
- Foam strips are folded in a semicircle and placed several pieces in each partition.
Thus we get a bright and stylish drawer for storing jewelry.
to contents ↑Important! If your arsenal has various decorating elements - ribbons, small bows or beads, then feel free to use them. So your product will look more original and spectacular.
How to make the simplest gift box for jewelry?
With the approach of holidays such as International Women's Day or Valentine's Day, the male population rushes around in search of an original gift. In most cases, the choice falls on jewelry, but despite their beauty, they also need holiday packaging. If you are running out of time, and gift shops have long been closed, you will have to spend several minutes creating a small gift box.
To get started, you will need:
- Designer or plain cardboard.
- Transparent superglue.
- A sharp clerical knife.
- Handle without paste.
- Ruler.
- Drawings (templates).
We begin to carry out a jewelry box:
- Attach the template to the cardboard and push it along the contour with a pen.
- Carefully cut cardboard parts and form a box out of them.
- Glue the cardboard parts together.
- Tie your masterpiece with a twine or satin ribbon.
If you used plain white cardboard when creating the product, you can decorate the holiday packaging with heart-shaped details (red or some other color) made with a hole punch.
to contents ↑Important! Press the contour lines on cardboard slowly, otherwise - as a result, the box will turn out to be completely not attractive and not neat.
Recommendations for creating an original gift wrap
In order for you to end up with a gorgeous festive box, you should consider a few tips that will help you in the creative process:
- Do not use PVA glue to glue parts, as it leaves visible smudges.
- If you decide to create creativity and do not follow the instructions from the master class, then carefully consider each action in order to get the most positive result.
- Sharpen the scissors and clerical knife well so that they do not leave uneven cuts.
- Choose high-quality materials - paper, fabric, decorating elements.
- Use a metal ruler to make even folds on parts.
Stock footage
Following these simple tips will give you a wonderful, unique gift box. And what exactly to put in it is up to you.
- How to choose a vacuum cleaner taking into account the characteristics of the house and coatings?
- What to look for when choosing a water delivery
- How to quickly create comfort at home - tips for housewives
- How to choose the perfect TV - useful tips
- What to look for when choosing blinds
- What should be running shoes?
- What useful things can you buy in a hardware store
- Iphone 11 pro max review
- Than iPhone is better than Android smartphones
 (No ratings yet)