

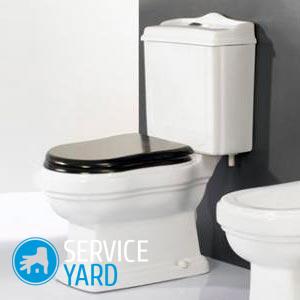
Mounting the tank to the toilet
All residential premises are equipped with toilet bowls. To ensure the proper functioning of the toilet bowl and the fulfillment of its main purpose is capable of only high-quality and proper installation. It may seem to beginners that it is impossible to install this part on their own, but in reality, there is nothing impossible. In this article we will discuss how to install, what can be the fastening of the tank to the toilet, all the most important points.
to contents ↑What are the criteria for selecting drain equipment?
The main criterion for choosing a drain tank is its design. Basically, stores offer kits consisting of a tank and toilet bowl, which is why it is necessary to pay attention to the entire set, to select it in accordance with the required dimensions.
There are currently two options for draining:
- Upper with valve without float. Simply put, this is a cylindrical plastic valve. It rises at the time of discharge, and then falls. The entire draining process is done manually.
- Lateral with the float valve. This system is equipped with a drain lever, a chain and a water lock. All of these parts are included with the float valve. When draining the water, the valve rises, under the pressure of the hydraulic lock, the water supply stops at the right time.
to contents ↑Important! To ensure stable operation, special mechanisms are used, for example, fittings for the toilet and drain. The latter may include equipment responsible for adjusting the water supply, which avoids overflow. Armature begins to work due to mechanical stress. Modern models differ from the old ones in that in the second case, the devices are mounted using fittings. It is equipped with a special float that works on the principle of back pressure. It is worth noting that modern designs have a completely different configuration.
Varieties of tanks and features of their installation
Before you figure out how to install the tank on the toilet, you should first study what they are, since the choice of installation method depends on their technical characteristics.
Varieties of modern tanks:
- Freestanding from the toilet.
- Tank on a shelf.
- Built-in constructions.
Standard products consist of the following parts:
- Drain fittings.
- Stub. It is used in cases where the water pipe is supplied from the side. Install it on the opposite side of the reinforcement responsible for pouring.
- Devices and mechanisms responsible for filling the tank with water and adjusting its volume. This includes a float valve, a ball valve, a filling valve, and inlet fittings.
- Button. It is attached to the lid itself. In rare cases, it connects to the drainage mechanism of water. To detach it, just twist it counterclockwise.
Installation of a freestanding device:
- Installation of a toilet flush tank of this type begins with a wall marking, that is, it must be noted at what height it will be located. It is necessary to choose the optimal height at the required level - the ratio of this point to the opposite lower edge of the pipe.
- It is better to use a standard 32 mm pipe.It is brought to the tank, then using a hammer or electric drill, holes are drilled under the mount.
- Installation is done with dowels, but some models come with special brackets. If they are not there, then you need to purchase them separately.
- Pre-installed in the tank drain valves. Once all work has been completed, the entire mechanism can be checked for leaks.
Mounting the device on a shelf
In this case, the flush tank is attached to the toilet using a special shelf:
- A rubber sleeve, of the highest quality, will have to be applied to the drain hole, since the duration of the system depends on this element. If you select a too fragile cuff, then quickly enough, water will begin to seep to the floor.
Important! The gasket between the tank and the toilet should be made of soft, elastic, rubberized material. Be sure to make sure that the cuff has the correct shape when buying, because it happens to be oval and round in shape.
- The surface of the shelf should be perfectly smooth without cracks, sagging, chips. After installation, the sealing cuff should fit as tightly as possible to the shelf below and to the tank itself at the top.
Important! To prevent water leakage, it is recommended to apply a layer of sealant, for example, silicone, at the installation site of the cuff. In addition, this step will prevent this element from shifting during installation.
- It is time to pay attention to the holes inside the tank. It is important that they coincide with the holes on the toilet shelf. It is there that fasteners having sealing gaskets on both sides are pushed. Using a spanner, these nuts are tightened. When installing the bolts, one must not forget about the insertion of the gaskets on the bolts on both sides. If this is not done, then the toilet bowl or the tank may split, thereby violating the tightness of the structure.
- It remains to install the cover, then connect the water hose.
Important! The hose must have a rubber gasket, since in its absence the connection will not provide proper tightness.
- At the final stage, it is necessary to monitor the level of water entering the tank. If necessary, adjust it in such a way as to avoid overflow.
Installing embedded models
Built-in tanks have become the most popular in recent years. They are made from high quality polymer materials. Outwardly, they resemble a flat large canister, which is fixed with a metal frame on a rough basis. It is on this frame that an additional hanging toilet bowl is mounted. In this case, the entire mechanism is sold complete with basic elements, so nothing extra is required to buy. Such designs are very different in price and installation method. It’s easy to figure out how to install a flush cistern on a toilet bowl of this type, because the entire installation process is described in the manufacturer’s instructions. But, despite such a variety of designs, there is a generally accepted principle of their installation.
The installation process is divided into several stages, which must be performed in strict sequence:
- The first thing to consider is strict vertical compliance. You can check it using the building level. Only vertically located, the device will be able to function correctly.
- The frame is attached to the floor and wall with dowels. In some cases, built-in tanks are mounted directly into the walls without a metal base. Then make a frame of brick or blocks.
- Sewer and water pipes are pre-connected to the structure.
- If you bought a model with the function of dosing water, then you will have to embed it next to the main parts.
- In order to avoid condensation, the tank is insulated with polystyrene foam.
- After installing all the necessary communications details, you can close the case with a sheet of drywall. But bolts should be peeping out of the wall for mounting a hanging toilet bowl and holes for draining water from it and draining water.
- You can connect the toilet. At this point, it is important to ensure that all connections are tight.
In such devices, the drain button has two keys that are responsible for adjusting the volume of discharged water. In this case, the first button releases six liters of water, the second, in turn, the remaining nine. Through the use of embedded structures, you can significantly save cold water consumption.
to contents ↑Stock footage
In principle, if you carefully study the schemes attached to plumbing, you can connect any type of tank correctly and without problems!
- How to choose a vacuum cleaner taking into account the characteristics of the house and coatings?
- What to look for when choosing a water delivery
- How to quickly create comfort at home - tips for housewives
- How to choose the perfect TV - useful tips
- What to look for when choosing blinds
- What should be running shoes?
- What useful things can you buy in a hardware store
- Iphone 11 pro max review
- Than iPhone is better than Android smartphones
 (No ratings yet)