

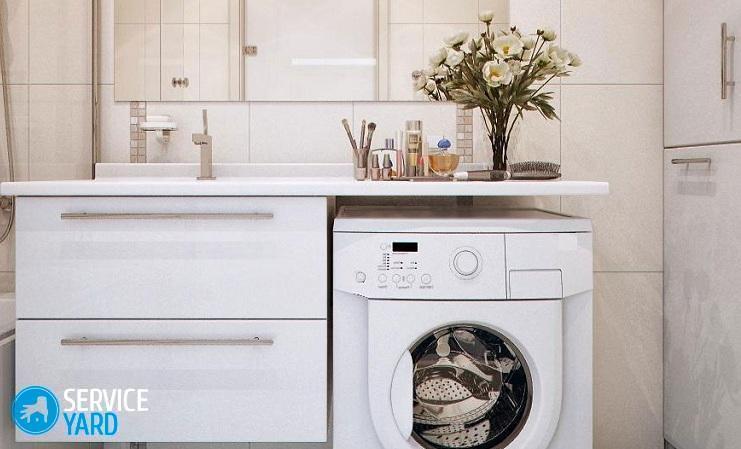
Fixing the sink to the wall in the bathroom

One of the most sought-after plumbing elements in the house is the sink. And the most common type of layout of the water supply system is fixing the sink to the wall, whether it is a bathroom or kitchen. This type of placement of plumbing has several advantages, the most important of which is the rational use of free space. If during the repair you decided to replace the old washbasin with a new one, then you need to remember that each model has its own design features, and attaching the sink to the bathroom wall requires certain knowledge of installation and connection to a common water supply system. It is necessary to consider not only the optimal placement of the washbasin in the room, but also provide free access to the wiring nodes for prevention and repair. Today we will tell you how to attach the sink to the wall, depending on the models of washbasins and their design features.
to contents ↑Types of Hanging Sinks
The modern plumbing market offers the following types of sinks:
- “Tulip” - a washstand placed on a pedestal. In this model, both the siphon and the water pipes are quite successfully hidden.
- Built-in washbasin - located in the countertop of the cabinet, which hides unsightly communications. Elegant design attracts many buyers, however, this design is not suitable for rooms with a limited area.
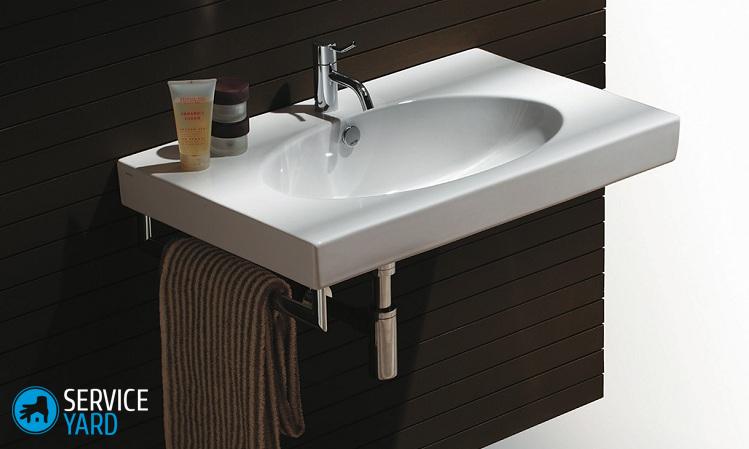
- Console - mounted to the wall with special fasteners. This model has its drawbacks - the siphon and water supply remain visible.
The advantages of wall-mounted washbasins:
- Reliability. Brackets or consoles made of enameled steel are quite durable materials, so they qualitatively fix the plumbing.
- Minimalism in the interior. The hinged design eliminates bulky cabinets. And due to the variety of shapes and materials, such a design will seem to soar in the air.
- Extra space. In the hinged structure, a free space appears under the washbasin, in which you can place a basket with dirty linen or put drawers for household items.
- Ease of maintenance. After mounting the hinged sink, free access to all communications is provided, which makes it easy to clean a siphon or other element of the system.
Important! When choosing a washbasin model, pay particular attention to piping and drainage to the sewer system. Choose exactly the option of sanitary ware that would be completely identical to the distribution of these communications in the bathroom.
Depending on the design, there are several ways to mount sinks on the wall.
to contents ↑Sink Mounting Options
Wall-mounted washbasins can only be mounted on solid, solid brick and concrete wall structures, or use special frame structures if the walls in the room are not strong enough.
Depending on the model and design, the sink can be mounted on the wall in the following ways.
Method 1
The washbasin bowl is mounted in a hinged countertop (cabinet cover), and the countertop (cabinet) itself is mounted on brackets or an anchor. This mounting method is very reliable.
Method 2
Models of washbasins with openings on the rear side are attached to the wall with anchor bolts, and specially provided openings in plumbing serve as brackets.
Method 3
Mounting with brackets. Usually fasteners are not visible, but the original designer mounts serve as an additional decorative decoration. Mounting fixtures for mounting plumbing must support the weight of the sink with a margin.
Brackets are made of various metals and they have several varieties:
- Special mounts that come with a particular model. Often these are exclusive washbasins of an unusual shape. Brackets for this version of plumbing can be made in the form of pins of a special shape, enveloping the bowl or unusual welded structures. Mounts of this type are treated with special decorative compounds, for example, ceramic or metal, depending on the model of the plumbing.
- Brackets for standard sinks. Mounts are made of cast iron or steel, covered with special anti-corrosion paint. Standard brackets are available in the form of L-shaped and T-shaped racks. They can be in the form of a frame with a sliding assembly for adjusting the size of the fasteners. Mounting in the form of a metal frame into which the washbasin fits is considered the most reliable.
Important! A correctly fixed bracket must not be moved by force. Only after you are convinced of reliability of fastening, it is possible to lay down a sink. The bowl is fixed with special additional clips or plumbing sealant.
Method 4
Frame construction. If the walls of the bathroom are not very strong, and you want to install a hinged model of the washbasin, then use a frame structure that is attached to the floor and walls and consists of profiles. The design is height-adjustable by legs, so the washbasin can be positioned at the required height. All communications are hidden inside the profile design.
Important! When choosing a bracket for installing plumbing, pay attention to its bearing capacity and size. Fasteners must withstand heavy loads. Pay special attention to the method of fixing the washbasin on the bracket, as the sink, simply laid on the fasteners, is unsafe during operation.
Consider each method of attaching the washbasin to the wall in more detail.
to contents ↑How to hang a sink in a bathroom without brackets?
For work, prepare the following tools and materials:
- Building level.
- Black marker and ruler.
- Set of wrenches.
- An electric drill with a set of drills, including a drill with a victory tip for working on concrete.
- Gas key.
- Screwdriver.
- Hammer.
- Packer type sealant (for threaded connection).
- Mounting material. The mounting kit must be included with the sink when purchased. If there is no such kit, then purchase it separately.
Important! Focus on quality products from well-known brands so that fasteners are reliable.
Step-by-step instructions for fixing the sink to the wall in the bathroom:
- Turn off the water in the apartment. If necessary, dismantle the old equipment and block the holes in the pipes with a stopper.
- Decide where to install the sink and take appropriate measurements.
Important! It is recommended to install the bowl at a height of 70-85 cm from the floor. The distance from the wall to the edge of the sink should be at least 0.9 m.
- Relate the dimensions of the washbasin to the place prepared for it. If necessary, adjust the location of the plumbing. Try to see the final position and appearance of the sink in the room.
- At the selected height of the plumbing, designate the central horizontal using the building level, marker and ruler. This will be the upper limit of the washbasin installation, and installation work will be carried out at this height.
- Attach the top edge of the bowl to the drawn horizontal line and mark the attachment points.
- Drill holes in the marks, insert dowels.
- Screw the studs into the dowels. The screwed-in hairpin must be 2 cm longer than the width of the washbasin.
- Place the bowl on the fasteners and tighten the nuts.
- Connect the siphon. Insert the outlet end of the siphon into the sewer socket.
- Install the mixer and connect the water supply.
- Finally expose the sink horizontally in level and securely fix all the fasteners by tightening the nuts all the way.
Advice:
- To prevent moisture from entering the gap between the sink and the wall, seal the plumbing with silicone.
- After completion of installation work, check the tightness of the drain section of the system by filling the siphon with water. If a leak is found, tighten the threaded connections more tightly and insulate them with a sealant.
to contents ↑Important! If you want to save space in the bathroom, then purchase a flat siphon. Close the water supply to the bowl and the siphon with a cabinet, which will be the place for storing toiletries.
How to attach the sink to the wall on the brackets?
Before installing the brackets, check the strength of the bearing surface. Make markings with a nail first. If the surface is loose, then you should increase the drilling depth, and, accordingly, choose fasteners with a large diameter.
In concrete or soft plaster it is difficult to securely fix the brackets, therefore, the depth of attachment under such layers should be at least 25 mm. In this case, the anchors must also be individually selected from 50 to 120 mm.
The process of mounting the sink on the wall step by step:
- Carry out preparatory measures - turn off the water and determine the height of the sink.
- Mark the center horizontal and draw a line.
- Measure the thickness of the walls of the sink, which will rest on the brackets.
- The measured wall thickness, lay down from the drawn horizontal line and make a mark.
- Connect the resulting marks with a horizontal line - this will be the height of the brackets.
- Turn the bowl over and fix the brackets on its outer sides.
- Invite an assistant to try on a sink with brackets. Put the washbasin in a horizontal line, through the recesses mark the places where the fixtures will be.
Important! All lines and places for the brackets should match, as holes will be drilled using these designations.
- In the designated areas, drill holes with a slightly smaller diameter than the mounting screws. The dowel or fixing screw must be hard to enter the hole.
- Drive bushings under the screws with a hammer into the drilled places.
- Attach the bracket supports to the screws.
- Install the bowl on the brackets.
- Mark the places for future plumbing fixtures to the wall with a marker. Drill holes and put the bowl back in place.
- Connect the siphon, sewer and install the mixer.
- Check the horizontal position of the sink by level and tighten all washers.
- Check for leaks in the system and, if leaks are evident, repair them.
If the sink sits firmly, without movement, it means - you did everything right.
to contents ↑Important! To protect yourself from the appearance of fungus, cover the gap between the wall and the sink with a sanitary silicone sealant.
Installation of a sink with a curbstone
The washbasin variant with a cabinet is very convenient in that you can hide the entire plumbing system in a cabinet. To secure such a structure, proceed as follows:
- Draw a horizontal line in level at the desired height.
- Place the cabinet and see how it fits into the siphon and mixer.
- If necessary - immediately drill additional holes for plumbing in the rear wall of the cabinet.
- Install the brackets for the cabinet (we wrote about how to mount the fasteners above).
- Place the stand on the brackets.
- Install a sink on top of the cabinet and connect a siphon and a sewer to it.
- If the bowl model provides for additional mounting of the sink to the wall, then drill holes in the right places and tighten the anchor bolts. You can also glue the washbasin with silicone to the wall for greater reliability.
How to fix the sink to the wall in the bathroom using a frame structure?
If you purchased a hinged sink, and the walls in the bathroom are not strong enough, then the issue of installing plumbing can be solved with the help of a frame consisting of profiles.
The frame installation is mounted as follows:
- Level the frame and fasten it to the floor and wall using fasteners.
- At the required height, screw the studs to secure the sink.
- Sheathe the frame with moisture-proof drywall or tile. You can use other materials for decoration.
- To reduce noise during operation, put a rubber washer over the stud between the wall and the sink.
- Fasten the hinged sink to the studs over the cladding material.
to contents ↑Important! If you assembled the frame structure correctly, then it will be able to withstand a load of up to 400 kg, and this is not only a sink, but also other plumbing.
Stock footage
Now you know how to fix the sink in the bathroom to the wall using different methods. If you have chosen a hinged version of plumbing, then this is the right and good solution. Such designs do not clutter up the space, allow it to be used rationally. We hope so. that our tips and tricks have helped you with this!
- How to choose a vacuum cleaner taking into account the characteristics of the house and coatings?
- What to look for when choosing a water delivery
- How to quickly create comfort at home - tips for housewives
- How to choose the perfect TV - useful tips
- What to look for when choosing blinds
- What should be running shoes?
- What useful things can you buy in a hardware store
- Iphone 11 pro max review
- Than iPhone is better than Android smartphones
 (No ratings yet)