

DIY chandelier from improvised materials
Chandeliers, sconces, floor lamps, night lights and table lamps make our life a little more joyful and brighter. Correctly directed light will successfully emphasize the advantages of the interior and hide its disadvantages favorably. Do-it-yourself chandelier made from improvised materials can be made of completely unpredictable things, for example, wire, paper, plastic, or you can knit a beautiful lampshade of thread on knitting needles - choose which option is right for you.
to contents ↑Thread chandelier
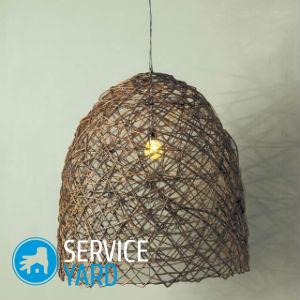
If your eyes are uncomfortable with too bright light, then you can try to make an original lampshade of thread.
To do this, you will need the following:
- Ready base for the chandelier - cord, lampholder, bulb.
- Balloon.
- Paint.
- Cotton yarn.
- PVA glue.
- Fat hand cream.
The sequence of making a chandelier with your own hands from such improvised material is as follows:
- Inflate and tie the balloon. Spread it with oily hand cream.
- Dilute PVA glue with water (3: 1). Immerse the threads in a container with glue.
- Tie the ball with adhesive-impregnated threads, trying to do this over the entire surface as evenly as possible.
Important! Near the “tail” of the balloon, do not wind the thread.
- Leave the thread chandelier to dry for a day in limbo.
- After complete drying, pierce the film of the ball and remove it from the outer shell.
Important! If desired, you can decorate the product with rhinestones or sparkles.
- Hang the resulting structure on the bulb holder.
to contents ↑Important! If the top of the threads is varnished, it will be much stronger. Also, instead of threads, you can use a clothesline.
Paper tube light
If you have a pile of unnecessary magazines and newspapers at home, then you can dispose of them in a completely unusual way - make a lamp yourself from improvised materials. To do this, you will need the following:
- White or colored sheets of paper (it is better to use a denser version).
- Newspapers pre-stained with a mixture of PVA and gouache.
- Glue.
- Scissors.
- Knitting needle.
Production Sequence:
- First you need to twist each sheet of paper into a tube using a knitting needle. The paper should be wrapped diagonally, and so that the tube does not unwind, the tip of the sheet must be glued with a glue stick.
Important! The number of blanks will depend on the size and shape of the future lamp. For an average size, approximately 200 tubes are required.
- The shape of the lampshade can be round or triangular. In the second case, long tubules are used at the base, and shorter ones are closer to the apex.
- Lay out a triangle of three tubes on the table. Then lay another triangle on top of it in such a way that a six-pointed star is formed in shape. Glue individual parts together with glue.
to contents ↑Important! To prevent your lamp from lighting up, you must use it for it. energy saving light bulb, because it does not heat up and does not carry danger.
Floor lamp made of plastic bottles
You can also make a very original floor lamp with your own hands from improvised materials, for which you will need the following:
- Five liter plastic bottle.
- Marker.
- Multi-colored acrylic paints.
- Sealant.
- Cartridge.
- Sweetheart.
- The wire.
- Waste stand from an old floor lamp.
Production Sequence:
- Remove the bottom from the plastic bottle, and then cut off the neck.
- Divide the plastic bottle into six identical sectors with vertical lines.
- Mark with a marker.
- Outline the image with a thin line of sealant.
- After the circuit is completely dry, the resulting lines can be painted with metal or gold paint.
- Paint the empty areas with acrylic paints.
- Assemble the electrical part of the floor lamp, that is, the cartridge, two-wire wire and plug. Cores on the one hand attach to the boss, and on the other to the plug.
- Secure the structure to the stand.
- Screw the bulb into the cartridge.
Stock footage
If you wish and even have a little experience, you can assemble the chandelier with your own hands from improvised materials, and then decorate it with fabric, artificial flowers, fringe, buttons, rhinestones, and generally anything. Everything will depend entirely on your imagination.
- How to choose a vacuum cleaner taking into account the characteristics of the house and coatings?
- What to look for when choosing a water delivery
- How to quickly create comfort at home - tips for housewives
- How to choose the perfect TV - useful tips
- What to look for when choosing blinds
- What should be running shoes?
- What useful things can you buy in a hardware store
- Iphone 11 pro max review
- Than iPhone is better than Android smartphones
 (No ratings yet)