

DIY bath furniture

Any room needs an appropriate environment, in particular with regard to furniture. If we talk about the bath, then it should also be equipped with both special and standard items. It must be taken into account that special conditions must be created in this room, because increased humidity prevails here. That is why, if you decide to make furniture for the bath with your own hands, then read the basic requirements and restrictions imposed when choosing basic materials. We will talk about this in this article.
to contents ↑What materials are used to make bath furniture?
If you intend to make furniture in the bathhouse with your own hands from wood, then note that for each room you should select the source materials separately. So, for example, a steam room is a place where furniture should be able to tolerate high humidity, temperature, having low thermal conductivity, safe, not releasing toxic hazardous substances when heated. There are many materials, but not all wood is suitable for this purpose. Which options are more appropriate, which are not - we will now examine in detail.
Conifers
A material containing many resins can cause severe burns: the fact is that in the steam room at high temperatures the resin heats up, gradually softens, as a result - it can stain and even burn. That is why, making furniture for a steam room, spruce and pine are very rarely used, because these are resinous breeds.
Important! Pine is sometimes eliminated from the resin, but it is almost impossible to do it yourself; buying it ready-made is expensive.
Gorgeous items are made from cedar, as there is little resin in it, its texture looks attractive, it is not very expensive.
Important! If you make furniture from Canadian cedar, you will get a wonderful healing effect, due to the fact that this wood, when heated into the air, begins to release essential oils that have a deodorizing and disinfecting property.
Hardwood
In the steam room, linden or aspen products are more common. These types of wood have a pleasant light shade, respond well to moisture changes, do not lend themselves to corrosion. Linden has a pleasant aroma, the wood itself is soft, easy to process.
Important! A big drawback of linden - it is affected by fungi and rot, unfortunately, it is impossible to fight them without using chemistry.
Initially, aspen has a light shade, but its minus is that it fades over time. Aspen tolerates high humidity, it does not rot, does not darken.
Important! The only negative is that the fibers quickly wear out, which is why scuffs and dents appear on the furniture.
Exotic breeds
Another option from which you can make furniture for a bath with your own hands is Abashi. This tree grows in Africa. Its main advantage is that it practically does not heat up at any temperature. The color of wood attracts attention - initially it has a light yellow or milky hue, but under the influence of high temperatures it changes to a dark brown color. But this exotic is not cheap.
to contents ↑Important! It is easier to choose materials for other rooms, as the washing furniture must tolerate high humidity, any wood can be in the rest room or locker room.The main thing is that the material does not give in to decay, does not crack at high humidity.
Simple and affordable DIY bath furniture
In the right modern steam room, in addition to the places for lying, there should not be anything superfluous, because hot air must be freely circulated. Other premises can be equipped at your discretion with everything you need. Now more about how to make all the furniture for your own bath.
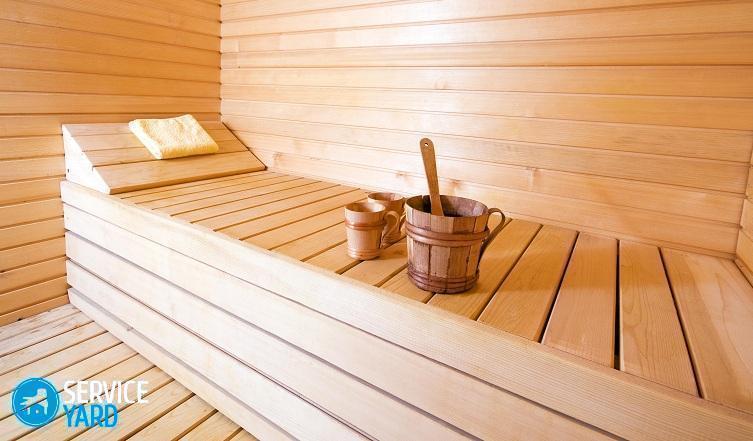
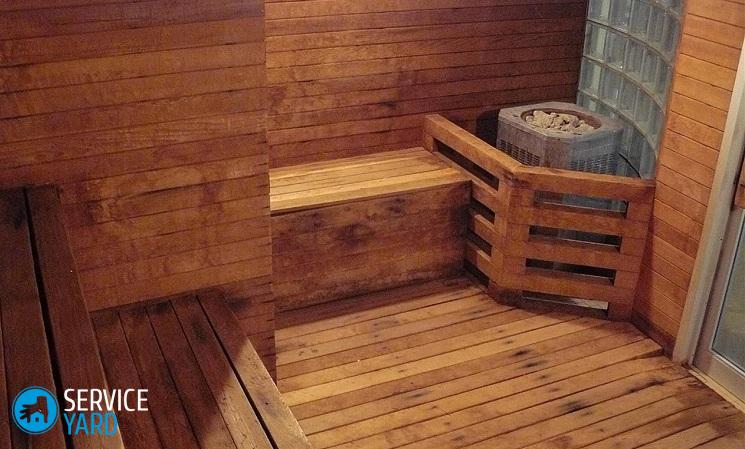
Shelves
Before starting the manufacture of sunbeds, you should decide what specifically you need:
- What width, length, shape or size of shelves should be, in what way it will be located - for example, around the perimeter of a steam room or in the form of steps.
- It is also important to determine its main purpose - for lying or sitting, it all depends on the imagination, tastes, wishes of the owner.
The manufacture of this item is as follows:
- First, you should make a sketch of the future sunbed, measure the room. Everything needs to be measured as accurately as possible, you can draw a drawing, designate the location of the door and boiler on it. Then the future shelves are drawn on it, the sizes, places of fastening are indicated.
- After taking all measurements, purchasing timber and boards, you can begin to work. First of all, a frame is mounted from a bar. Racks are fastened together by metal screws.
Important! It is better to make the distance between the racks no more than 50 cm.
- Next are the seats. You can make them from the lining or polished boards. Boards are mounted at a distance of 1.5 cm from each other.
Important! It is better to fix the seat boards with wooden dowels so that in the future you will not get burned on the metal caps of self-tapping screws or nails.
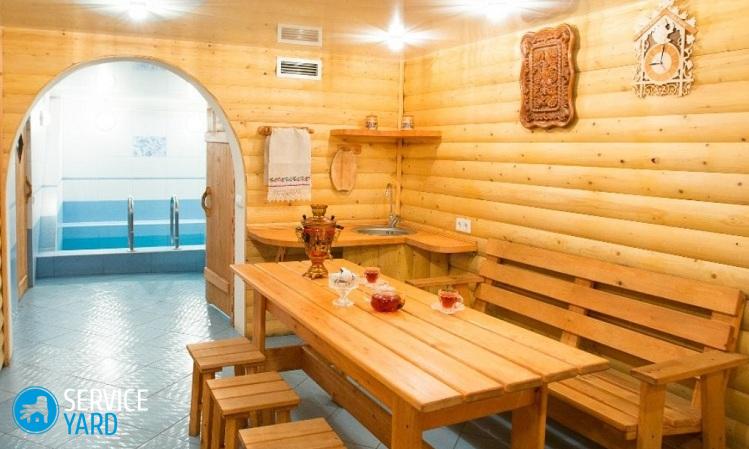
Benches and tables
There are tables and benches in the dressing room. Here, during a soulful conversation, you can drink tea, physically relax, restore your strength, organize emotional balance. The benches are made in the same way as a shelf for a steam room, the only difference is that they are attached to the wall.
To make benches, you will need:
- Lining or boards.
- Whetstones.
- Self-tapping screws.
Important! Before starting work, all parts must be sanded to prevent splintering and personal injury. This is best done with a grinder or sandpaper. Pay maximum attention to all corners and edges.
Follow the instructions below:
- Measure the required length according to the drawing, cut the beam.
- From the bars make a frame.
- Attach the lining or boards to the frame frame.
Of course, you also have to make a table in the bathhouse with your own hands, because without it the furniture set will not become harmonious. To make it, prepare:
- Glued beam for the crossbars and sidewalls of the table.
- Furniture shield for countertops.
- Fasteners.
The work process itself is quite simple: you need to cut the beam according to the dimensions of the drawing, make all the cuts, then assemble all the details in one design.
Important! All joints should be lubricated with wood glue to increase the durability and strength of the product.
Hanger
To make the room as convenient and useful as possible, you will need a hanger in the bathhouse. Do it yourself with your own hands is not difficult. You can use unnecessary lumber residues for its manufacture.
Schematically, it looks like this:
- Using a jigsaw, give the board the required length, shape.
- Connect the boards with furniture screws.
- Paint them with stain. Once they dry, open with varnish.
- Screw the hooks with screws.
The original and comfortable hanger is ready.
Stool
To make a stool for a bath with your own hands, prepare 4 boards for the seat, 2 bars as fasteners, 4 legs, 4 crossbars.
Important! Round off all sharp corners, remove irregularities.
Making a stool looks like this:
- Lay 4 seat boards on a flat surface 1 cm apart.
- Fix the boards with fixing bars.
- Insert the legs into the grooves of the bars.
- Install and lock the crossbars.
- Polish the resulting stool, cover with a protective compound on top.
Armchair
If you like to relax and unwind after bathing procedures alone, sit on the doorstep with a cup of aromatic tea, then to create the most comfortable conditions you will need a bath chair. Do-it-yourself drawings can not be done - it is better to use ready-made schemes.
In terms of materials, prepare:
- 5 seat boards;
- 2 fixing bars;
- 2 transverse, 2 longitudinal crossbars;
- 2 racks for a back;
- 2 armrests;
- 3 boards for the back;
- 2 front and 2 rear legs.
Follow the instructions below:
- Trim the mounting bars, seat boards, back boards, struts, armrest, front legs at an angle of 90 degrees. The rear legs are trimmed at an angle of 11 degrees, the longitudinal and transverse bar - at an angle of 45 degrees. Cut 200 mm on one side of the top of the back at an angle of 5 degrees.
- Round the sharp edges of all elements.
- Lay on the surface of the plank for the seat at a distance of 1 cm.
- Cross boards fix the boards.
- Attach transverse and longitudinal rungs at the edges.
- Racks of a back fasten to cross racks.
- Fix three boards of a back on racks.
- Attach the legs to the longitudinal rails.
- Place the armrest boards on top of the legs.
- Sand the assembled chair, cover with varnish on top.
to contents ↑Important! Using a similar technology, you can make chairs for a bathhouse from a tree with your own hands, you just have to slightly adjust the drawings. It all depends on your personal preferences, features of the room, the availability of free space.
Stock footage
In the end, you can add that with due desire, zeal, you can make any furniture yourself. If you turn your imagination to the maximum, then your bath will be decorated not only with standard benches, but also with elegant, durable, high-quality chairs, hangers, tables.
- How to choose a vacuum cleaner taking into account the characteristics of the house and coatings?
- What to look for when choosing a water delivery
- How to quickly create comfort at home - tips for housewives
- How to choose the perfect TV - useful tips
- What to look for when choosing blinds
- What should be running shoes?
- What useful things can you buy in a hardware store
- Iphone 11 pro max review
- Than iPhone is better than Android smartphones
 (No ratings yet)