DIY sewer installation in the bathroom
Sewerage in the apartment is the most important communication system on which comfortable living conditions directly depend. If you decide to make a repair in the bathroom, then you need to start by replacing old pipes with new ones. This type of work can be successfully done independently, if all the rules and regulations are followed. It will be useful for any home master to study the instructions on how to install a sewer in the bathroom with your own hands.
to contents ↑Project creation
The whole process begins not with the purchase of the necessary materials, as many might think, but with the creation of the drawing:
- On the sheet of paper you must indicate the location of all plumbing fixtures that need to be connected to the drainage system.
- It is also useful to indicate their appearance. This will help you choose the right diameter pipe.
The instruction for laying the sewer system requires the following rules to be followed:
- all connections are made using special tees or adapters having a conical shape;
- pipes for internal sewage under the bath should be laid using several series-connected sections to facilitate installation;
- when combining a single system to drain water from the bathtub and sink, a tee with a branch having an angle of inclination of 45 or 90 degrees should be used;
- to connect the siphon to the sewer pipe when conducting sewage in the bathroom with your own hands, you need to use the drain pipe at an angle of 90 degrees.
Important! If you plan to install additional plumbing equipment in the bathroom, it is advisable to immediately provide a bypass hole for it. Subsequently, the installation of additional drains will be difficult.
In order not to puzzle over the preparation of the project, you can simply copy the old wiring diagram. But if you plan to move plumbing items or install new elements (for example, a bidet), then the sewer wiring in the bathroom with your own hands should be redesigned.
When determining the number of outlet sewer pipes, the following should be considered:
- Pipe diameter. If the sink and bathtub are connected to pipes having a diameter of 50 mm, then pipes with a diameter of 100 mm will be required to connect the sewage system to the toilet.
- The length of the pipes. As a rule, the sales length of pipes is 50, 100, 160 and 200 cm. Therefore, the total necessary length of pipes requiring replacement must be carefully measured and only then purchased.
to contents ↑Important! There is also a couple of rules that you must definitely consider when installing your own sewer in the bathroom:
- the toilet is the closest point to the central sewer;
- the more direct pipe sections, the easier it is to clean the resulting congestion in the pipes later;
- constructions are connected by bells against the flow - this is done so that the water flow does not have excess resistance formed by the transition between the pipes.
Material selection
According to the requirements imposed by building codes and rules, the following types of pipes are allowed to be used for wiring sewers in the bathroom with their own hands:
- cast iron;
- ceramic;
- asbestos-cement;
- ceramic;
- polyethylene, polypropylene, PVC or plastic.
Important! In the production of pipes, manufacturers most often work according to standards, namely according to GOST 22689.0-89 and GOST 22689.2-89. Therefore, polyethylene pipes are perfect for sewage in the bathroom with your own hands. The material does not have a high price, but it is reliable and resistant to impact.
Modern PVC pipes have several advantages over their cast iron predecessors:
- Plastic will last you a long time, its service life is at least 50 years.
- PVC, unlike cast-iron pipes, are not prone to the accumulation of various deposits. This ultimately does not affect the quality of the water and does not lead to a narrowing of the diameter of the pipe itself.
- Modern materials are quite easy to mount, because all kinds of fittings, connectors, corners, which simplify the task of craftsmen, are sold with them.
- Also, plastic pipes are joined by hand, without the use of special equipment. In addition, they can be easily and simply cut with construction scissors.
- Compared to their “brothers” of metal or cast iron, plastic pipes are quite lightweight, which is simply indispensable for low-rise construction.
Auxiliary components
Pipes - this is not all that is needed to install a sewer in the bathroom with your own hands. It should also cover the costs of acquiring the following materials and tools:
- plastic fittings - tees, revisions, bends, elbows and much more (you won’t need an exact list, since it all depends on the configuration, length and complexity of the sewage system);
- compensator;
- clamps for fastening pipes to the walls (take with special shock-absorbing gaskets so that later the noise of the drained water in the pipes does not wake you at night);
- revision for the riser (it will be necessary if the vertical riser connecting all apartments and displays sewage in the central sewer is clogged);
- silicone sealant (they lubricate the sealing rings in the pipe bells to ensure complete tightness of the joints);
- cement (what if it comes in handy).
Instruments
Also significantly facilitate the installation of sewage in the bathroom tools such as:
- grinder;
- Bulgarian;
- hammers;
- chisel;
- scissors;
- building level;
- measuring tape (tape measure);
- marker.
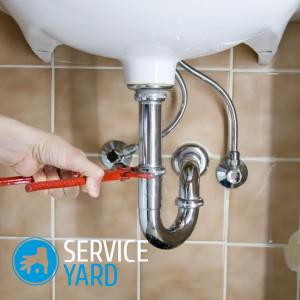
Dismantling old pipes
As a rule, preparatory work does not take much time and effort. The exception is only those parts of the pipes that are mounted on the walls. All that you need from the tools at this stage is a grinder:
- Open parts of the pipeline that are closed.
- When dismantling the riser, be extremely careful. Any careless movement, and your neighbors can remain without water, because this part is connected with all apartments in any house.
- Use a respirator to protect against dust and dirt, which will certainly be.
The dismantling itself can be divided into the following stages.
- Turn off the water in the riser of your apartment.
- Remove old pipes, also do with stopcocks. Using a grinder, cut the thread and screw on a new one.
- Before carrying out work, it is worth draining the water from the system so that it does not interfere with you.
- Also, professionals advise disconnecting the taps and the washing machine.
The old sewer in the bathroom with your own hands is cleaned quite simply. Especially if all the parts pass along the surface of the walls and floor, and not inside.
to contents ↑Installation of a new system
First of all, when installing the sewage system in the bathroom with your own hands, install a counter. Make sure that readings can be easily read, and arrows should indicate the direction of flow of water.
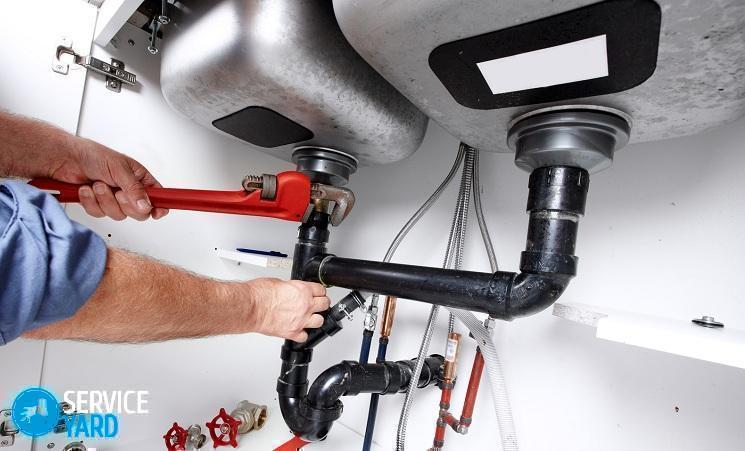
Pipe assembly
Before starting work on installing sewage in the bathroom, you need to align the surface of the floor and walls. This will allow you to determine the required level in all areas.
Important! Also, do not forget that until you have finished working with the riser, not only you, but also your neighbors will remain without water.Therefore, try to make the sewers in the bathroom with your own hands as quickly as possible.
To do this, just follow the following recommendations.
- A cross or tee is inserted into the lower bell - this is at your discretion. To ensure a tight fit between the parts, use a rubber cuff or silicone based sealant.
- Fasten the riser to the wall using special clamps.
- After the riser is mounted, the neighbors are again with communal goods, you can safely proceed to the wiring of the system.
- When replacing pipes, the bells are placed along the direction of the water movement, the pipes are changed from the bottom up.
Important! Pipes must be mounted with a slope of 2 cm per meter of pipe length so that the sewage does not clog
Installing a sewer in a bathroom with your own hands is not particularly difficult, but there are certain nuances:
- To connect to the drain and overflow, it is better to use a siphon with two branches.
- Corrugated pipes in work is better not to use. They tend to quickly accumulate dirt from the inside, which leads not only to a deterioration in water quality, but also to blockages. Better use smooth plastic pipes.
- When you connect the drain and the pipe, make a small difference in height. Then the water in the bathroom will not stagnate and you will not need to clean the hole often.
- When installing the sewage system in the bathroom, pros recommend that they use a plastic adapter to attach a siphon.
- Be careful when choosing materials. Note that a plastic adapter is suitable for plastic pipes, and if you chose cast-iron pipes for work, then take the material from rubber.
- Be sure to seal all joints when installing the sewage system in the bathroom. Otherwise, they will let water through, and the bathroom will constantly have an unpleasant odor from dampness and humidity.
- When mounting the siphon, it is better to tighten the nuts manually, without the use of special tools. Otherwise, you risk damaging the siphon and it will crack.
- After assembling the siphon, you just have to insert part of the pipe into the socket.
Your bathtub is now connected to the sewer.
Use a soldering iron to connect pipe fragments in the bathroom, but remember that soldered areas should be easily accessible:
- Soldering parts of the pipe, wait 15 seconds for the plastic to solidify.
- Hot water will flow through the plastic pipes, so do not fasten them firmly to the wall. It is necessary to use plastic clips. They will be indispensable for the fastening of sewer pipes.
- Check for gaskets at the assembly points for draining from the bathtub, sink, or shower.
Important! Lubrication with technical petroleum jelly is necessary when connecting and on the thread. If it becomes necessary to untwist the thread, it will be easy to do.
If you decide to do the installation of a sewer in the bathroom with your own hands, then installing a toilet will also not be very difficult. To do this, you need to follow these steps:
- Fill the previously cleaned part of the pipe with a plastic bottle.
- Put the corrugated pipe on the outlet. Put the bowl down.
- Place a specific pad under the heel.
- Carefully slide the toilet bowl against the wall.
- Use the black marker to mark the mounting locations on the floor.
- Using a diamond drill, drill holes for fastening.
- Insert dowels into the holes.
- Attach gasket and mount.
- Screw washers and screws into the marked holes. Screw them into the dowels carefully, in no case drive them.
- The edges of the pipe must be treated with sealant. Remove the plastic bottle from the pipe and connect the toilet to the sewer.
- Secure the drain tank with anti-corrosion bolts.
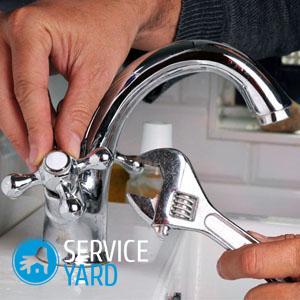
- When installing a flexible hose for water supply, tighten the nuts by hand, and then tighten with a wrench.
- Drain, make sure there is no leak.
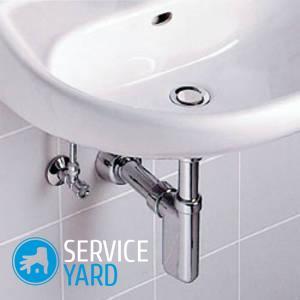
Washbasin installation
Start this part of the installation of the mixer.It must be attached using union nuts through rubber gaskets:
- Attach a siphon.
- Insert the corrugated siphon hose into the socket.
- Use either a standard gasket or a cuff for sealing.
- A corrugation comes with a siphon - it all depends on its diameter.
- Remember to check for leaks or make sure they aren't there.
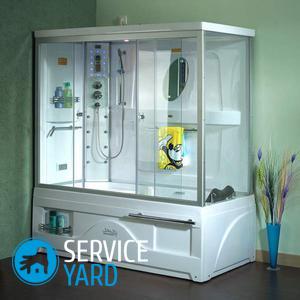
Connection of a shower cabin
The shower cabin is no longer a luxury, but a convenient, reliable and practical assistant to a modern person. Do-it-yourself installation is easy:
- Connection is made according to the principle of connecting the bathroom. The drain should be higher than the level of the pipe.
- Usually, the shower drain system consists of corrugated tubes, so you can install a shower cabin in any convenient place.
Important! Before installing the cab, you should carefully read the instructions, because manufacturers offer different models, and there are nuances that must be considered.
Washing machine connection
Dirty water can be drained from the washing machine into the bath, toilet or sewer:
- The first method is inconvenient in that the machine hose is lowered into the bathtub or toilet bowl, and the water goes into the sewer. At this point, you can’t take a bath or shower, you can’t use the toilet, after dirty water you need to constantly wash the bath. In addition, the hose can come off and fill the floor with water, and at the same time the neighbors below.
- It is possible and necessary to organize a drain for the washing machine directly in the outlet pipe, which leads to the riser or to the sink siphon. It all depends on the location of the washing machine.
to contents ↑Important! A polyethylene drain hose comes with a machine, it has a special tip. This hose is mounted on the rear wall using special clamps. The hose should be at a height of 80 cm - this will facilitate the operation of the pump.
Testing
An important point when installing the sewer in the bathroom with your own hands is to check the entire system. Testing is necessary in order to find out how tight the system is and how efficient it is in all areas:
- After completing work, turn on the water at maximum power. So you check to see if your new pipes can handle the load.
- Fill your sink or bathtub to the brim. This step will let you know if the sewer in the bathroom is leaking with your own hands.
- You can also take a regular bucket and fill it to the brim with water, and then sharply pour this water into the bath or toilet.
to contents ↑Important! Once you have finished the test, carefully inspect your new plastic pipes and floor in the bathroom. If no damp spots were found and there were no smudges at the joints, then the work was done perfectly. During the testing of the system, the sewage system in the bathroom must withstand any flow of water. Therefore, it is very important to carefully examine each compound.
Possible problems
Often, many are faced with such a problem as an unpleasant smell in the bathroom. If the pipes are old, then they are the reason - this is the most obvious. But if the pipes are new, and the smell does not go anywhere, then it is time to audit the system.
Water closure problems
A water seal is a layer of water that must always be in the bent part of the pipe. The presence of water does not allow gases, and accordingly - unpleasant odors to go outside. If this happened, then - the water seal is broken:
- If there is no ventilation in the sewage system, then the pressure may increase. As a result, the smell is squeezed out through a water plug and goes out. Sometimes in the form of small bubbles, and sometimes even in the form of bursts. 
- An excess of water, as well as a lack, can also affect the functionality of the water seal. When the pressure drops, the liquid from the siphon is drawn, removing the water plug and the smells again burst out.
To avoid the occurrence of such problems with the normal functioning of the hydraulic seal, it is worth paying special attention to this even at the stage of pipe installation:
- When conducting sewers in the bathroom with your own hands, do not neglect the rules, use pipes of only the recommended diameter.
- When operating the system, try to avoid clogging. Clean the pipes and siphon more often.
Minor leaks
If a serious malfunction occurs in the system, you will know about it right away. In the worst case, your neighbors will learn the news along with you. But it also happens that there is a slight leak that is invisible to the eye. It is smudges that can cause an unpleasant odor. Therefore, faced with this problem, conduct a thorough inspection of both the sink with the bathtub, and all pipes and joints.
to contents ↑Stock footage
Summing up, it is worth recalling once again that the slope, although minimal, is nevertheless welcomed when installing sewers in the bathroom with your own hands. This will avoid stagnation of water. The slope is towards the central highway and it should not exceed 1 cm per meter. You can cut the sewer pipe with an ordinary hacksaw for metal or with a small hacksaw for wood, but it is better to clean the edges of the cut. On long sections of the sewer pipe, it is advisable to install bends for cleaning in case of blockage, which are easily closed with special stoppers with plugs. If you follow all the tips, then everyone will cope with the installation of sewage in the bathroom with their own hands.
 (No ratings yet)