

DIY vase
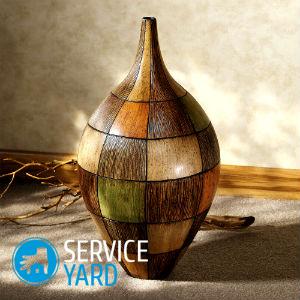
Creating beautiful things with your own hands is a very exciting experience. By including decor elements of hand-made production in the interior of the house, you will be able to decorate your home in an original way and save on designers from expensive items. In this article we will talk about how to make a floor vase with your own hands, what it will take, how it can be made out.
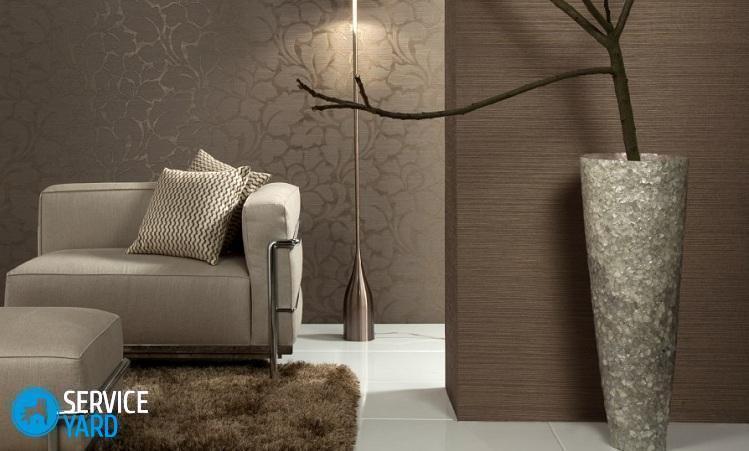
The basic rule that you should rely on in the process of decorating the interior of your home is the correspondence of all details to one stylization. When making a vase with your own hands for a certain interior style, you need to observe organicity and not spoil the overall picture.
to contents ↑Interior styles and their design
Today there is a wide variety of interior styles. Let's take a look at the most popular of them and consider how to emphasize the individuality of a room using a do-it-yourself floor vase:
- Minimalism - you should give preference to laconic forms, modest decoration and restrained colors.
- Classicism - use symmetrical patterns, a light palette and a traditional floral ornament.
- Hi-tech - use modern materials. You can decorate a vase with a fancy shape in steel or glass.
- Kitsch - here you can forget about the rules and combine incongruous, various configurations and bright colors will help you with this.
- Modern - use abstract shapes and smooth lines, wood or metal will be appropriate for decoration.
- Art Deco - a luxurious style is created through the use of brown and gold tones.
- Vanguard - think creatively, here you will be helped by bright colors and unusual shapes.
Choose the size of the floor vase
Before you begin to make a floor vase with your own hands, you need to decide on its main parameters. One of them is the size of the product:
- The width can be chosen at your discretion, depending on the form and style in which it will be performed.
- The height is in the range of 40-90 cm.
to contents ↑Important! A large vase placed on the floor is a spectacular addition to the interior. She looks unusual and is able to give the room a special charm.
Product Shape
In addition to size, it is also important to choose a shape for it when creating a floor vase. The form is chosen at your discretion, the main thing is that it is combined with the general style of the room in which the product will stand.
Designers name the following most popular forms:
- Round - such a product will succinctly fit into any interior. It is easiest to make it using the papier-mâché technique, taking an ordinary bottle as a basis.
- Square - will be appropriate in a modern interior. The base can be a cardboard box.
- Triangular - it is better to make such a floor vase with your own hands using newspaper tubes.
to contents ↑Important! A vase can be oval, convex, elongated - its shape can be the most original and bizarre. Here everything will depend only on your imagination.
Floor vase
Let's look at how you can make tall floor vases with your own hands from a pipe. The master class will allow you to understand everything very accurately, how to create such an accessory. For the manufacture of a pipe made of hard cardboard (from linoleum). You must determine the height of the future vase yourself.
So, to work, you need the following:
- Cardboard pipe.
- Silicone thermal gun.
- Thick cardboard.
- The basis for the vase (a piece of OSB or fiberboard).
- Pen or marker.
- Putty.
- Scissors.
- PVA glue.
- Sandpaper.
- Acrylic lacquer.
- Old newspapers.
Sequencing:
- Measure and cut a piece from the cardboard pipe of the required size. From a sheet of OSB or fiberboard, cut a circle that will serve as the bottom for the vase. Using a glue gun, glue the pipe onto the base.
- Decide what shape your product will be, make a template. Cut stiffeners out of cardboard. Ideally, their number should be about 30 pieces.
- Using a glue gun, glue cardboard blanks to the pipe. Try to glue so that the distance between them is approximately the same.
Important! For convenience, you can make markings based on a vase.
- Paste the resulting frame with newspaper pieces using papier-mâché technology. Leave to dry a fully pasted vase for 2-3 days.
- Mix PVA glue with putty until the consistency of thick sour cream, proceed with processing the product. Apply a uniform layer of putty on the frame, the thickness of which should be at least 0.5 cm.
- Thoroughly coat the entire surface of the vase. Try to make the surface as flat as possible. Grease the neck no less carefully, also treating the inside of the vase to a depth of 5-10 cm - as far as the hand can reach.
- Wait a couple of days until the product is completely dry, smooth the surface of the vase with fine sandpaper.
- Decorate the product at your discretion, paint, varnish.
Do-it-yourself floor vase is ready! Enjoy the results of your work.
to contents ↑Vase “Rope”
To make a decorative floor vase, you will need:
- Thick cardboard or plywood.
- Pipe from linoleum.
- Small deep capacity.
- PVA glue.
- Twine (any, most importantly - from natural material).
- Spray paint of any color, preferably acrylic.
Sequencing:
- Take a pipe from cardboard and cut a piece of the required height from it.
- For the base, cut a circle out of plywood or thick cardboard. Diameter make a couple of centimeters more than the pipe itself.
Important! It is impossible to make a base of such a diameter as the pipe, because because of its height + the weight of the flowers in it, the vase may fall.
- Glue the base with universal PVA glue.
- Pour glue into the container. Unwind the twine, completely dip it in glue and wait until it is thoroughly saturated.
Important! It is undesirable to use synthetic twine, because it cannot be impregnated with glue and will not be fixed on the product.
- Wrap the pipe with twine soaked in glue. If there are small gaps between the threads, it's okay, but it is advisable to wrap the pipe without them.
- Leave the product for a couple of days in a dry, warm place until the glue completely dries.
- Use a spray can to paint the vase and let it dry completely.
to contents ↑Important! It is better to work with paint outside the apartment building - on an open balcony or street. Be sure to use rubber gloves and a respirator.
Vase with butterflies
From a piece of plastic pipe, you can also make a floor vase with your own hands.
To create such a product, you need the following:
- Plastic pipe.
- PVA glue.
- Plastic cover for the bottom.
- Paper of different colors and density.
- Paper napkins.
- Acrylic paint in black.
- Satin ribbon approximately 3 cm wide.
- Foam sponge.
- Acrylic paint golden color.
- Lacquer.
Sequencing:
- Cut the pipe to the required height. If the size of the pipe suits you, then you do not need to cut anything.
- Using superglue, connect the main part to the bottom. Wait for the glue to stick together the parts well.
- Dilute the PVA glue with water (just a little to make it easy to apply), and brush them with a surface using a brush. Quickly, before the glue has dried, glue paper napkins.
- Wait for the first layer to dry, then grease it with glue and make a second layer of napkins.
- While the napkins are drying, cut out butterflies from the ribbon, and leaves and blades of grass from colored paper.
Important! Cutting butterflies from a ribbon will be much easier if you use a cardboard stencil. To do this, put the stencil on the tape, circle it along the contour and cut it out.
- When the layer of napkins is completely dry and you cut out all the details, proceed to fix them. Do this with PVA glue (not diluted). Glue grass blades with a slight tilt, and place butterflies in a chaotic manner.
- Wait for the product to dry completely. This may take about 2-3 hours.
- Take acrylic black paint and paint over the future vase well. For these purposes, it is better to use spray paint.
Important! If you use paint in a spray can when decorating a floor vase with your own hands, it is advisable to work with it on an open balcony or street.
- Take liquid golden paint, pour a little into an unnecessary container, and use a foam sponge to apply the paint in dotted movements. Be sure to leave a part of the black background - do not paint the vase with all the gold paint. But paint the blades of grass all (for this you can use a brush). After the paint has completely dried, a beautiful vase is ready.
to contents ↑Important! It is better to put artificial flowers or dried flowers in such a product, but you can also experiment. Try using quality glue and sealant to connect the bottom and base of the pipe. If everything works out for you, then in such a vase it will be possible to collect water and put fresh flowers.
Vase “Gifts of nature”
You can also try to make a floor vase with your own hands, decorating it with decoupage elements and tree bark. Such a thing can become a real decoration of your hallway or living room.
To make it, you will need the following:
- Plastic pipe approximately 70 cm long.
- Newspaper.
- PVA glue.
- Bark of tree.
- Primer.
- Colored napkins for decoupage.
- Rope or rubber bands for money.
- Gypsum.
- Stickers - if they are not, then you can print a color image on the printer and cut it out.
- Lacquer.
- Acrylic paint.
Sequencing:
- Take the pipe and cut it to the required size. The ideal height for the product (if the pipe is weaving) is 60-70 cm.
- Tear the newspaper into medium-sized pieces (approximately 10 by 5 cm).
- Dilute the PVA glue with a small amount of water, use it to glue the pipe with newspaper, let it dry a little. Next, coat for strength and leave to dry.
- Decide what shape and size the area will be on which the picture will be placed. Cut out the area under the picture from paper and stick it on top of the newspaper.
- From firewood or sawn trees, peel the bark and dry it for a couple of days. Glue the bark to the surface of the pipe. For these purposes, you can use both PVA (undiluted) and universal thick adhesive.
Important! If you have too liquid glue, then the bark must be fixed with rubber bands or ropes.
- When the bark adheres well, take colored napkins with a pattern and cut out the necessary elements from them. For example, flowers, butterflies or any other drawing that is depicted on your napkins.
- Take stickers or print a color picture on paper and cut it out.
- Glue the flowers in the area that is reserved for decoupage. To do this, use PVA diluted with a small amount of water.
- Glue butterflies on flowers, as well as in empty places.
- Make a not very “cool” gypsum mortar, put the bottom of the vase from it: put a pipe on a plastic plate and lay the solution on top. Leave to dry for a couple of days.
- Paint the bark with brown paint and apply several layers of varnish on top.
- Leave to dry for a couple of days.
Stock footage
As you can see, making a floor vase with your own hands is not at all difficult.For this, you do not need to have special knowledge and skills, in addition, simple and affordable materials will be required in the work. Such a vase will become a real decoration of your home.
- How to choose a vacuum cleaner taking into account the characteristics of the house and coatings?
- What to look for when choosing a water delivery
- How to quickly create comfort at home - tips for housewives
- How to choose the perfect TV - useful tips
- What to look for when choosing blinds
- What should be running shoes?
- What useful things can you buy in a hardware store
- Iphone 11 pro max review
- Than iPhone is better than Android smartphones
 (No ratings yet)