DIY bath legs
In the modern world, great importance is attached to the interior design of the apartment, and the bathroom in particular. Technical capabilities and a range of materials make it possible to embody even the most unusual ideas of decoration and decoration. Supports for plumbing equipment make a huge contribution to the beauty of the bathroom. Why are they needed at all, is it possible to make supporting and decorative legs for a bath with our own hands - we will deal with this in this article.
to contents ↑Differences and types of supporting structures
The whole abundance of models of supporting structures on which the bathtubs are mounted, according to their purpose, the craftsmen conditionally divide into several types:
- supporting - are used during the installation of capital structures, withstand, as a rule, the weight of the bath directly, the water and the person collected into it;
- auxiliary - necessary to set the level, while the entire weight of the bath is evenly distributed over the brick base;
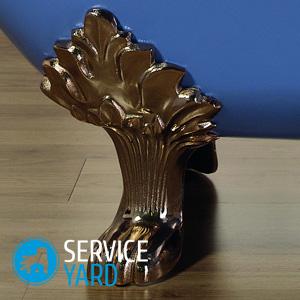
- decorative bath legs - fake linings that perform an exclusively aesthetic role.
Important! These types of supporting structures are easily combined - in stores with building materials it is often possible to find decorative supports or adjustable supporting devices for the bathroom. The latter fundamentally differ from other models in their rigidity and reliability, because they are made of sufficiently strong metal.
In order to accurately determine the type of legs, carefully consider the design of the support:
- Obviously, if the legs are intended to be attached to the bathroom using double-sided construction tape, then this design can be exclusively auxiliary. She is not able to withstand a heavy load for a long time, but it may well provide the master with the necessary height for placing the bathtub on a furnished brick pillow in a horizontal position.
- Reliability and rigidity of fastening of a sanitary product on the support itself can be increased with the help of structures that are attached to its lower part forever. As a rule, this is achieved using an additional element designed for fixation. On heavy cast-iron bathtubs, an arm with several mounting holes is placed, which protrudes somewhat above the surface of the bathtub.
- Legs for steel baths most often are plates for fasteners.
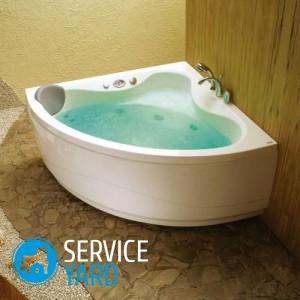
- Acrylic bathtubs are fixed in a slightly different way: their legs are screwed to the bottom, and the sides are insured against accidental shift using special support pins.
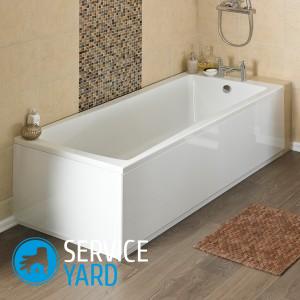
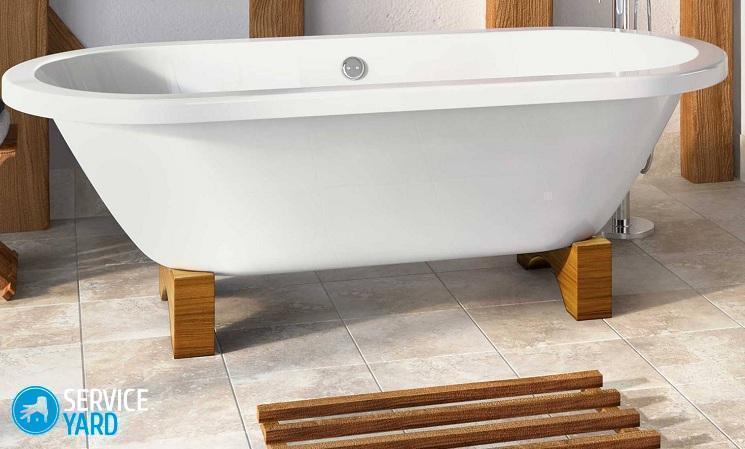
Steel foot baths
A steel tub with legs does not represent anything unusual: steel products are of average weight, and in addition, they are quite practical, convenient and relatively inexpensive. Experts recommend that those who wish to purchase a foot bath should pay attention to this particular option.
The design of the stops on which the steel bath is installed, as a rule, does not pay much attention, since it happens to be absolutely any. The most reliable experienced specialists call those supporting devices that are mounted on linings with a self-adhesive layer.
Important! Remember that in designs in which the supports are rigidly tightened together by bolts or studs, often during operation, and sometimes during the process of tightening on the bathroom, the enamel layer may peel off during fastening.
Homemade frame
This support can be quite simply made using ordinary pipes and corners. But the process itself requires strict adherence to the instructions:
- First measure the gutters under the upper edges of the sides of the bathtub.
- Observing the same removal, weld 4 pipes to their inner plane.
- In order to make the design more reliable, in the middle part connect with the help of corners.
This way you get a solid frame.
Legs
To make them you need:
- metal corners;
- metal pipe with a diameter of 50 mm;
- rubber gaskets 3 mm thick;
- roulette;
- electric welding device.
Operating procedure:
- First, decide on the height that you want to have.
- After that, cut 4 legs from a metal pipe of the required height.
- Using the metal corners, connect the legs: two from each end of the bath.
- Then weld the supports directly to the bath body.
- Next, glue the rubber pads on the contact points of the legs with the floor tiles.
to contents ↑Important! To ensure greater stability, you can attach the bath itself to the wall.
Installing a bathroom bowl
Installing the bath on the supports is completely uncomplicated, as a set, as a rule, all the necessary clamps and fixtures are sold:
- In order to install the supports, turn the bath upside down or lay on its side.
- Insert the supporting structures into the holes specially designed for them, then tighten them completely.
Important! In order not to damage the enamel on the front side of the bath, put foam rubber or cardboard under it. If the bathtub has just been purchased and still remains in a cardboard wrapper, it is better to install the structure without removing the cardboard substrate.
- Wipe all the places where the legs will be mounted with a degreasing liquid, such as alcohol or acetone.
- Before sticking to the bathroom, use a hair dryer to warm the legs.
- Supports are best mounted at the greatest possible distance from each other. This refers to mounting them near the very edge of the bath. However, you must also consider the location of the drain hole itself: the foot must be attached at least 40 mm from the center of the bath.
Important! When choosing the location of the legs, also consider that after installation, it will be necessary to mount a siphon. Therefore, arrange them so that they do not in any way interfere with this process.
Screw and solid legs
Support installations with special adjustment screws must be assembled before installation. Insert the studs into plastic or rubber tips, for this, screw the nut flush on one end and hammer the other end into the tip with a hammer. After you perform all these processes, insert the assembled stud into the leg, after unscrewing the nut.
Most nowadays acquire a variety of decorative overlays or solid decorative legs. They must be attached, strictly observing the method specified in the instructions, and expose the bath, taking into account the distribution of weight.
to contents ↑Important! Under no circumstances should the load fall on the linings. Fully correctly installed decorative legs only improve the interior and add a unique style to the bathtub.
Stock footage
To install the font on the supports, it is not necessary to call the master. You will cope with this task yourself if you follow all the requirements, instructions, and you will follow common sense during work.
 (No ratings yet)