DIY electricity meter connection

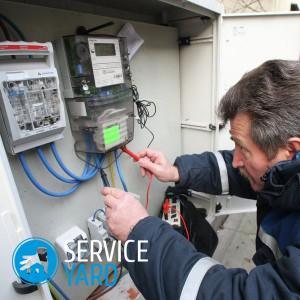
Probably, everyone is familiar with the most familiar electric meter, which is equipped with almost every apartment in every house, because it is an integral part of our life. But, unfortunately, few people resort to connecting an electricity meter with their own hands, being afraid of confusing something in the course of work. Why pay for a specialist if you can install yourself? Let's talk about this in a bit more detail.
to contents ↑How to set the counter?
In order to carry out the installation of the meter, you need to delve into the general principles of connection. Most often, a single-phase type device is used in apartments, so let's start by considering it as an example.
Many flow meters are owned by an organization that provides electricity services. This is to the fact that almost no one does the installation themselves, since this procedure is also the responsibility of the service organization. Also, do not lose sight of the fact that owners do not bear any responsibility for installed appliances and seals.
Important! Despite all this, no one is forbidden to connect the meter with his own hands, however, all consumables and the meter itself will have to be purchased independently, and all responsibility will rest only with the contractor.
For installation, you will need the following consumables and tools:
- Switch box.
- Single phase or three phase meter.
- Wires for transmitting electric current. It is necessary to choose a conductor with a cross section of 1.5-6 mm.
- Circuit breakers and RCDs.
- Current transformer if you plan to install a three-phase type device.
- Set of fasteners and insulators.
- Mounting strips.
- Multimeter.
- A set of screwdrivers, pliers and a knife.
- Insulating tape.
Important! All tools must have an insulated handle!
If all the tools are at hand, you can proceed to consider the scheme of connecting electricity meters.
to contents ↑General installation rules
To get started, you should familiarize yourself with the general connection diagram, which can be found on the Internet for any particular case. Also, before buying, it is best to immediately determine the number of phases and decide whether you need a current transformer with which the device itself will be connected.
Important! For a single-phase device, the latter is not needed. In fact, it all depends on which house you live in - private or apartment.
The general scheme of work will be as follows:
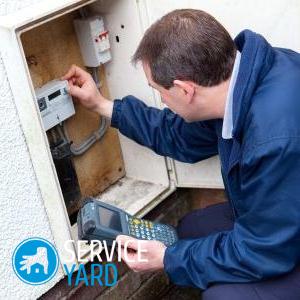
- All work should begin with fixing a special mounting plate, counter, RCD and switches inside the purchased shield. For installation, you need to use fasteners that must be included with each component.
Important! Before fixing each machine on the mounting plate, you need to make sure that everything is working properly and stably. To do this, use a multimeter and measure the resistance at terminals AB.
- At the beginning of work, you need to install the bar itself inside the shield body. This strip is installed using special insulators. The switches are installed on the site using spring latches, which this design is equipped with.
Important! In case of dismantling of such equipment, the switches can be very easily removed by slightly pulling and prying the latch with a screwdriver.
- In addition to the parts and components described above, you will need to fix special tires that are fixed in the same way on insulators with screws and nuts.
to contents ↑Important! The design and dimensions of the shield affect the location of all parts inside it. You can install the tires directly on the mounting rail, but this method requires a distance between them. But this is necessary in order to avoid the accidental occurrence of a short circuit.
Connection of a three-phase electric meter
How to install a three-phase electricity meter? In fact, the installation is not much different from the installation of a single-phase type device. But, nevertheless, you must follow all the basic rules for connecting with the same care.
The only and main difference will consist only in the fact that for this case it will be necessary to connect the meter itself with current transformers, which will also need to be installed inside the shield housing near the RCD.
The bottom line is that the three-phase device must be connected via current transformers. It should be noted that the meter itself is equipped with ten terminals. The first current transformer must be connected to the terminals numbered 1-3, the second transformer to 4-6, and the third to 7-9. The tenth clamp is used to connect to ground (zero shield bus).
to contents ↑Important! Remember that during installation it is imperative to comply with safety regulations. Do not take up work if you have not yet made sure that the voltage is turned off and no one will supply it without your knowledge. You should also carefully examine the insulation of the handles of each of the tools used.
Stock footage
Now you understand how to install a three-phase meter. Obviously, this is not the most difficult procedure, but, as you can see, during installation you should not relax for a minute. Remember the safety rules and carefully read the description for all installations!
 (No ratings yet)