

DIY candle holder
Currently, few people use candles for their intended purpose. Therefore, candle holders have become rather a beautiful element of decor, which complements and decorates the interior of the room. Recently, hand-made is gaining more and more popularity. It has become popular to do various DIY crafts for the home. And candlesticks are no exception. They are made from all kinds of materials - from twigs, tree bark, old pencils and even dough. Today we’ll talk about how to make a candle holder out of a can with your own hands.
to contents ↑Glass jar candle holders
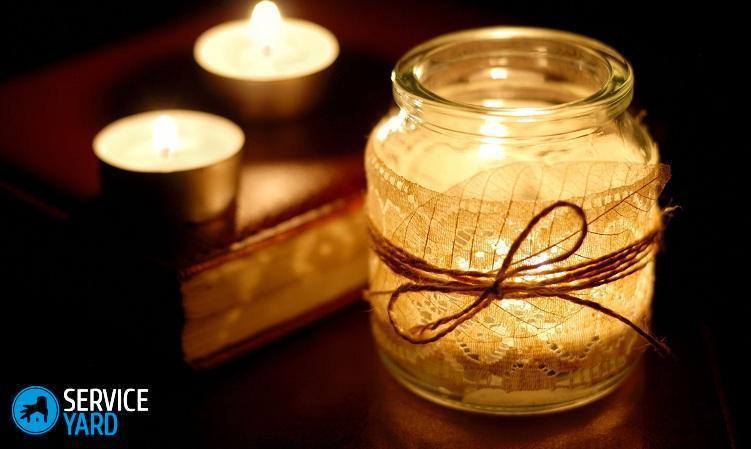
The easiest way to make a candlestick from a glass jar. To do this, any jar that you like is suitable, you just need to remove the label. You can decorate a jar and put a finished candle there, or you can make a candle yourself by pouring wax.
Homemade candle
How to make a candle yourself? This is not difficult, let's take a closer look at the whole process of making such a candle in a glass candlestick:
- First of all, prepare a glass container, remove the label.
- Make a wax. Cut it into pieces and put in a small saucepan.
- Put this pan on a steam bath and melt the wax, stirring it with a wooden stick.
- Put dyes and aromatic oils in the melted wax.
Important! Remember that the wax quickly hardens, so immediately pour it into the prepared glass container.
- Fasten the wick to the bottom of the jar. This can be done by dropping a little molten wax on its end or using a special clamp.
- Fasten the other end of the wick and carefully pour in the molten wax.
- When the wax hardens, the fixed end of the wick can be released.
Important! In the same way, you can make a striped candle of different colors. In this case, you need to fill in all the colors in turn and wait for each layer to solidify.
Other glass jar candle holders
There are many different options for other candlesticks made of glass jars - which one to make with your own hands, choose for yourself:
- An interesting and original New Year's candlestick can be made from a half-liter can. To do this, you need to beautifully lay fir branches inside the jar and sprinkle them with coarse salt, which will imitate snow. Place a candle in the salt snowdrift. The neck of the jar can be decorated with ribbon or braid. And on top of the jar to fix a couple of fir cones.
Important! For greater effect, the cones can be painted in some color, for example, gold or silver. This can be done with acrylic paints.
- Cut out any silhouette you like from masking tape. It can be a star or a heart. And then just paint the can with gouache. You can also buy paint in a spray can and cover the entire can. Then remove the tape and get the original product. The border of the silhouette can be decorated with some shiny powder. Insert a candle inside.
Important! If you paint with acrylics or gouache, then on top it is advisable to cover with several layers of varnish so that the paint does not peel off.
- If you draw well, the task is simplified - you can simply draw a beautiful drawing on the jar, and inside it you can put an LED garland instead of a candle.
- You can come up with a silhouette applique that will encircle the entire can. Silhouettes can be printed on a printer and glued onto a jar using PVA glue. Then you need to cover the entire application with varnish.Draw small details with a marker, and paint the jar itself in a suitable color.
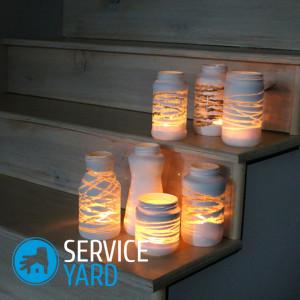
- Candlesticks decorated with semolina look very beautiful and unusual. They start from the bottom of the bank - they smear it with glue and dump it in semolina. Then they make patterns on the jar with glue and also sprinkle with semolina. When the glue is dry, paint is applied and the product is dried again.
to contents ↑Important! There are a lot of options for decorating a glass jar. They are tied with hooks with the most intricate patterns, pasted with decorative pebbles, shells, tied with ropes, threads. There are no boundaries for your imagination - take materials that are more convenient for yourself, and create!
Tin Can Candlestick
Very original products come from cans. How to make a candlestick out of a tin can with your own hands?
- Apply a pattern to the jar. You can print the picture and stick it with tape to the bank. Inside, it is advisable to fill the jar with moist earth more densely.
- Using a nail and hammer, punch holes along the outline of the pattern. You can do this with a drill.
- Paint your product with spray paint. If you want a more saturated color, then apply several layers of paint.
- Put a candle inside.
to contents ↑Important! The larger the jar and the candle, the more spectacular the light pattern.
Decorative tin can candlestick
If you want to do something unusual, then we suggest you try to make a decorative candlestick out of a tin can with your own hands. To do this, you need to pick up a jar that has thicker tin so that it subsequently holds its shape. Olive cans are best suited for these purposes.
Here's what to do with her so that she takes the form of a beautiful craft:
- Cut off the top rim of the can and remove the sticker, if any.
Important! When cutting the tin, make sure that burrs do not form, they must be immediately treated with sandpaper.
- Cut a strip 3-4 mm wide from the top of the can.
- Cut this strip into pieces 2-2.5 cm. From them we will make brackets for joining.
- Bend an angle of 3-4 mm wide at the strip. This can be done with pliers.
- Cut the jar vertically into strips 3-4 mm wide.
- Count the number of resulting strips and divide them into 6 equal parts.
Important! If you can’t divide it accurately, then the extra strips can be cut.
- For convenience, bend the strips down 2 pieces.
- Turn the paired stripes 90 degrees in different directions with the help of pliers.
- Then on each side, turn 3 more lanes.
- Gather them in a bundle. Pull and align.
- Take the bracket and wrap it around the bundle of strips. Tighten gently and tighten with pliers.
- Collect in this way two more beams. You should get three pieces.
- Now you need a torsion tool. Hook the end in the bundle of your strips and twist the strip into a spiral. You need to twist in the direction from the center of the beam.
- We do the same with two other bundles.
- There are 6 strips left in the beam. Now you need to twist the third and fourth towards the center.
- The remaining strips need to be pulled down from above and fixed with a bracket. We twist the first and fourth from the center, and the second and third to the center.
- The remaining strips are rotated with pliers 90 degrees. Half in one direction, half in the other.
- We divide them into three beams, bend the central one down, tighten them with brackets.
- Those strips that are closer to the center, we connect the brackets at the top.
- Of those stripes that are bent down, we form the legs. To do this, we spin them in the direction from the center.
Now we need to paint our product with spray paint, and the decorative candlestick is ready.
to contents ↑Stock footage
Of course, the ideas suggested in this article are just the basis for your imagination. You can improve them and create your own unique little things that will look very nice in the interior and give it special warmth.
- How to choose a vacuum cleaner taking into account the characteristics of the house and coatings?
- What to look for when choosing a water delivery
- How to quickly create comfort at home - tips for housewives
- How to choose the perfect TV - useful tips
- What to look for when choosing blinds
- What should be running shoes?
- What useful things can you buy in a hardware store
- Iphone 11 pro max review
- Than iPhone is better than Android smartphones
 (No ratings yet)