

DIY shelf illumination with LED strip
Glass shelves are an excellent decoration of the interior. Everything that stands on them is visible in the palm of your hand. And if they are also highlighted, the room takes on a luxurious, but at the same time, mysterious look. Sometimes the question arises for the owners: where to get such furniture? Now we’ll talk about how do-it-yourself lighting of shelves with LED strip is done.
to contents ↑What are LEDs?
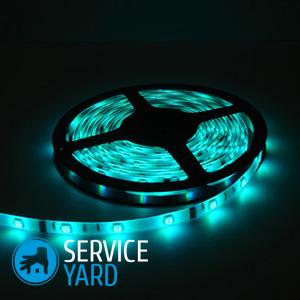
Do-it-yourself lighting of glass shelves with LED strip looks great, of course. But what are LEDs and why is it better to choose them? Any such element is a conductor. A current passes through it, electrical energy is converted into light energy, the lamp glows. Brightness depends on the chemical composition.
Important! Sometimes shelves are highlighted with other devices - halogen or incandescent. But this is very inconvenient and to some extent even dangerous.
The advantages of LED strips are obvious:
- the lighting system is absolutely safe;
- works equally well both at room temperature and in a hot or cold room;
- LEDs are much less sensitive to mechanical stress than other lamps;
- such illumination will last for years - the tapes practically do not burn out;
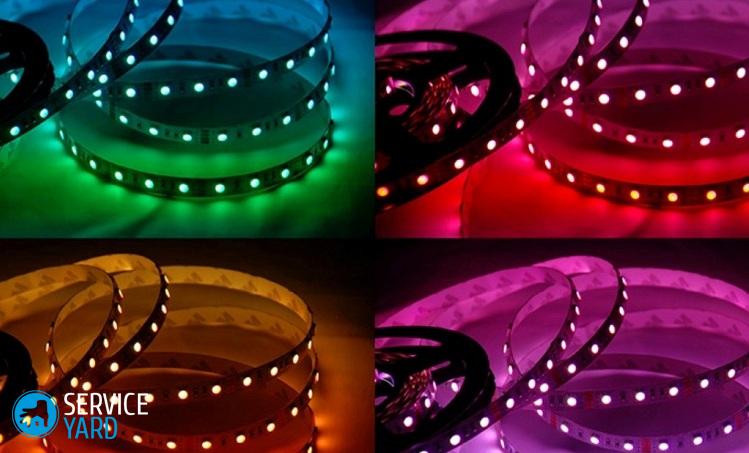
- on sale you will find lamps of various colors and shades;
- the lighting is bright, and the maximum power is achieved immediately after switching on - the LEDs do not need to be warmed up;
- if desired - you can use infrared and ultraviolet lamps;
- there are options with four outputs, when you can get the main, red, blue or green color from one lamp;
- You can position the lamps at different angles;
- affordable price.
to contents ↑Important! For the tape to serve for a long time, it must be properly serviced, in particular, install a stabilizer.
Choose a lamp
Before you make the backlight in the cabinet with your own hands, you need to buy the LED strip itself. The most popular option is SMD LEDs. Their selection is large enough, and the following points should be taken into account:
- number of crystals;
- sizes
- the nature of the glow.
With the number of crystals, everything is relatively simple - there can be from one to four. As for the size, then the situation is somewhat more interesting. In the assortment of almost any electrical goods store you will find tiny diodes ranging in size from 1.06x0.8 mm, and giants 5x5 mm.
The glow can be of two types:
- color;
- monochrome.
Why are you lighting up?
Before you go to the store, decide what you need the tape for. Do-it-yourself lighting of the shelves with an LED strip can be:
- decorative;
- functional.
to contents ↑Important! Of course, and bulbs attached simply for beauty give light. But its brightness in this case is not so important. Therefore, you can choose diodes SMD 35x28 with one crystal. If functionality is more important, it is better to buy more powerful lamps - for example, SMD 50x50 with three crystals. This will be enough.
What are the tapes?
LED strips differ from each other not only in the quality and brightness of the lamps, but also in several ways:
- the number of LEDs and the step of their installation;
- relative to humidity.
How many lamps on the tape?
Having familiarized yourself with the assortment of the electrical goods store, you can make sure that the number of bulbs on the tapes is different. The number of pieces is calculated per linear meter, and you can see the following options:
- 30;
- 60;
- 120;
- 240.
Two words about humidity
LED strips are now used to illuminate a variety of rooms, including those where there is always a lot of water vapor - for example, kitchens or bathrooms. By the way, nothing prevents you from making a glass shelf with lighting and in the bathroom, since there are tapes in the shops, too, since water has no effect.
Remember to read the labeling:
- IP20 The luminaires on which you will see the inscription IP20 are not suitable for either the bathroom or the kitchen. They can only be hung in a completely dry room.
- IP65 The tape marked IP65 can be attached to the shelves of the kitchen cabinet, its level of protection against moisture is average.
- IP68 IP68 marking means that the lamps are completely insensitive to moisture and can even be placed in an aquarium.
Choose a power supply
Having decided on the power of the lamps, you can begin to choose a power supply. There are a lot of such devices on sale, and accurate calculations need to be done. The power should be enough for the correct operation of the lamp, but no more than that:
- Decide how long you will connect the tape to this power supply.
- Multiply its power by the length - as a result, you get the total power.
- Multiply the result by a factor of 1.25 - this is the indicator you need for the power supply.
Talk about glass
To make the shelf with your own lights illuminated beautiful, first you need to take care of the object itself, to which you will attach the LED strip. Glass as the main material is now extremely popular. Transparent inserts have not gone out of fashion for many centuries, but glass cabinets in apartments appeared much later - twenty years ago they could be seen almost exclusively in medical institutions and museums.
Make shelves
Furniture stores, frankly, do not indulge lovers of glass cabinets and shelves. Manufacturers are not very willing to produce such products, which is very easy to understand, because the risk of breaking or damaging such a cabinet during transportation or even directly in the cabin is extremely high.
Therefore, there are two ways out:
- order a cabinet in a specialized workshop;
- make it yourself.
Shelves to order - reliable and high quality, but expensive. Self-production will cost much less, but some skills with the tool are required. However, a person can learn something only in practice, so why not try it?
Cooking Tools
Work even with such a fragile and, at the same time, hard material like glass will do better if you worry about a good tool in advance. You need:
- high-quality glass cutter;
- belt sander;
- skin with grain of 120 units;
- ruler.
Test work
Glass cutter is better to buy oil. To get started, you will need a few more unnecessary large fragments, on which you can practice. The most dramatic thing is that hands should not tremble during the cutting process, even if you are not very confident.
Important! Keep in mind that an incision must be done right away - a second one will only harm the case. Glass is cut once, then breaks along the intended line.
Practice slicing too. Your product should not be hazardous either to you or to other household members. In addition, uneven sections look ugly. Grinding is carried out using a special machine. You can, of course, do this with just a sandpaper, but for a long time, besides, it's easy to cut yourself.
After you practice a little, you can start making shelves. The first product may simply be in the form of a rectangle of a given size. The most important point is to make sure that all angles are right.
to contents ↑Important! During grinding, the surface is moistened with water so that there is no dust.For the same reason, it is better to grind in a respirator.
We fasten the shelf to the wall
After the rectangle is cut out and all of its sections become smooth and shiny, the time comes to hang it on the wall. There are two ways to do this:
- on special holders;
- using an aluminum profile.
Holders are a more convenient and versatile option. Thus, glass of any thickness can be fixed. As for the backlight, it serves as a frame.
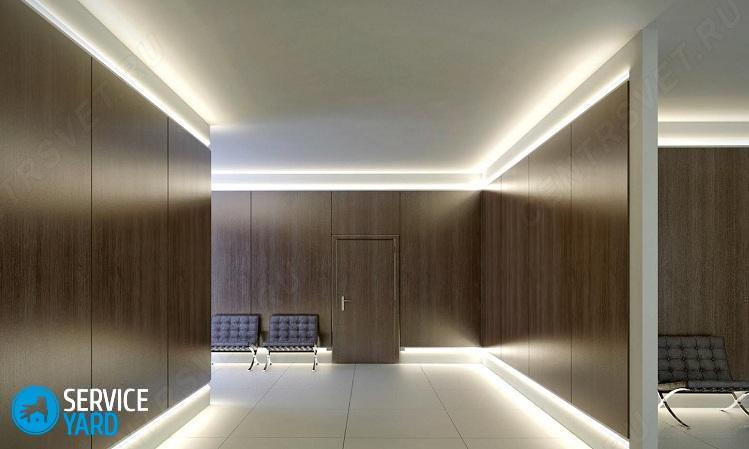
Important! If you are going to make the backlight with an LED strip so that the light comes from the inside of the structure, the profile will be more convenient, because the tape can be mounted directly on it. The same applies to cases when you need to insert LEDs into the wall with your own hands.
Put holders
Special holders look simple enough. They consist of two parts:
- main;
- top.
The main part is attached to the wall, a shelf is laid on it, and on top of it all is closed by an overlay. For work you need:
- level;
- dowels;
- drill.
Dowels are most often included. Then we do this:
- Separate the holder parts.
- Using the level, mark the position of the two holders on the wall.
- Drill holes in the wall according to the number of holes in the main part.
- Use the dowels to secure the main part.
- Put down the shelf.
- Fasten the upper parts of the holders.
Important! For a short, small shelf, two holders are enough, but if the shelf is long, there can be three, four, or even more.
Fasten profile
When buying a profile, it is important to ensure that it matches the thickness of the glass:
- Cut the profile to the desired size.
- Remove the burrs.
- Draw a strictly horizontal line on the wall or cabinet wall - this is done by level.
- Mark the position of the shelf on it.
- Mark the position of the holes on the profile.
- Fix the profile with self-tapping screws and plastic plugs.
to contents ↑Important! Do not remove the plastic inserts that are found in almost any aluminum profile - they will still come in handy.
Making the backlight
So, the profile is fixed, it's time to make sure that the shelf glows beautifully.
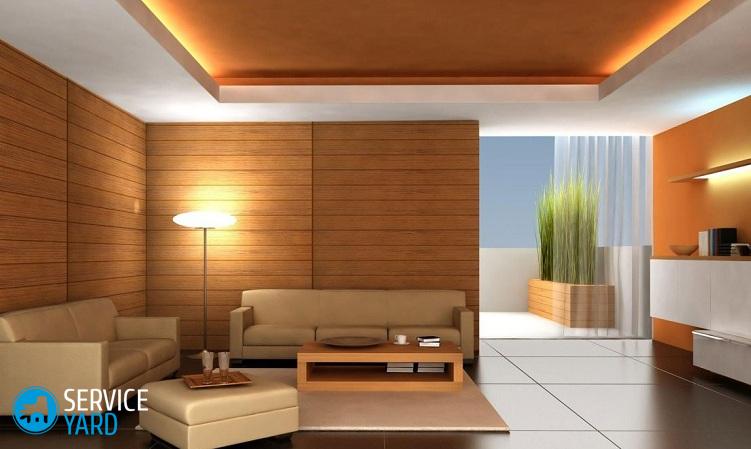
Important! If you are interested in lighting in the closet with your own hands, the procedure will be the same, only long ribbons are needed. In general, the use of LED strips allows even a novice designer to do something beautiful and interesting. For example, you can decorate the shelves with ribbons of different colors.
Inserting the tape in the profile is not very pleasant, but the result is worth the effort:
- Plastic inserts are needed so that the tape does not touch metal parts - this will largely protect the power grid from short circuits.
- If this is your first shelf, make sure that the ends remain open, so it will be easier to insert the tape.
- If the ends are closed, you will have to use improvised means - something thin, but not too sharp. For example, a nail file is suitable. With its help, the tape is pushed into the groove of the profile. A thin plastic ruler is also suitable, it is even more convenient - you can tuck the tape immediately along the entire length.
- After the tape is inside the profile - insert the glass.
Important! Get ready for the fact that the glass, which you seem to have measured correctly, cannot be inserted right away. You can try to drive it with a wooden hammer, only you need to do this carefully, strictly perpendicular to the cut, the blows should not be strong. It remains to connect what you did to the power supply.
We highlight the shelf in the closet
LED strip is a wonderful thing, which does not have to be inserted into any grooves there. One side of it adheres perfectly to any surface, be it glass, plastic, wood or metal. Therefore, issuing a paycheck on holders in this way will not be any work at all.
You need:
- the tape itself, preferably without a silicone shell;
- rated power supply unit;
- wires (you can take ordinary ones that connect household speakers);
- soldering iron;
- rosin;
- solder;
- insulating tape;
- drill;
- drill.
Before you solder the tape, you can practice on something else. But if you are confident in yourself and know how to do it, you can start right from the tape, in principle, there is nothing wrong with that:
- Consider the tape - there are always 5 cm segments on it, on which there are 3 bulbs and there are icons where the tape can be cut.
- Cut the tape into pieces of the desired length.
- Solder the lamp of the desired configuration (if you want the LEDs to be located around the perimeter, you can try to bend the tape just in the right places).
- Connect what happened to the power supply and check.
- Mark on the wall of the cabinet above or below the shelf the tape mounting points.
- Drill holes for the wire.
- Insert the wire into the holes.
- Put a shelf
- Stick the tape on the cabinet wall.
Stock footage
You can paste over the shelf and around the perimeter. Nothing prevents you from making fancy patterns on, say, the back of the cabinet. In short, the use of LED strips makes it possible to create a unique corner in the apartment without much effort. And all your fantasies now have practical applications, because you can easily and quickly choose the right material and apply it correctly using our practical tips.
- How to choose a vacuum cleaner taking into account the characteristics of the house and coatings?
- What to look for when choosing a water delivery
- How to quickly create comfort at home - tips for housewives
- How to choose the perfect TV - useful tips
- What to look for when choosing blinds
- What should be running shoes?
- What useful things can you buy in a hardware store
- Iphone 11 pro max review
- Than iPhone is better than Android smartphones
 (No ratings yet)