

Do-it-yourself camping table
In the hot summer, many residents try to spend all their free time in the fresh air, preferably away from home. But in order to communicate with nature fully, to enjoy a country trip or a picnic, everything should take place in comfortable conditions. That is why tourists take with them not only tents, but also furniture, which is now sold in any specialized salon or on the market. In the presented variety of forms, materials and designs, you can get confused without owning special knowledge on the selection of such products. Why not try to make a camping table with your own hands to match all your needs? In addition, you can still save some good money. In this article we will tell you how to make a picnic table.
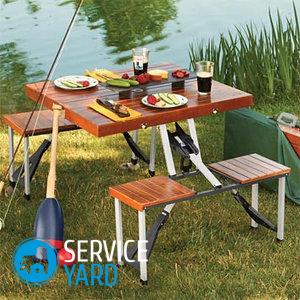
to contents ↑Making a do-it-yourself little suitcase table
Consider the simplest design of camping furniture. Its manufacture does not require large financial costs and the availability of a specialized tool. When assembled, this table will look like a small suitcase.
Prepare the following workpieces for work:
- 10 mm plywood.
- Birch planed timber measuring 30 by 30 mm.
- 4 50 mm self-tapping screws for fixing the frame bars.
- 4 25 mm screws for attaching plywood and fittings to the frame.
- 2 loops with a plate width of not more than 30 mm.
- 4 furniture screws 70 mm long, nuts and 8 washers to them.
Important! How to make a camping table yourself? It is not necessary to equip the suitcase with locks and a carrying handle. But if you think that they are necessary, then use the details from the old suitcase or case. As a lock, you can use small hooks. It is more convenient to use a belt for carrying.
Follow these steps to make a camping table with your own hands:
- Cut two pieces of plywood 500 x 580 mm in size for the countertop.
- To make a frame, saw off 8 bars: 4 - 520 mm each, 4 - 500 mm each.
- Saw off for the legs 4 bars of 500 mm length so that they fit when folding into a box.
- Drill holes in the wood to prevent splitting of the bars when screwing in the screws. Then pull off the frame, attach the tabletop plywood to it.
- Attach the table legs to the 500 mm bars on the frame. Step away from each internal corner of the frame 15 mm, then from the table top 15 mm, mark the centers of the future holes for screwing in the screws. Also measure on the bars 15 mm from each end and one of the four sides. Make holes with a drill.
- Screw the hinges to the frame. They need to be deepened a little so that in the closed form between the halves of the table there are no gaps.
- Additionally, you can make legs for the suitcase made of plastic or rubber. In length, they should coincide with the diameters of the hinges of the hinges so that when the table is closed, it does not fall and opens freely.
- Sand wooden parts with sandpaper.
- Treat the product with an antiseptic.
- Coat the table with varnish or paint.
Using this scheme, you will make a wonderful and convenient do-it-yourself suitcase table. Due to its special design, it fits even in the smallest trunk, or it can be easily worn on the shoulder.
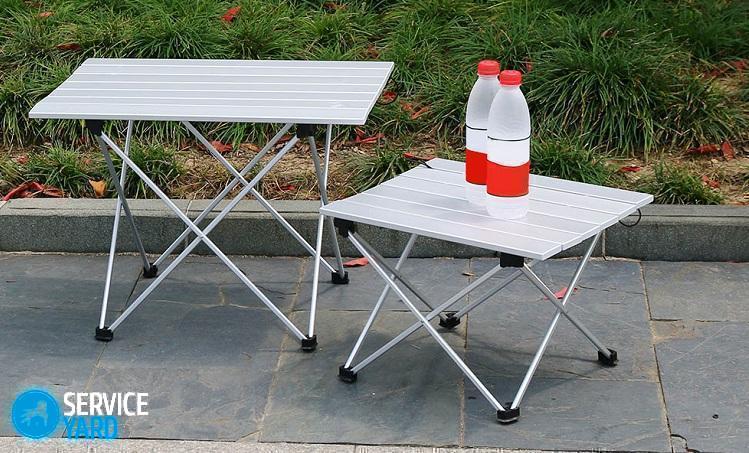
to contents ↑Self-made roll table
There is an even simpler option to make a travel table with your own hands. You can use old cuttings from garden tools or wooden rods with a round cross section for work.Fasteners and several meters of wooden planks are also useful to you.
Here is the exact list of required materials:
- 10 pieces of wooden 600 mm planks 45 by 15 mm.
- 4 wooden rods 400 mm long, 30 mm in diameter.
- 2,540 mm wood planks measuring 15 by 45 mm.
- 2 canvas, leather or nylon belts 54 cm long.
- 4 bolts 70 mm long.
- 4 inserts with internal thread.
Important! If you decide to buy the material in the store, then pay attention to birch rods or cuttings, because the appearance of the product largely depends on this. In addition, birch wood is considered the best option for the manufacture of tabletop battens.
You will need to perform a series of actions in this sequence:
- Cut 10 rails 600 mm in size, two 540 mm rails, and 4 rods of 400 mm each.
- Sand the surface of the workpieces.
- Take a construction stapler and fasten 10 straps of the future countertop with a strap to each other. Leave a gap between the strips, but it is important that it is the same over the entire length. Insert a 15 mm thick block into each gap between the slats. To make the countertop rectangular, use a square.
- Fold the finished countertop with an accordion or in a roll.
- Clamp the table leg in a vice, use sandpaper, wood or rubber as a lining to prevent damage to its surface with sponges. At the end of each leg, drill a hole 40 mm deep, insert a threaded insert into it. Perform this operation with all the rods. The drill must be strictly perpendicular to the leg with respect to its end.
- The base of the countertop, which will give it rigidity, will be 540 mm planks. Near the edges, drill two bolt holes. Reiki attach at the same distance from the edges of the countertop across the strips, mark the centers of the holes on the extreme rails. Make 4 holes in the countertop with a drill.
As a result, you will get a versatile folding table with your own hands, you just have to treat it with an antiseptic composition, paint and varnish.
to contents ↑Features of finishing camping tables
Well, if everything worked out for you, all the details are the same, the table folds freely and unfolds. But so far you can enjoy this process only at home, where it is always dry and warm, the room is constantly ventilated. The product in this form can withstand no more than three out-of-town picnics. After all, there is water everywhere, and it makes friends with wood until the tree is rooted to the ground with its roots. Blackening and swelling are dangerous for such structures. Therefore, you need to be able to properly handle wooden tables.
Tips of professionals on the processing and strengthening of camping furniture:
- Details can not be sanded to achieve perfect smoothness, because it is paramount to remove potential splinters.
- It is recommended to stain and coat all the constituent elements carefully so that they serve properly and for a long time.
- Be sure to carry out antiseptic processing to protect plywood and wood, or to give the product the selected color.
- Before varnishing, plywood worktops and bars must be soaked with linseed oil. It is enough to heat it in a water bath to achieve maximum fluidity, rub it into the brim with a stiff brush.
- It is not necessary to varnish the entire surface - it is better to rub it. Apply two to three layers.
Stock footage
You figured out how to make a fishing table with your own hands, folding or roll design, it remains only to realize that you have to go hiking with it, which means that its high-quality processing is really an important event. If everything is done at the highest level, then it will serve you for many years.
- How to choose a vacuum cleaner taking into account the characteristics of the house and coatings?
- What to look for when choosing a water delivery
- How to quickly create comfort at home - tips for housewives
- How to choose the perfect TV - useful tips
- What to look for when choosing blinds
- What should be running shoes?
- What useful things can you buy in a hardware store
- Iphone 11 pro max review
- Than iPhone is better than Android smartphones
 (No ratings yet)