

DIY fridge
To paint a refrigerator with your own hands is quite real. Why not? Indeed, this will require quite a bit of your work and efforts, but the subject of much-needed equipment in any home will look in a new way. Information on how to do everything right and not spoil the coating of a household appliance in the process can be found in this article.
to contents ↑The reasons for painting the refrigerator at home
There are many reasons to bring changes to the appearance of the refrigerator:
- It often happens that the unit still functions flawlessly, and you made repairs and this white color does not fit into the color scheme of the kitchen. If the rest of the household appliances (microwave, kettle, etc.) is small and not striking, then you can’t hide the refrigerator anywhere.
- Sometimes a well-functioning equipment acquires a non-marketable look, as scratches, abrasions from thorough cleaning, and rust spots appear during use. But there is no money for the new refrigerator yet, and there is no need to throw completely working equipment into the trash. The solution is to update the appearance of the refrigerator.
- Or maybe you have an interesting design idea? The interior of the kitchen has become creative and fashionable, and the traditional white refrigerator, like an “eyesore” in the eye, is out of context. Then such an option as painting the device really seems to be an excellent way out of the situation.
to contents ↑Important! On the old working equipment to test your artistic talent is very possible. It’s not so bad, if it doesn’t work right away, you can wipe and paint it again. So there are many reasons why we can color the refrigerator.
Necessary equipment for successful painting
The choice of tools directly depends on what paint for the refrigerator on the outside you will use. To begin, we list what you need in any case.
Masking film or a stack of newspapers
Such items are necessary in order to cover all surfaces on which splashes of paint can get. Newspapers, of course, are a more budget option, but they may shift during your work, and spots will remain somewhere. But the use of a special protective film is a more reliable way that will completely protect the walls, floor and furniture from pollution.
Important! Some manufacturers produce a protective film with an adhesive strip on one edge, which facilitates the process of fixing it in the right places.
Respirator and gloves
Gloves are needed in any case to protect the skin of the hands from the effects of paint and solvent. But a respirator in case of coloring the refrigerator with acrylics is not needed. But, if you paint with a spray or enamel in the form of a spray, then you can not do without it. Small splashes will certainly get into the respiratory system, and you should also be protected from the toxic smell.
Masking tape
This item is needed in order to close those non-removable parts of the refrigerator that cannot be painted (logo, handles, sealing rubber on the door).
Important! You should not use ordinary adhesive tape, as there will be traces of glue that are difficult to remove subsequently.
Fine sandpaper
It is needed in order to sand the surface to remove the old layer of enamel.
Solvent
Such a liquid is needed to degrease the surface and remove paint stains.
Important! Acetone, white spirit or other similar means will do.
Cleaning products
A bowl of hot water, rags, sponges, brushes, an anti-grease product - all this is necessary to clean the external and internal surfaces of the refrigerator from old traces of grease, soot and other contaminants.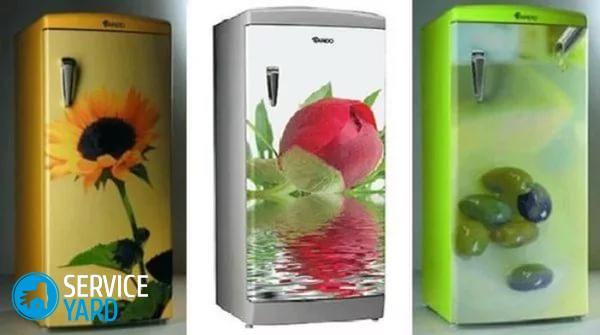
Putty
If your refrigerator is "seen" and there are deep scratches on its surface, then you will also need a quick-hardening putty. She will need to repair all the pits and cracks before painting.
Other tools
And then the choice of tool depends on the type of paint:
- If you decide to paint with automotive nitro enamel, then you will not need anything else.
- If you opted for acrylic paint, then you need a narrow roller and a brush 3-5 cm wide to paint hard-to-reach spots.
- For epoxy (polyurethane) paint, you will need the same tools.
What paint to paint the refrigerator at home?
There are a lot of types of paint in stores, but not all of them are suitable for painting a household appliance. So how to paint the refrigerator outside?
- If you want to do everything perfectly, you can find a special paint for household appliances, for example, New Ton. This is alkyd enamel for the restoration of household appliances, mainly white.
- If you have artistic talents and know how to draw, then you should try to portray something on the refrigerator using graffiti paints, for example, the Montana brand. These are bright nitro paints with high-quality pigments, having a wide palette of shades. They are suitable for all surfaces.
- Ideally, the refrigerator will repaint automotive nitro enamel in any color. It is easy to work with: it is stable, durable, lies flat and dries quickly. A big minus is its toxicity and the mass of spray on adjacent surfaces.
- Polyurethane epoxy paint impresses with the fact that it is the most resistant of all. But it is two-component, difficult to apply, and very expensive. So the choice is purely “on the fan”.
- Acrylic paint is probably the best option. It is quite resistant to external influences, has a large selection of shades and is completely non-toxic, does not emit unpleasant odors. And the spray during painting will be much less.
to contents ↑Important! To consolidate the result and additional effect, you can purchase varnish (glossy, matte or even with a shimmer).
How to paint the refrigerator with your own hands?
The process of painting the refrigerator will not take much time. You will be busy with preparation longer.
Procedure:
- Disconnect the unit from the network and remove all the boxes, shelves, in general, all the internal filling.
- If it is possible to take the refrigerator outside - do it. So you will then less clean and wipe.
Important! It is especially recommended to paint the refrigerator in the fresh air for those who are going to use automotive nitro enamel, as it is toxic and has a strong unpleasant odor.
- The next stage of preparation for painting is washing. Arm yourself with sponges, a basin of hot water, a brush and household cleaning products that can handle old grease and soot.
Important! It must be washed thoroughly, otherwise - the paint layer may lie unevenly.
- Unscrew the handle from the door if it is removable. If not, then seal it and other parts (inscriptions, sealing rubber) with masking tape so as not to wash off the paint from them later.
- Now arm yourself with fine-grained emery (you can grinder) and sand the surface. Especially pay attention to those places where there is rust, clean them to clean metal.
Important! Some experts recommend using a chemical wash, apply it, and then remove a layer of old paint with a spatula.
- If there are deep scratches, then repair them with a quick-hardening putty, let it dry thoroughly.
- Clean and degrease the surface.If the paint manufacturer recommends first primer - do it, although this procedure is not required. Also, there is no great need to apply fire and anti-corrosion agents.
- Now proceed to the painting itself. First try the color in an inconspicuous area. Then paint the side that faces the wall to get the hang of it and “fill” your hand. And then proceed to the processing of the front side.
Important! It is not recommended to paint the back of the refrigerator.
- If you paint in several layers, then give them the opportunity to dry thoroughly.
- In the end, if desired, fix the result with a layer of varnish. It will give shine and make the surface more resistant to external influences.
Features of the application of paint:
- Spray paints are easy and quick to apply. The balloon must be kept at a distance of 30 cm from the surface to be painted. The movements should be smooth. Move your hand from right to left, not stopping in one place. Then you get a uniform thin layer. If necessary, apply another 1-2 coats (one coat dries for about 30 minutes).
Important! Usually one cylinder is enough for 2 layers for a refrigerator with a height of 170 cm.
- Acrylic paint should be applied with a roller, also from left to right with a thin layer. Move from top to bottom, evenly, without jerking. Inaccessible places paint with a brush. After applying the first coat, allow the surface to dry thoroughly. To do this, leave the refrigerator for 2-3 hours. After this, a second coat can be applied.
- Using stencils or masking tape, you can decorate the refrigerator with stripes, patterns, geometric ornaments. That is, you can make a designer element of the interior from ordinary household appliances. And if you have the skills to work with an airbrush, then you can draw at least a landscape, at least a still life. It all depends on your skills, preferences and tastes.
to contents ↑Important! Similarly, you can paint the inside of the refrigerator. The tools and paint for the refrigerator inside are the same, only painting inside is more uncomfortable.
Stock footage
As you can see, to paint the refrigerator with your own hands it is not necessary to study a large amount of information, and the process itself will not take so much time. Using the useful recommendations from this article, you can breathe new life into a refrigeration appliance and thus update the interior of the kitchen.
- How to choose a vacuum cleaner taking into account the characteristics of the house and coatings?
- What to look for when choosing a water delivery
- How to quickly create comfort at home - tips for housewives
- How to choose the perfect TV - useful tips
- What to look for when choosing blinds
- What should be running shoes?
- What useful things can you buy in a hardware store
- Iphone 11 pro max review
- Than iPhone is better than Android smartphones
 (No ratings yet)