Floor painting is an important part in home repair

More recently, in every house and apartment there was a wooden floor, since there was simply no other floor covering. Today, many owners replace wooden floors with more modern materials, but if you are making sure that your home is environmentally friendly and comfortable, then this article is for you. Today we will tell you how to paint the floor, what important points you should pay attention to during the process, so that the flooring has a beautiful appearance and money is not wasted.
to contents ↑Painting - priority of work
To paint a wooden floor should be treated responsibly, so that the final result will please you. The painting process itself is not particularly difficult, but you must adhere to a certain technology and do everything efficiently.
The whole process of floor painting can be divided into the following steps:
- Preparation of tools.
- The selection of the necessary materials.
- Preparing the floor for painting.
- Surface painting.
- Quality control of the work done.
Let us dwell in more detail at each stage of the floor painting process.
to contents ↑Necessary tools
High-quality surface painting provides for the following tools.
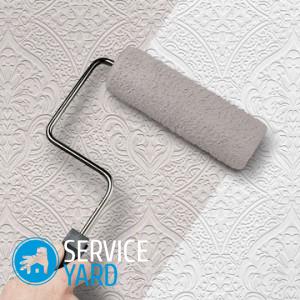
Roller
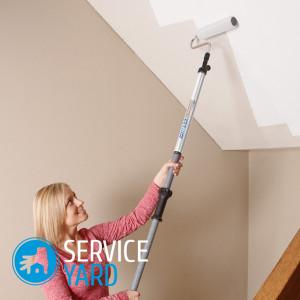
To speed up the process significantly, use a roller. Advantages of this tool:
- the paint is applied evenly;
- There are no pronounced transitions between adjacent sections of the floor.
Important! Experts recommend choosing a roller with a medium-length pile and a long handle. This will greatly facilitate the process of applying paint and relieve uncomfortable poses. If you decide to use just such a tool, you may also be interested in reading more about how to choose a paint roller.
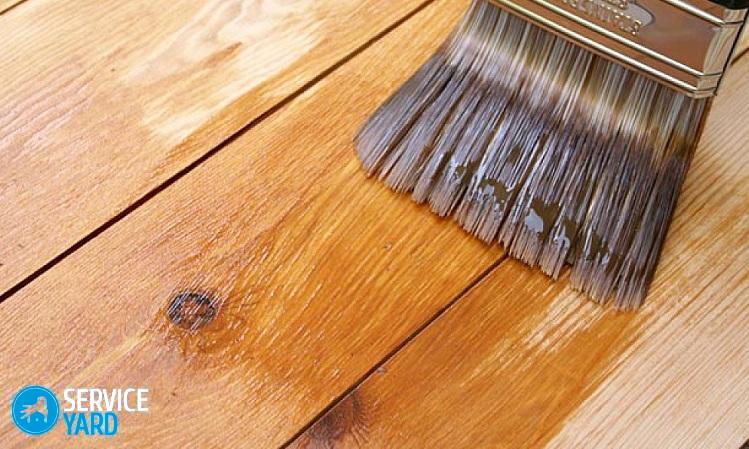
Different size brushes
Brushes are necessary for painting corners, baseboards and those sections of the floor where it is inconvenient to work with a roller.
Important! Experts recommend using a set of flute brushes (flat brushes of different widths) to paint the floor. This tool is convenient to use when painting corners, edges of a wooden floor and skirting boards.
Paint tray
You can also use any available containers for paint, but this will increase the consumption of material. The special tray has a convenient design in which a slope is provided to avoid ink settling at its edges. In addition, the ribbed surface of the tray is specifically designed to remove excess paint from the roller and brush.
Chisel
This is an auxiliary tool that is designed to expand the gap in the floor and remove unnecessary knots, slivers and other irregularities from the boards.
Putty knife
The tool is necessary to remove the old flooring, as well as to putty cracks and gaps between the wooden planks.
Masking tape (adhesive tape)
Using masking tape, it is necessary to close those places that do not need painting. Scotch tape has a waterproof base, which completely eliminates the ingress of water or paint to the surface. After all work, the masking tape is easily removed and leaves no residue.
Advice:
- If your house has old parquet or lacquered floors, then without parquet scraping machines it will be difficult to quickly and efficiently process the surface in order to obtain an even and smooth coating.
- If several layers of paint were applied to the old floor, then in order to quickly and easily clean them, use a building hair dryer. Or look paint remover review.
Selection of materials for painting a wooden floor
To prepare the floor and the painting process, you will need the following materials.
Filling for cracks and cracks
Putties differ in their structure, and this must be taken into account when choosing a material. Types of putty:
- Oily. It contains glue sifted from chalk, drying oil and desiccant. The main advantages of oil putty are reliability and durability. However, this putty dries much longer compared to other types.
- Acrylic Advantages of the material: it dries very quickly, perfectly lubricates cracks and makes the surface smooth. The composition of the acrylic putty: barite, talc, ocher and white. This material is perfect for leveling surfaces.
Important! Before applying the acrylic putty, the slots must be cleaned, washed and dried. This will improve the quality of work.
- Homemade. Such a putty is being prepared from building glue and small wood sawdust. Perfect for regular wooden plank floors. The filler is easy to prepare at home, it dries quickly and is easy to apply. Advantages of home-made putty: ease of use, does not crack with time, reliability and durability.
Important! This putty is perfect for preparing the floor for varnishing.
Primer
The wooden floor is painted only after applying the primer, which will enhance adhesion and extend the life of the coating. Before choosing a primer, determine the flooring:
- If you will be varnishing it, then choose a soil suitable in color, otherwise it will be difficult to overlap in color.
- If you opted for paint, then carefully study the instructions for it, since many manufacturers recommend the primer of the same brand.
Important! Spray the primer so that the coating is even and drip-free.
Drying oil
The material is needed to impregnate the plank floor and to protect it from insects.
Paint
The paint should have a high level of resistance to mechanical and chemical influences and not give in to abrasive wear. When choosing a paint, the following factors must be considered:
- Type of wood floor.
- The operating conditions of the coating (humidity, possible temperature changes, the intensity of mechanical loads).
- General condition of the floor (presence of previous coating).
Lacquer
Water-soluble alkyd and acrylic varnish is most often used to cover completely new boards. Drawing on wood after applying varnish becomes more clear and bright.
to contents ↑Important! A solvent is also useful.
How to choose a paint?
The most important stage of all preparatory work is the choice of paint, since the quality and durability of the future coating depends on this material. Construction stores offer a wide range of paints and varnishes. To make the right choice, listen to the following tips.
Tip 1
It is best to use oil paint, alkyd enamel, acrylic or alkyd impregnation, alkyd varnish for a wooden floor:
- If the floor is new, then apply acrylic or alkyd impregnation.
- If the surface was previously painted, then use oil paint or alkyd enamel.
Important! Oil paint is inexpensive, resistant to wear, but dries for a very long time. Enamel paint is considered to be quick-drying, but its cost is slightly higher than oil. It should be noted that the enamel has a life of 6 years, and oil paints - up to 3 years.
In more detail, different types of paint and criteria for choosing a suitable mortar for different types of wooden floors are discussed in the article. “Paint for the floorboard”.
Tip 2
Buy paint should be only one batch. So that the color of the coating does not differ, pay special attention to the batch number of the paint. In the store, the subtleties of the shade can not be noticed, but in the room this can manifest itself in the multi-colored surface of the floor.
Tip 3
Before going to the store, calculate the amount of consumable material. Some manufacturers, for the convenience of consumers, indicate on banks the approximate consumption of material per square meter of plank flooring. If such data are not available, then calculate independently, taking into account the fact that 1 square meter requires about 250 grams of paint (in one layer).
to contents ↑Important! If you plan to cover the surface with two or more layers of paint, then get 1.7 times more material than one layer, since more paint is spent on the first layer than on subsequent ones.
Preparing the floor for painting
The appearance and durability of the coating largely depend on the quality of the preparatory work performed. To restore the old floor, on which more than once layers of paint were applied, it is necessary to work hard and remove everything to the base.
Step-by-step instructions for preparing the floor for painting:
- Remove the old skirting boards so that they do not interfere with further work.
- Clean the surface of debris and old putty.
- Carefully examine the condition of nails and other fastenings of boards to the logs. If necessary, replace the old nails with new ones.
- Examine the condition of the floorboards. If there is a need (rot, crack) for replacement, then make it.
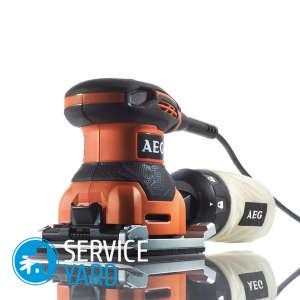
- Remove the old paint coat with a grinder. If in doubt that you will do it right without experience, use our floor grinding workshop. It is better to clean a multilayer floor with a building hair dryer. He will raise a layer of paint during heating, which can then be easily removed with a spatula or scraper.
- Perform a thorough inspection of the surface. If bumps and irregularities are found, then remove them with a manual grinder. If it is necessary to align the joints of the wooden floor, then use a looping machine.
- Remove all debris from the surface. A construction vacuum cleaner is perfect for this job.
- Fill the gaps between the boards with putty. For wide slots, use wooden wedge-shaped slats.
- Carry out a test grinding and remove any remaining debris and dust.
- Process the prepared surface with hot drying oil or a primer. For this procedure, ready-made impregnations with antiseptic properties are suitable.
- Allow the material to dry (at least 24 hours).
to contents ↑Important! If the plank floor is new and there are no gaps between the boards, then sand the surface and cover with drying oil or an antiseptic. It is better to cover new boards with a primer in two layers. The first layer is absorbed into the boards, and the second will make the surface ideal for painting.
DIY floor painting
Depending on the condition of the floor and the desired end result, there are several options for painting the surface:
- If the floor has no visible defects, then after the preparatory stage, the first coat of paint is applied, which dries for several days. After the surface is completely dry, a second coat should be applied.
Important! The complete drying of the second layer can take from 4 days to a week.
- If there are cracks and gaps between the boards on the surface, then after the preparatory stage and applying the soil (drying oils), you need to give them time to dry. After - the surface is treated with a special oil filler and cleaned with a sandpaper. Then the procedure is repeated again. Before the wooden floor is completely painted, problem areas of the surface are primed and painted several times until the filler is hidden. Next - two layers of paint are applied.
- A more laborious and complex option involves applying a putty layer of putty on the surface of the wooden floor after the first layer of putty is cleaned. A heavily stretched gauze is applied to the putty and recessed. After the surface dries, the putty is applied a third time, the surface is cleaned and primed, and then painted in three layers.
Important! When planning your home renovation, you may also find some ideas from our site useful:
Regardless of the option, painting the floor consists of certain steps, the sequence of which must be followed. Instructions for applying paint:
- Prepare the paint: mix it thoroughly in a jar so that all lumps and film become a homogeneous mass.
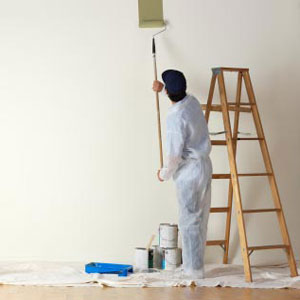
- Change into work clothes, protect your hair and skin from accidental contact with paint.
- Pour a small amount of paint into the prepared tray.
- Use a wide brush to paint the corners of the floor around the perimeter of the room.
- Use the roller to paint the entire surface, starting from the corner and ending with the door. When you paint, swipe the roller over the patterned bottom of the tray to get rid of excess. Work the roller in the direction away from you, without lifting it from the floor.
- After the first coat of paint has dried, install the baseboard.
- Apply masking tape along the skirting line to prevent paint from getting on the wall.
- Use a narrow brush to paint the skirting boards in two steps.
- Apply a second coat of paint to the floor surface. Apply each subsequent coat of paint only after the previous coat has completely dried.
- After the floor is completely dry, wash the surface with a special soap solution. This is necessary in order to eliminate the stickiness of the painted plank floor.
Important! Can be used to clean a freshly painted floor and water with a little vinegar. This old folk way will help improve the adhesion of the paint to the surface and will allow you to maintain bright color for a long time.
Advice:
- If you plan to apply a drawing, then first cover the entire surface of the floor with one color, and then separate with masking tape those areas where the drawings will be applied. After the first coat of paint has dried, remove the masking tape.
- If spots of old paint appear on the surface after staining, or streaks or marks from the brush appear, then apply another coat of paint.
- To check if the paint has dried, press a finger or a small sheet of paper to the surface. If the finger or paper does not stick, the paint has dried.
- If painting is carried out with water dispersion paint, the layer should be in the direction of the board. Avoid getting paint on adjacent boards, otherwise there will be leaks.
- It should be remembered that the paint after applying to the surface becomes lighter, so if you want to get a brighter shade, apply varnish to the surface. Repeated application of varnish is possible only after two days.
to contents ↑Important! The paint will dry much faster if the room is warm and the ventilation works well. Ventilation is important in terms of safety for health, since most paints contain solvents, the inhalation of vapors of which can cause poisoning. It is best to paint floors in summer with windows wide open.
Stock footage
We hope that our tips and tricks have helped you not only in choosing paint, but also in choosing how to apply it. Allow freshly painted floors to dry thoroughly and bring furniture!
- Which roller is better to paint the ceiling with emulsion paint?
- What type of grinder is suitable for scraping the floor?
- Paint remover
- Floor paint
- Do it yourself polishing parquet
- How to paint the ceiling?
- How to paint the walls with a roller?
- The design of the wall in the room from a variety of materials
- Apartment Lighting Design
 (No ratings yet)