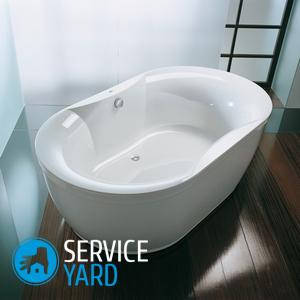
DIY acrylic bathtub coating
Due to continuous use, the bathtub quickly comes into inappropriate form. Chips, scratches and darkening on the coating make it ugly, dirty and old. A full replacement of the bath can cause repairs, as well as a complete replacement of plumbing, which implies serious financial costs. Application of enamel to the bath is a laborious and rather complicated process that requires experience and skill. Therefore, acrylic coating is often preferred, since it is acrylic that is recognized by users as the simplest and most reliable material that is used in restoration work. In addition, do-it-yourself acrylic coating of the bath does not require special knowledge and the availability of special tools.
to contents ↑What is liquid acrylic?
For work on the restoration of the bath, two varieties of acrylic-based material are often used:
- Liquid acrylic is a white coating that has a high mass of non-volatile ingredients.
- Stacril is acrylic + epoxy.
The material may be ready for use or may consist of two components that must be mixed together. When connected, these components form a composition that differs in hardening by strength and resistance to temperature extremes and significant loads.
Important! There are several most popular brands of acrylic coatings, for example, Stakril, Plastall, Epoksin.
Characteristics of liquid acrylic:
- The coating of liquid acrylic in the bath retains its appearance and protective properties for more than fourteen years, subject to proper and gentle operation.
- During restoration work, this material hardens for 36-48 hours.
- The material has almost no sharp unpleasant odor, which makes it possible to carry out restoration work without a mask or respirator.
- The finished material does not thicken, spreads evenly, air bubbles do not form in its thickness.
Many masters prefer the two-component type of acrylic “Stacril” and its analogues, which were mentioned above. Unlike cheaper varieties of material for a bulk bath, it has many advantages:
- During the entire period of operation, the bath remains snow-white.
- When applied, an even layer without sagging forms.
- There are no bubbles and irregularities.
- The components mix well.
- The material is packaged in metal containers, which preserves its properties and qualities.
Important! Plastic containers can not fully guarantee such an effect, even with a normal shelf life.
- The coating is characterized by high-quality heat and noise-saving properties.
- It can be applied to the surface of any shape of the bath.
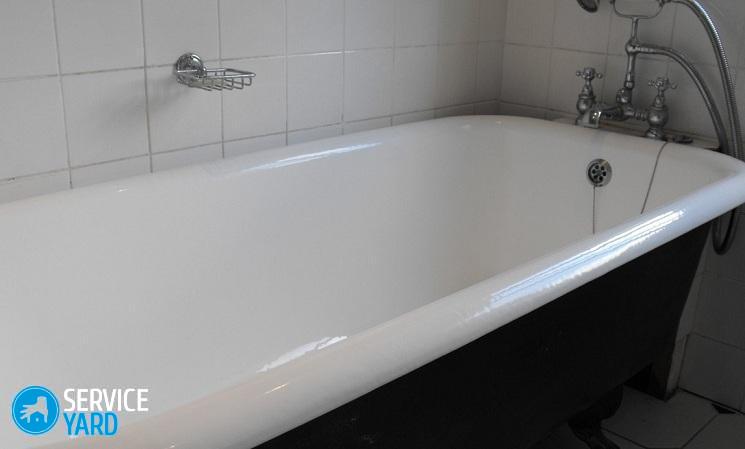
- The dried material has an even, smooth structure with a mirror shine that lasts for many years.
What is needed for preparing the bath and applying the material?
In order to cover the bathtub with acrylic on your own, you need to prepare the following:
- Acrylic and hardener.
- Solvent.
- Stick for mixing coating components.
- Plastic or rubber spatula.
- Oxalic acid to eliminate rust (if the bath is damaged by corrosion).
- Drill or grinder for preparing the bath (nozzles must have sandpaper disks).
- Automobile putty (in the presence of large chips on the surface).
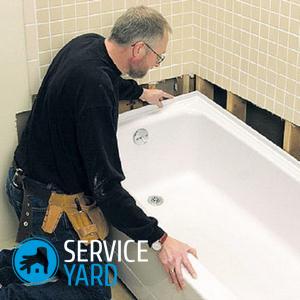
Bath surface treatment
Before you start updating the bath, you must carefully prepare its surface. Otherwise, the acrylic coating will spread unevenly and all indentations and chips will be noticeable.
Important! If there is rust on the surface and the bathrooms cannot be cleaned before restoration, after a while it will “lift up” the coating and appear on the walls.
Here's what to do:
- Removing the old coating. If you have a very old bathtub and its inner walls are badly damaged, then you have to completely remove the old enamel layer. To do this, carefully grind every centimeter of the surface of the bath with a drill with a nozzle or a grinder. In the process of work, a large amount of dust can form, therefore, doing this work, be sure to protect the respiratory system.
Important! If the damage on the old coating is slight, then you can simply clean it with sandpaper.
- Cleaning the surface of the bath from dust. Rinse off the dust with warm water, and then carefully inspect the surface for any enamel residues, rust stains, or unpolished chips. If the result satisfies you, proceed with degreasing the surface; if not, continue the preparation.
Important! Masters recommend repairing deep scratches and chips with a car putty, this will reduce the amount of work with a drill or grinder. After application, the putty is cleaned with fine-grained sandpaper.
- Degreasing. Perform this procedure with a solvent. If you do not have such a substance, then use ordinary soda. Dilute several packs of ordinary soda in warm water to the consistency of the slurry and apply to the inside walls of the bath.
Important! Soda every centimeter of the surface, otherwise - in untreated places, liquid acrylic can form an air bubble, and then chip during operation.
- Heating the bathtub with hot water. To do this, draw a full bath of the most hot water from the tap and wait 30 minutes. Then drain and quickly wipe the surface of the bath with a clean, lint-free cloth.
Important! Before filling, the bath should be completely dry.
- Dismantling the water drain. Under the bottom - substitute the container into which the remaining acrylic will merge, and under the top - lay cellophane, which will protect the floor from drops of material. In addition, it is advisable to cover the entire floor around the bathtub, in order to avoid damage to its appearance with drops of acrylic coating.
to contents ↑Important! Before mixing the components, it is necessary to keep them indoors for at least a couple of hours. Mix acrylic with hardener gradually, in small doses. After thorough mixing, the mixture should stand for about 20 minutes. Only after holding this time can you start applying the material.
Pouring acrylic on the walls of the bath
Before you cover the bathtub with acrylic yourself, you need to read the instructions of the manufacturer of acrylic and figure out how to mix acrylic and hardener.
Important! The restoration of the bath is only possible after thorough mixing and exposure of the two-component material. It is advisable to transfer acrylic from the main container into a tall glass - this will simplify the application of the mixture on the walls of the bath.
Working process:
- First of all, pour acrylic over the sides of the bath, bordering the wall. Pour very carefully, in a small stream. Carefully level the material near the wall with a spatula.
- Now proceed to the outer side. Try to pour so that the mixture does not drip onto the floor. In this case, the flowing liquid should reach approximately the middle of the walls.
Important! When working, focus on ensuring that the material is applied to the walls in a uniform layer, approximately 3-5 mm.
- After the first round of pouring proceed to the second.Acrylic pour the same stream on the walls of the tub around the perimeter. Pour material until it covers the entire surface of the bath.
Important! To even out the influxes at the bottom of the bath, you can use a spatula to draw along the bottom of the tank in zigzag movements, achieving a more uniform distribution of the material. This must be done very carefully, without touching the bottom of the tank. In the event that the influxes and bumps still remain, do not worry: in the process of drying, the composition should level out by itself, and the excess material flows into a special container, which was substituted under the lower drain.
- Leave the bath to dry for 36 hours. Although many experts recommend not using the bath a couple of days after restoration - this will increase the life of the coating.
- At the end of the work, connect plumbing utilities to the bathtub.
Important points when working with acrylic
To cover the bath with acrylic with your own hands was the most effective, you need to know some important nuances of working with acrylic:
- Before starting work, you need to thoroughly mix acrylic in a container. Particular importance should be given to the walls and bottom. So the material will be more uniform, with a uniform consistency.
- Liquid acrylic can not be heated - because of this, its viscosity decreases. This may cause all material to simply drain down and too thin a layer will remain on the walls. It is necessary to use the material at room temperature, keeping it indoors for several hours.
- If you want to change the color of the bath, you can apply tinting paste. This material must be added while mixing the components.
Important! It is worth knowing that the amount of color should not be more than 4 percent of the total mass of liquid acrylic.
- If acrylic is presented in ready-made liquid form, then it will not be possible to dilute it with any other materials. This will ruin its properties and the coating will be short-lived.
- It is necessary to work with liquid acrylic in a headdress, which will prevent hair from getting from the head to the coating. In addition, it is desirable to have clothes that, after restoration, will not be a pity to send to the trash.
Care for the bathroom after restoration
Despite the fact that the acrylic coating for the bath positions itself as durable and durable, it can be damaged if improperly maintained:
- Do not use acids, metal sponges or abrasive powders to clean the bath. These cleaners will quickly leave scratches on the surface and spoil the entire appearance of the coating.
- For cleaning the restored surface, special liquid acrylic products are suitable, which can be purchased at any point of sale of household chemicals. They will not only keep the surface intact, but also enhance its beautiful mirror shine.
Stock footage
As you can see, to cover the bathtub with acrylic with your own hands, it is not necessary to have a lot of experience in this matter - anyone can handle the task. The main thing is to carefully read all the recommendations and clearly follow the sequence of actions. If everything is done correctly, you can update your old bath quickly and inexpensively.
 (No ratings yet)