

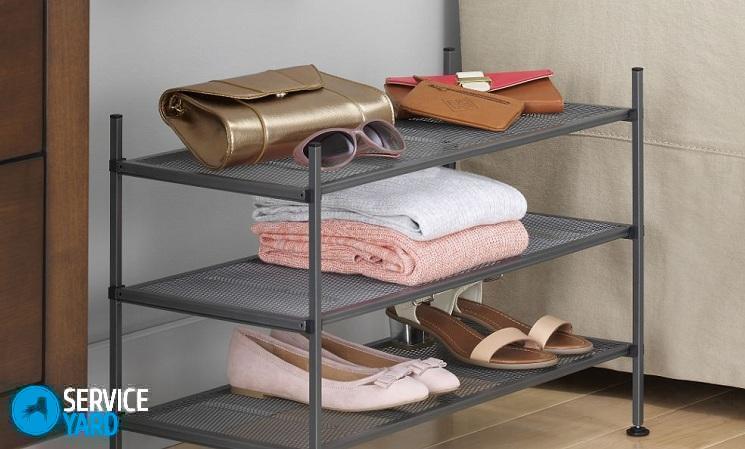
DIY shoe rack

Naturally, shoes should be kept in order and a special place should be allocated for their storage. However, it is not always possible to place the structure with shelves in an almost toy hallway. And money for the purchase of finished furniture is not always there. Or maybe you have long wanted to realize your ability to craft and want to demonstrate your creative abilities? A do-it-yourself shoe rack is a great opportunity for this. Moreover, the raw materials are always at hand: metal, laminate, wood, pipes and even old boxes and boxes. This article is a brief overview of how you can make quite decent shoe racks with your own hands. So, it's time to transform the interior of your own hallway.
to contents ↑DIY shoe rack: what is needed for work?
A set of tools and auxiliary materials will need a different one. It all depends on the design of the future stand and the materials used.
The optimal set of tools is as follows:
- Electric drill.
- Screwdriver. If it is not, then a special nozzle for a drill is suitable.
- Hacksaws - for metal and wood.
- Grinding machine.
- Chisel.
- Ruler for marking.
Where to begin?
Before starting work, decide on the design of the future device, its functionality and dimensions. The most convenient in terms of compactness and ease of use are round, corner and rotating shoe shelves in the hallway with your own hands.
to contents ↑Important! If you use an old cardboard box for shoes, you can limit yourself to cutting material. More sophisticated technologies are not needed here.
Plywood
From this versatile material, you can build not just a separate shelf, but also a modular multi-story structure. At the same time, the shoe rack will not take up much space. It will be fixed to the wall in the hallway.
In addition to plywood, you will come in handy:
- Electric drill.
- Hammer.
- Electric jigsaw.
- Glue on wood.
- Hammer drill.
- A set of pins.
Operating procedure:
- Cut the plywood sheet into identical pieces of a rectangular shape with a size of 200x300 mm.
- Grind them well, and then begin assembly.
- Form separate modules of the U-shaped form, putting them one into one, according to the principle of a maze. Blocks can be arranged as you wish, at your discretion.
- Fasten the maze to the wall with wooden pins installed in the holes carved in plywood.
DIY wooden shoe rack
The best option is to buy an already processed tree in the store. Working with raw wood without a special skill is quite difficult. Provided that you started work from the very beginning, prepare such tools and consumables:
- Plane.
- Sandpaper.
- Corners made of metal.
- Screwdriver or screwdriver.
- Saw.
- Set of screws.
- Roulette, pencil - for marking.
- Varnish or paint composition.
The main material is a wooden board with a width of 250-350 mm and a thickness of 2 cm. The production process itself looks like this:
- Saw the vertical side walls from the board.
- Prepare the crossbars and bars for support.
- Cut 4 pieces of 600-700 mm.These are shelves for shoes.
- Sand all workpieces with sandpaper.
- Fix the bars on the side walls with self-tapping screws.
- Fix the corners of metal at the rear ends of the structure.
- Lay the shelves on the bars and secure them.
DIY shoe rack is ready! It remains only to paint it in any color or, leaving a natural wood pattern, varnish.
to contents ↑DIY shoe rack from chipboard
Manufacturing technology is the same as plywood and wood products. But, due to the characteristics of the chipboard material, you will also need such tools:
- Hex wrench.
- Mounting knife. The square.
- Special tape for the edge.
- Confirmats.
- Wood screws.
- Stubs.
Important! The design can be linear or angular, the ends can be straight or rounded.
The algorithm in general terms is as follows:
- Mark the side parts and cut them out.
- Using a grinder, level out all bumps and chips.
- Using a hot iron, glue the edge tape.
- Grind the corners with fine emery.
- Make slots and start assembling the product.
Laminate
From sheets of laminate, you can assemble a stylish and uncomplicated product of minimal design. A do-it-yourself shoe rack made of laminate flooring can be made in the shortest possible time. At the same time, it is durable and light:
- The number of laminated boards depends on the number of tiers of the product.
- In addition to the laminate, you will need metal tubes.
- To fix the parts, make a slot in them with a grinder.
- From the ends put the plugs made of plastic.
- If you want to make a high frame structure, you will need to mount it to the wall - for added stability.
Do-it-yourself shoe rack will be quite roomy.
to contents ↑How to make a shelf for shoes with your own hands from a profile?
As a result, you will get a wonderful high-tech product. If at the same time the shelves themselves are made of tempered glass, it will turn out very beautifully. But you will have to work hard to keep the structure in constant cleanliness.
For work you will need:
- Glass cutter.
- Bulgarian.
- Screwdriver.
- Construction level.
- Electric drill.
- Set of drill bits for metal.
- Jigsaw.
Important! For the manufacture of shoes, you can use a multi-colored or galvanized profile. The color product is easier to fit into the interior, and the galvanized construction is moisture resistant.
The procedure is as follows:
- Using one self-tapping screw, fasten a section of the profile on the wall.
- Using a level, check the horizontal layout.
- If everything is done correctly, tighten a few more screws.
- Mount the frame.
- Install pre-cut glass shelves on the frame.
DIY cardboard shoe rack
This is the least expensive option. If you do everything carefully, you get a compact and very beautiful shelf.
The algorithm of actions is as follows:
- Draw on a cardboard box a scan of the future product.
- Cut the workpieces with a special knife.
- Put the resulting rectangles in boxes.
- Lay the blanks on top of each other, forming grooves for shoes. Fasten the structure with brackets.
- Cover the finished product with decorative film and mount on the wall of the hallway.
Plastic pipes
A good raw material for a plastic product is pipes from which sewer risers are made. The manufacturing process is very simple. The pipe itself will serve as a cell for placing shoes. The main tool that is involved in the production process is a hacksaw:
- Saw the PVC pipe into pieces of the same length.
- Using sandpaper, grind sharp edges.
- Paste the pipe sections with decorative film.
- Fasten the pipes together using plastic holders. The order of the cells can be any.
Of metal (another option)
It is not at all necessary to order an expensive item at the forge.It is possible to make the simplest shoe rack from metal yourself, without having the skill in locksmith work. The basis will be the old stepladder, which you no longer use. The procedure is as follows:
- Saw a piece of the stepladder so that only a few steps remain.
- Sand the edges.
- Fix the workpiece on the wall of the hallway.
- Attach plastic hooks to the crossbars. On them you will hang shoes.
Corner
To make a simple angular design, in addition to the MDF sheet, you will need:
- Drill.
- Electric jigsaw.
- Self-tapping screws.
- Set of drills.
- Pencil for marking.
- Construction level.
- Acrylic paint.
Proceed according to the following algorithm, so that the shelf for shoes with your own hands is reliable and beautiful:
- Saw 2 identical rectangular parts and several elements of a triangular shape. The number of triangles depends on the number of tiers.
- Fasten the rectangles with self-tapping screws. The result is an angular design.
- Mount the corner shelves on the screws.
- Cover the finished shelf with acrylic paint.
- Install a shelf in the corner of the hallway and secure with dowels.
Round
For work you will need MDF sheets and an electric jigsaw. The shoe rack will be in two tiers, that is, quite roomy.
Given the largest shoe size of your family members, cut 3 round blanks from an MDF sheet. The further procedure will be as follows:
- Cut 4 pieces of rectangular shape.
- Cut the grooves in the middle of the rectangles.
- Insert the rectangles into each other. Get crosses.
- Fasten the crosses with screws to the round parts.
- Sand the ends and cover them with decorative film.
Rotating
This is a very convenient design. It can be integrated inside the closet in the hallway. The basis of this shoe is plywood discs and a metal pipe. You can place a shoe rack in a narrow niche in the hallway.
Procedure:
- Saw the desired size from the MDF discs.
- Drill the center holes for the dividers.
- Establish dividers and fix disks.
- Reinstall the finished product.
Stock footage
It is possible that the ideas presented in the article will help you make your own shoe rack. This will help not only to streamline the storage of shoes, but also to decorate the interior of the hall with an unusual and functional product.
- How to choose a vacuum cleaner taking into account the characteristics of the house and coatings?
- What to look for when choosing a water delivery
- How to quickly create comfort at home - tips for housewives
- How to choose the perfect TV - useful tips
- What to look for when choosing blinds
- What should be running shoes?
- What useful things can you buy in a hardware store
- Iphone 11 pro max review
- Than iPhone is better than Android smartphones
 (No ratings yet)