

DIY shelves
We often encounter a problem such as a lack of space for things in the closet. That is why the necessary little things and other wardrobe items lie throughout the apartment where there is free space. It is not very ergonomic. How to be in this situation, is it possible to correct the situation? The answer is yes - yes! We will tell you how to rationally use the space, and one little secret will help in this - shelves made of fabric with your own hands. In this way, you can also sew a very convenient closet for storing clothes and even shoes. This irreplaceable thing is an excellent adaptation not only for parents, but also for their kids, who so love to scatter their favorite toys.
to contents ↑Advantages of suspended structures
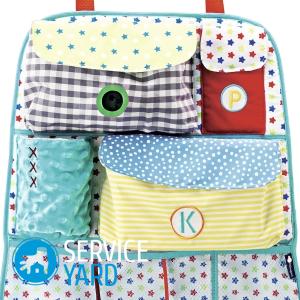
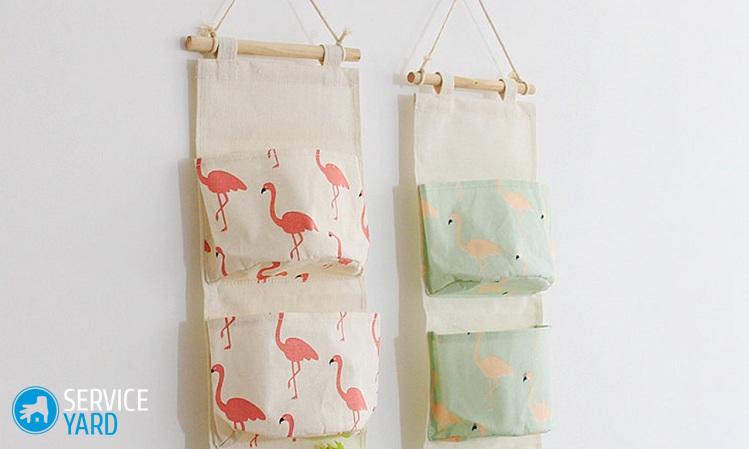
Hanging shelves are often called storage pockets. Outwardly, they are very similar to pockets of various sizes, equipped in a single design. On the Internet you can find a lot of interesting ideas for creating such a home assistant for storing a variety of items - from clothing to materials for crafts. This idea came to us from Europe 30 years ago. Since then, suspended structures have become so popular.
Naturally, because they have the most necessary advantages in everyday life:
- Their location can be completely different - bathroom, children's room, hallway, balcony, kitchen.
- Despite the small dimensions, the shelves-pockets are able to accommodate a large number of things and other accessories.
- Suspended structures do not occupy the free space of the room. Most often they are placed along the door, wall or inside the cabinet.
- The design allows you to wash hanging shelves and cabinets in the washing machine when you need it.
Factory suspended structures have one significant drawback - the high price. They cost almost as much as a set of plastic furniture. That is why it is much more profitable to sew shelves from fabric with your own hands. All you need is a little sewing skills and as much patience.
to contents ↑Important! Such a product can be made not only from new fabric. You can use, for example, old jeans, decorative braid, buttons, unnecessary soft toys, and so on.
How to sew a hanging shelf made of fabric?
It is very convenient to use such a shelf for storing large items - clothes, bedding, baby diapers. It can easily be placed in a wardrobe, hanging on the bar with other things on the shoulders.
Important! If desired, each compartment of the rack can be made in different colors. And the outer side parts complement the very compact side pockets. So you free up a large amount of space in a long overflowing closet.
Materials
So what we need to prepare:
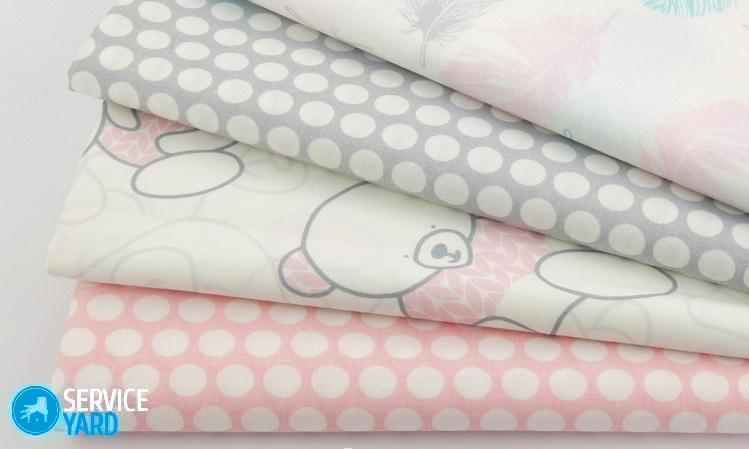
- 3 meters of fabric (it is better to take dense material).
- Fiberboard for creating shelves.
- Narrow corsage tape or braid for ties (can be sewn from fabric).
- Threads.
- Needle.
- Sharp scissors.
- Spreader.
- Tailor pins.
- A piece of chalk or remnant.
- Iron.
We recommend taking a sufficiently strong material for the base that could withstand the possible load and not tear. Depending on what things and items you plan to store in this design, use three-layer cardboard or plywood as shelves.Such hanging shelves made of fabric with their own hands are sewn without pre-manufacturing patterns. Therefore, all measures are applied directly to the material, that is, you do not need paper.
Important! If you plan to hang a shelf of fabric in the bathroom, then opt for a water-repellent fabric. Both raincoat and jacket materials will suit you well. It is advisable to use such material to store things for the baby, which often spills liquid from a bottle, and not only.
Pattern
In order to assemble the shelf, we need to prepare the following details:
- 1 main part measuring 1160 by 1350 cm.
- One piece for the upper and lower tiers - 1040 by 330 cm.
- 6 parts for shelves - 520 by 310 cm.
- Fixing putty - 280 by 320 cm.
Important! The pattern is given taking into account all the allowances. Above and below the central part of the structure, we took 2 cm increments, and on the side sections - 1 cm.
Sewing technique:
- We lay the fabric face down on a flat surface. We draw on it with chalk the details, starting work with the main one. As a result, we get 2 rectangular parts of the side walls of the rack, one part of the back wall and 8 parts for the shelves.
- We measure the location of the shelves on the main long segment, and after - draw and cut in size all the other details.
- We turn and adjust the front vertical edges of the part on the wrong side to a width of 10 cm, laying a line to the very edge of the fabric. We process in this way one horizontal side of each part of the shelf.
- We return to the main part. We twist the horizontal sections (the width of the outer hem is 15 mm, the inner - 5 mm) and adjust. We fold alternately the main part with the front side outward along the marked lines of sewing on the shelves, and then iron it. We put inward a horizontal slice of each shelf and sew on the front side of the largest part. The stitch should extend at a distance of 5 mm from the fold of the fabric. It must be started and finished, not reaching 1 cm to the walls of the rack.
- Following the previous steps, we sew the details of the shelves to the sides of the largest cut of fabric, finishing sewing at the border of the horizontal seam.
- Fold the loops in half with the front side inside the fabric. Stitch the slices, leaving a small hole for future inversion. We turn the part to the front side, iron and sew the seam that is not completely closed manually. Attach belt loops to the edge. Sew on loops at one end of the button loops.
- We turn off short sections of the top and bottom components to the wrong side, iron, sew the edge. Fold the parts in half with the outer side inward, so that we get a fold on one short side. We grind the sidewalls by laying a line at a distance of 8-10 mm from the cut. We cut the seam allowances to a width of 5 mm. We turn the part, straighten the corners and iron the edges.
- Now we begin to assemble the entire structure. We arrange the upper and lower parts so that the fold goes to the front of the rack.
- Fold the upper cut of the lid and bottom with the rear wall of the main part facing sides towards each other. Lay the line, iron the bottom allowance and the rack cover. We tuck and embed the bottom of the bottom and top.
- We pick up one side and the main side of the rack and sweep them together. We turn free sections of the bottom and lid, then adjust them, capturing the allowance for the main part and the upper layer of material. So we formed pockets for duplicate shelving elements.
- Stitch to the lid of the stitch, sewing buttons on the same level with the loops. We have also processed and stitched side pockets, but this is optional.
- Now we are working with plywood. We process the workpiece with sandpaper, rounding off sharp corners. We put duplicate elements in the lower and upper tier of the rack. We hang the shelf on the bracket. Throw the patches through it, and then fasten it with buttons.
- We decorate the shelf with braid, lace and beads, again, at will.
to contents ↑Important! If you want to make all the shelves stiff, then put in them the same stiff plywood as in the upper and lower elements of the fabric cabinet.
Do-it-yourself textile cabinet made of plastic bottles
This is another option to sew the shelves of fabric with your own hands. Sometimes, having bought an expensive plastic wardrobe, we may find that our things or shoes do not fit there, and to do this we have to deform our personal belongings. But why make such sacrifices when there is another way out of the situation - shelves from large plastic bottles. Such shelves are very convenient to use. Their depth allows you to store many things and other items. Let's get acquainted with a step-by-step master class in manufacturing shelves from fabric and plastic bottles.
For work, we need:
- Fabric in two colors, size 1m x 60 cm.
- Plastic 5 liter jars.
- Threads matching the tone of fabric or contrasting.
- Centimeter.
- Scissors.
- Double sided tape.
Important! Do not be discouraged if you did not find double-sided tape. It can be quickly made out of the ordinary. How? We will tell you about this in a step-by-step instruction:
- Glue a strip of ordinary tape on the edge of the table. The main rule is that the surface of the table should be dry and clean. Adhesive tape should come on the table no more than 1 cm along the entire length of the sticky side. We leave the steel part of the tape to hang freely in the air.
- We take the free non-glued edge of the tape and the sticky side out, wrap it by gluing the free edge to the edge that we glued to the table.
- Carefully remove the resulting twist and cut it into parts of the length we need.
Homemade double-sided tape is ready! It holds well and is practically not noticeable when connecting plastic bottles and not only.
We sew shelves from fabric
Now consider a workshop on creating a fabric cabinet:
- We started by taking three 5-liter bottles and cutting off their upper part, which is narrowing. Trimming should be done diagonally, so that when connecting, we get one angle of inclination.
- Using double-sided tape, we glue the plastic bottles together as tightly as possible, observing the same cut line.
- We begin to sew a contour cover for our shelves, which will decorate our homemade design. The case will consist of external and internal sides, since we took transparent plastic bottles.
Important! If you find colored jars of this volume, then the inner part is optional.
- We cut out the outer and inner parts according to the same pattern: one middle part and two side ones. The width of the central part is equal to the width of the bottom of the plastic shelves, and the length is the distance from the edge of the highest shelf to the bottom of the lowest.
- The sidewall pattern is very simple. We put the connected plastic shelves on the fabric and circle their contour. The result was a rectangular box, which will become our sidewalls.
Important! Remember to make a few centimeters of seam allowances.
- We connect the details of the top and the details of the lining. We iron the seams. We put the lining inside the outer part of the cover and, using an iron, prepare them for the connecting seam. Try to iron the hem so that its upper part extends 0.5 cm beyond the inner hem. So we will create a piping around the entire perimeter of our cover.
- We hang the finished product on a lace or strip, which you can sew with your own hands from the same fabric.
- We put the plastic shelves in a sewn little case and enjoy the result!
Stock footage
We really hope that our article helped you sew a textile wardrobe with your own hands. The best lessons on creating such a wonderful design were presented to your attention. Let peace, order and harmony always reign in your house!
- How to choose a vacuum cleaner taking into account the characteristics of the house and coatings?
- What to look for when choosing a water delivery
- How to quickly create comfort at home - tips for housewives
- How to choose the perfect TV - useful tips
- What to look for when choosing blinds
- What should be running shoes?
- What useful things can you buy in a hardware store
- Iphone 11 pro max review
- Than iPhone is better than Android smartphones
 (No ratings yet)