

DIY stocking belt
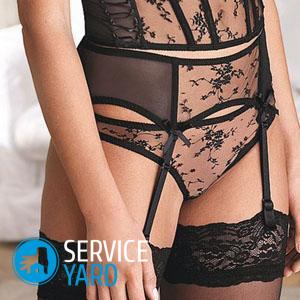
Stockings have always been a fetish for men, and for women - an occasion to feel incredibly sexy. Of course, they can be worn separately, but a special holder with clips will help to add more effect and fix the stockings on the leg. Ready-made support for stockings can be bought, but why splurge on it when it is possible to create this accessory the way you want it to. If you want to make a belt for stockings with your own hands, then you have come to the right place. Let's start sewing such a delicate thing!
to contents ↑DIY stockings
If you love your body and want to pleasantly surprise your young man, then you just need to have such a sexy product in your wardrobe. Let's look at a detailed lesson on how to sew a belt for stockings at home.
So, for work we need to prepare the following:
- Elastic lace (if this is not, then you can use any).
- Stretch fabric.
- Gum.
We start sewing:
- We have chosen the fastest way to pattern, which is done very easily without cutting various parts from paper. We take a strip of lace measuring 10 by 7 cm, cut it diagonally into two equal parts. We got two identical triangles. Sew them along the longest side into one large triangle. Using the same pattern, we make the second exactly the same triangle.
- We take the elastic fabric in our hands and draw a rectangle on it, where one top length will be 13 cm, the bottom 20 cm and the width (height) 6 cm. We should get a rectangle with one oblique angle. Cut out the resulting details.
- Sew openwork triangles to the fabric segments. Make sure that the angles of the parts coincide with each other.
- We attach decorative gum to the belt in such places: on the top of all the details (hips), at the very bottom of the inverted lace triangles.
- Sew a small loop on one side of the belt (you can use a thin elastic band), and on the other, a small button. You can use the clasp from an old swimsuit or bra.
- We adjust the waistband around the waist, sew four silicone clips to the ends of the hanging elastic bands.
The product is ready! Enjoy your new creation!
to contents ↑DIY stocking belt - pattern with dimensions
Of course, any clothes can be sewn even without ready-made sizes, but according to one’s own measurement or, as they say, “by eye”. We bring to your attention a step-by-step description of building a pattern for a stocking belt with measurements of all the necessary details for sewing.
Important! We make all the details by standard standards. Our belt will be 20 cm long, half hips - 46 cm and half waist - 36 cm.
Here's what to do:
- On paper, draw a rectangle of exactly the same length as the length of the belt - 20 cm and a width of 46 cm (semicircle of the hips).
- The width of one part of the pendant along the waist line is equal to half the waist circumference and plus 4 cm. We have such a picture: 36: 2 + 4 (allowance) = 22 cm.
- The width of one front half already along the hips is equal to half the waist and minus 4 cm. We carry out the calculations: 36: 2 - 4 = 14 cm.
- Now we draw one sideline at the front and back of the halves of our future belt.We deepen the middle of the front part by 3 cm from the top of one corner to the bottom, and the back - by 4 cm from the upper second corner to the lower point of the rectangular cut. We draw all the lines by hand.
- We cut out shelves for elastic bands in both parts of the belt. From the bottom corner of the rectangle, lay about 0.2 cm half-circumference of the hips: 46 * 0.1 = 4.6 cm (round up to 5).
- The width of the second front part along the hips is equal to half the semicircle of the waist - 36: 2 = 18 cm.
- To draw the shelves of the back half, we measure 10 cm from the side line.
- The width of the shelves below should be 5 cm or as wide as the elastic itself, sewn into the belt.
- From the lower right corner of the rectangle we measure 4 cm, draw by hand the bottom of our future belt, adding 2 cm to the button fastener.
- To give the product strength, we tune a strip of fabric on the upper side of the belt from the wrong side.
How to sew a do-it-yourself belt for stockings?
This workshop will help you sew a belt for stockings from a single piece of fabric. Thanks to the style, such a product sits well on the hips. Let's begin to get acquainted with this option of tailoring:
- Measuring your waist or hips - it all depends on how high you want to wear this accessory.
- We measure previously measured measure on paper with one horizontal line.
- We draw a rectangle with a length of previously measured measurement and a width of about 10-15 cm.
- We form 4 triangles so that they are solid and we have formed one solid canvas. To do this, draw 2 triangles in front and two in the back, leaving an even central part. In a word, we extend the rectangular cut by triangular additions. Here you can fantasize and modify the product. We get a whole pattern of the holder for stockings, in which there are no separate parts.
- Cut the finished pattern and transfer it to the fabric.
- We cut off the parts we need from the drawstring (braid) to fill the whalebone.
- Sew 4 cuts of braid vertically only along the front, keeping a distance of 3-5 cm.
Important! It is very important to lay a line along only one edge of the drawstring, since we will put a whalebone on the other edge.
- We insert a whalebone and sew up the second edge of the tape on a typewriter.
- Sheathed all the edges with an inlay. Now our belt has become a corset.
- We take the remaining inlay in our hands, cut it into the segments we need for elastic bands, which will hold the stockings.
- Sew the braid to the top of the solid triangles.
- We take Velcro and sew it a few millimeters from the side edge of the product. We should get two Velcro, which will fix the belt at the waist.
- We make small bows from a satin ribbon. Sew one on the front of the product in the center and the other four on the hanging braid.
The master class is over. Incredibly beautiful, and most importantly - a durable belt is ready to begin its direct duties!
to contents ↑Where to buy accessories for the stocking holder?
Where to buy and what are the holders properly called? I really want the handmade product to be beautiful and not much different from the purchased option. Beautiful accessories are the key to a good final result of the entire sewing process. Of course, special tapes can be replaced with ordinary rubber. But what about the clamps and where to get them? We will talk about this further.
Etsy
Here you will find absolutely any hardware. In stock you will find a large number of clips, various clips, fasteners, length adjusters and other additional details, including lace and elastic.
Important! Do not forget that metal clips will last much longer than plastic clips.
Very convenient models with double-sided clips (on the elastic band there is a latch on both sides). Such a device can be simultaneously attached to a corset, belt and panties. When the exciting moment comes, you can easily unfasten the elastic from the underwear.
Ebay
The second fishing place of various accessories for the belt with your own hands.Here you will find everything you need for sewing - starting with fabric and ending with elements for decorating an already finished product.
In this specialized store, you can buy ready-made straps with a rubber height regulator, which is very convenient in the use of the product.
Amazon
A very popular online store selling various accessories for creating underwear with your own hands. Here you will find everything you need for sewing the original belt. Clasps, holders and lace ribbons are presented in different colors.
to contents ↑How to wear and wear a belt?
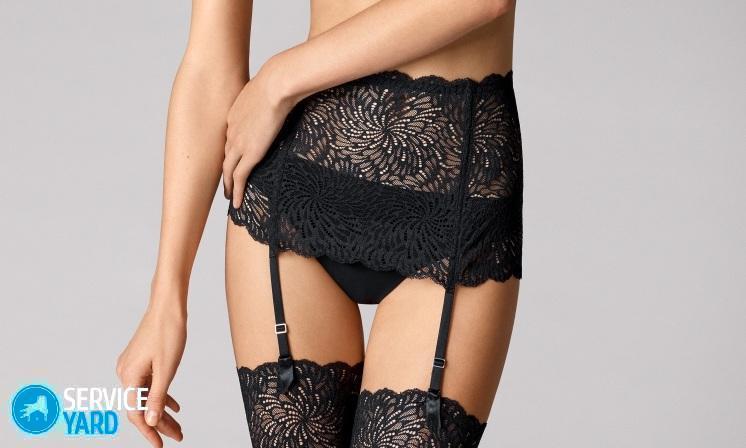
Oddly enough, but there are girls who do not know how to wear and what to wear the holder for stockings. Many people think that hosiery can be worn just like that. Yes, it’s possible, but for your man to become the plasticine in your hands, complete the look with a sexy lace garter belt. No man can resist such a temptress.
So, let's understand the question of how to put on such a product:
- Your belt should fully match the color of the stockings, it is desirable that everything was from one set. If you purchased stockings separately and want to sew the belt with your own hands, then you can take into account only color matching and it is not necessary that the material of the two products coincides: the stockings can be with a lace edge, and the belt can be made from textile without finishing.
Important! If you wear silk underwear, then the belt should also be made of silk or satin. Otherwise, the luster of one material will not be combined with a completely different fabric.
- Before you make a pattern, think about how often you will wear a belt. If you intend to use the product exclusively for romantic meetings with your loved one, then sew a belt with four fasteners. If you expect to wear an accessory almost every day, then you need to make more fasteners.
- Wear the accessory so that it does not constrain or squeeze your waist and hips. In any case, a tight fastener can always be altered.
- Adjust the garters so that they do not twist during your walk.
- Such a product should go well not only with underwear, but also with the clothes under which you will wear it. For example, under a black dress, you should wear black stockings with a belt.
- Do not use panties-shorts in a set for stockings and a belt. Thongs or bikinis are good for this.
Stock footage
Now you can definitely sew a belt for compression or decorative stockings with your own hands. This will come out much cheaper than the finished product. Decorating the clasp according to your design idea, you will get a unique accessory that no one will have! Do not be afraid to experiment!
- How to choose a vacuum cleaner taking into account the characteristics of the house and coatings?
- What to look for when choosing a water delivery
- How to quickly create comfort at home - tips for housewives
- How to choose the perfect TV - useful tips
- What to look for when choosing blinds
- What should be running shoes?
- What useful things can you buy in a hardware store
- Iphone 11 pro max review
- Than iPhone is better than Android smartphones
 (No ratings yet)