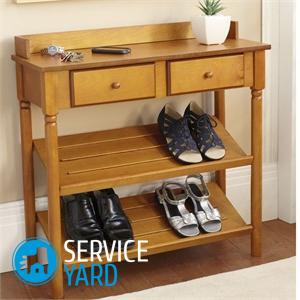
DIY padded stool - master class with hinged lid
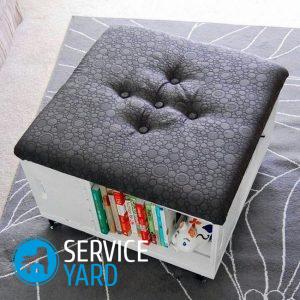
Surely you remember such a saying that everything new is long forgotten old. The same can be said of the ottoman. A couple of years ago, this element of the interior was in almost every house, over time, the fashion for it came down. And now his finest hour has come again. Why did the fashion for these products return? Everything is simple, such an element can easily fit into any interior, plus everything else, you can still store some small things in it. In this article you will find instructions on how to make a ottoman with your own hands (master class) with a hinged lid.
to contents ↑Do-it-yourself ottoman: what is needed?
Necessary materials and tools for the manufacture of this type of furniture at home:
- Chipboard with a thickness of not more than 15 mm;
- wood chipboard screws;
- construction stapler;
- drill and drill;
- drill for countersinking;
- glue for wood;
- foam rubber about 10 cm thick, the size of which is 50x50 cm, it is desirable that it be denser;
- fabric for upholstery ottoman;
- decorative elements, in particular, a handle for the cover.
That is all you need. Now let's take a step-by-step look at how to make an ottoman with your own hands from chipboard with a lid.
to contents ↑DIY ottoman: action algorithm
At the very beginning, as before any work, it is necessary to prepare everything that will be used for manufacturing:
- When buying chipboard in a store, ask them to cut it. Some hardware stores can do this.
Important! The dimensions of our ottoman will be as follows: the size of the bottom and cover is 50x50 cm, the front and back walls are 50x30 cm, all are 10 cm thick.
- Then, to create a ottoman with your own hands, we make drawings and diagrams. The sizes of our ottoman are indicated above. If you need a different size pouf, then prepare a drawing on paper in advance.
- We carry out a framework from a chipboard. We prepare all parts of the box of the required size. You can do this by first measuring the required size with a tape measure, marking with a pencil and cutting it out.
- To make a pouf with a do-it-yourself storage box, glue the prepared parts with wood glue. As a result, a through box should be obtained.
- Next, we arrange the holes at the upper and lower parts, as well as in the middle of the connection. This can be done with a drill. For further fastening, screw the screws into the finished holes.
- If, after fixing is complete, glue has flowed from the holes, then we remove it with a cloth.
- Next, glue the bottom to the existing geometric shape.
- To secure the bottom firmly, drill holes along the edge, the distance between them is 10 cm. We screw the screws into the finished holes.
Important! They must be inside the box.
- The next step is glue the foam.
- Softness was created using foam rubber, now we will create the beauty of appearance. Here we have a cloth to help. The main property is density. With regards to color, it can be anything to your taste. So, from the fabric or velvet we cut off the strip so that it can be wrapped around the box. To it, you need to add 1.5 cm to the seams, and leaving free fabric on top and bottom, 10 cm and 5 cm, respectively. Next, wrap the puff tightly. The remaining edges above and below are fixed with a stapler.
- Then we prepare the wheels for the ottoman with a hinged lid, which you do yourself. You can choose ready-made wheels painted in the color you need, or paint them yourself.Here you can use the spray paint of the desired color. Leave to dry completely. Now they need to be attached. To do this, at the bottom of the box in each corner, drill a hole and fix the wheels.
- Now we carry out the cover. To do this, you need a piece of fabric or velvet 18 cm more from the original. We put foam on the fabric, followed by a lid. Carefully tighten the cover on all sides and fix it with the stapler to the frame.
- To make the inside of the ottoman with your own hands from particleboard, you also need a piece of fabric that will correspond to the internal dimensions. Plus 1.5 cm to the seams. We attach the finished strip to the base.
- To attach the lid to the finished box, two secret hinges are needed. Using them, we fix the cover to the base.
- Well, the last touch in the ottoman with a storage box that you made yourself, will be the decor. You can place a brush in front, which will be used as a pen.
Stock footage
Here we have examined the basic algorithm of how to make an ottoman with your own hands from particleboard. Using your imagination, you can create a unique author's product that will complement your interior.
 (No ratings yet)