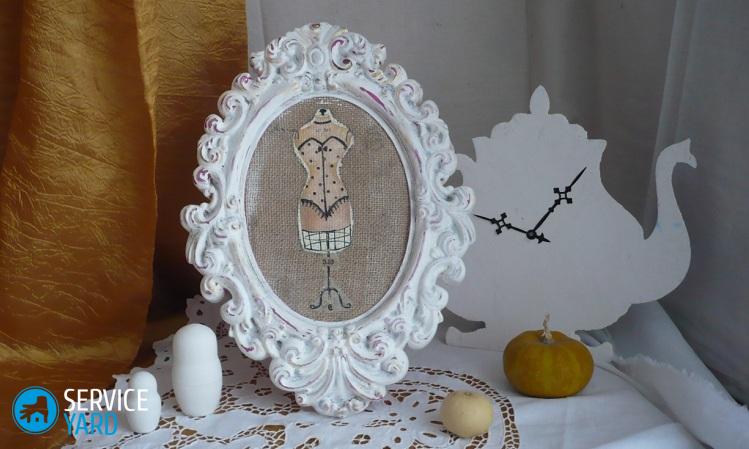
DIY frame for ceiling plinth

Nothing can decorate an apartment’s interior in such a way, adding a touch of warmth and home comfort, like home-made things and decor items. When looking at the remnants of the pretty fillets that remained after the repair, many needlewomen probably come to the idea that they can be used not only for their intended purpose. That is why in this article we will tell you how to make a frame for a picture with your own hands from a ceiling plinth.
to contents ↑Types of ceiling skirting boards
Before we start making a beautiful frame for a panel, picture or mirror, let's figure out what materials fillets come from.
Styrofoam
A frame for a panel or a picture from a foam ceiling baseboard is the cheapest option. This material is light in weight and easy to process (it can be cut with an ordinary knife).
Important! The disadvantages of this baguette include deplorable indicators of fire safety and low mechanical strength.
Polyurethane foam
This type of material is a more rigid and ductile analogue of the previous version. With regard to its fireproof quality, it can be said that there is no definite answer, however, yet this material does not ignite so quickly. Polyurethane foam is much stronger than foam, which makes it possible to bend it at the required angle.
Important! At the price of such products is a little more expensive, however, despite this, many needlewomen choose this material for the design of their work.
Wood
Products from this material are considered elite due to their high cost and attractive appearance, in comparison with other materials. The price of wooden skirting boards depends entirely on what kind of wood the product was made from, for example, oak, ash, mahogany.
This material is the most difficult to process, does not differ in special durability and fire safety. But even despite all these obvious flaws, the frames for panels and paintings from a wooden baguette differ in their expensive and unsurpassed appearance.
to contents ↑Important! All kinds of reproductions, miniatures and paintings look great when they are decorated in wooden molding.
Frame making
To make a frame for paintings with your own hands from the baseboard, you need to stock up on the following:
- Baguette made of polystyrene or polyurethane foam.
- Universal adhesive (“Dragon”, “Moment”) or “liquid nails”.
- Office or construction knife.
- Miter box or protractor in order to measure the cutting angle.
- Ruler.
- Acrylic paints.
- Marker.
- Acrylic putty for wood.
- Corrugated cardboard.
The frame for a picture or a panel of fillet can be made in different ways. Consider the option of using a corrugated cardboard, which is able to add rigidity to a fragile product.
Important! If such a frame will serve as a frame for the mirror, then there is no need to use cardboard.
Cutting and gluing parts
The first step in making a frame for pictures with your own hands from the plinth is cutting out its base. The parameters will depend on the size of the picture or photograph, which will be framed using such a frame.
Important! The cardboard rectangle, which will serve as the basis, should correspond to the image being drawn, or be a little larger.
Here's what you have to do:
- Cut a window in the rectangle, which will not be much smaller than your picture, so that its edges will be hidden under the frame.
- Cut a second cardboard part of the same size, but with a smaller window - each side will be 5 mm smaller than the first.
- Glue both cardboard parts together in such a way that a place is created for inserting the image.
Important! If the frame for a picture or mirror is attached to a thick base, the previous paragraphs are omitted.
- Using a ruler, measure 4 pieces of the baseboard that will serve as the sides of the frame. Using a miter box, cut the panels at an angle of 45 degrees.
Important! If you do not have such a tool, then draw the necessary slope on the paper and attach a baseboard to it. Mark with a marker, and then carefully cut the baguette.
- Check the correspondence of the sides by applying individual elements of the workpiece to each other. If everything matches, then glue the pieces of the plinth onto the cardboard blank.
- If you are not using cardboard, then simply stick the foam panels to each other. It is most convenient to use a silicone gun for these purposes.
Important! The most important thing in the manufacture of such a framework is to achieve smooth joints at the corners of the craft.
Putty, paint, decoration
Often when making a picture frame with your own hands from the plinth, cracks can form at the joints of the plinths, however, they can be very easily masked with putty and paint:
- After the glue dries, carefully fill the corner slots, the junction of the fillet with the cardboard base, as well as the back of the frame. This will make it possible not only to mask the flaws, but also to make the design more durable.
Important! The ends of the product should be plastered in several layers or glued foam strips between the skirting board and cardboard before filling.
- After the putty is completely dry, you can begin to stain. For these purposes, it is best to use acrylic or water based paint.
Important! Other types of coloring compounds can spoil the foam, which is why before using them it is necessary to coat the surface of PVA several times.
- After the paint has dried, cover the frame with water-based varnish.
to contents ↑Important! If necessary, on the back of the product can be mounted. To do this, take a twine and cut a rectangle from cardboard, the length of which will be slightly less than the width of the product. Put the twine on the back of the frame and glue the cardboard so that they press the ends of the rope.
Stock footage
As you can see, it’s not so difficult to make a frame for pictures with your own hands from the baseboard. To do this, you can use the remnants of fillets that you have left after the repair - both useful and beautiful. And somehow beautifully painting the frame, you will create a really beautiful thing that will decorate your room.
- How to choose a vacuum cleaner taking into account the characteristics of the house and coatings?
- What to look for when choosing a water delivery
- How to quickly create comfort at home - tips for housewives
- How to choose the perfect TV - useful tips
- What to look for when choosing blinds
- What should be running shoes?
- What useful things can you buy in a hardware store
- Iphone 11 pro max review
- Than iPhone is better than Android smartphones


