

DIY picture frame
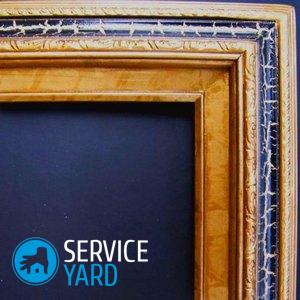
Photo frame - an indispensable decor in the home of any family. If modern youth prefers to take and store photos on the phone, then older people prefer to print and hang photos from their weddings, vacations, family celebrations, hugging with their beloved children or grandchildren throughout the house. That is why the question of how to create a frame for a picture with your own hands is quite relevant. If you are a fan of the original decor and decoration, then it will be very useful for you to learn how to make a baguette yourself, because this will help to save the budget. We will talk about this now.
to contents ↑A couple of frame design tips
The most important rule is that the frame should be a single “picture” with the design of the room and photograph. In no case should it stand out clearly. The main task is to create harmony between the photo and the design of the room.
Too bright a color will distract attention to yourself, however, if the color balance has not been achieved, you should not worry, because everything can be fixed. You can always modify the shape and paint, hang the frame at a different angle or change the lighting that falls on it.
Try different materials, and you may find that the usual frame perfectly transformed the interior. By trial and error you will surely achieve the desired result.
to contents ↑Materials from which you can make a frame for a photo
The first thing you need to do if you need a frame for a picture with your own hands is to decide what you want to make it from. As materials, you can consider anything.
The most popular are:
- Wood.
- The cloth.
- Cardboard.
Again, this is just a small list. Let your imagination run wild, and you will be able to create something beautiful and exclusive.
to contents ↑You will need such tools
In whatever style and whatever you decide to make the frame from, you will definitely need the following items:
- Scissors.
- Measuring instrument (Ruler, tape measure).
- A simple pencil.
- Glue.
- Nails
- Hammer.
- Paints and decor (depending on your preference).
Wood framing
Wood framing is the most popular. It is like a “little black dress” in the interior. This is a universal option that will fit and is able to complement any design. In addition, this is one of the most economical options.
Important! If you do not have special skills, then making a carved product will be quite difficult. That is why it is better to make a framing of a classical form without complex decorative elements. Glass is best ordered in a special workshop.
Do not forget that the parameters of the classic frame for the picture should be slightly smaller than the glass.
to contents ↑Soft frame
Soft frames will look great in a children's room or in a living room with a bright and cheerful design.
Make them not difficult:
- To get started, prepare wooden slats for the base.
- Connect them together with small cloves or glue. Remember that the parameters of the base should be less than a quarter of the image than the photo that will be in it.
- Outline the frame on cardboard and cut it out - this will be the pattern according to which you need to cut out the fabric with an allowance of one or two centimeters at the seams.
- Fold the resulting pieces of fabric and sew them from the inside out.
- Put them on the frame, filler synthetic winterizer or cotton, then sew.
Cardboard frame
Cardboard framing is quite simple. Again, you will not need any high skills. This material is likely to be found in your child, whom you can also involve in the process.
The most important step is to make a neat foundation. It is from her that the general appearance of the product will depend.
to contents ↑Important! As for jewelry, anything can be used: from roses made of colored paper to shells from the sea.
Old magazines
You probably have a pile of unnecessary magazines in your apartment. Do not rush to throw them out, because you can make amazing picture frames from pages.
You need:
- Unnecessary magazines.
- Threads.
- Scissors.
- Glue.
- Marker or simple pencil.
Instruction:
- Cut out a sheet of paper with parameters 22 by 27 centimeters.
- Inside, draw a frame, retreating from the edges by three to five centimeters.
- Roll the tubes from the pages and wrap them with colored threads.
- Glue the cardboard over them, starting from the center and bending at an angle of ninety degrees.
- The last step is to glue a sheet of cardboard to the back side, and a leg to it.
Unusual decor
If you are a lover of polaroid photos and you have accumulated a lot of them, you can make a stunning decor by placing them in one frame. To do this, glue the rope inside in the direction. When the glue dries, use small clothespins to attach the photo.
to contents ↑Stock footage
As you can see from the article, a frame for a picture with your own hands is done quite simply. You do not need to have great creative abilities - even with minimal skills you can make stunning frames for photos. Follow our methods and tips, and you will succeed!
- How to choose a vacuum cleaner taking into account the characteristics of the house and coatings?
- What to look for when choosing a water delivery
- How to quickly create comfort at home - tips for housewives
- How to choose the perfect TV - useful tips
- What to look for when choosing blinds
- What should be running shoes?
- What useful things can you buy in a hardware store
- Iphone 11 pro max review
- Than iPhone is better than Android smartphones
 (No ratings yet)