Dresser restoration

A chest of drawers is a convenient and functional piece of furniture. Of course, the shortage of furniture remained in the distant past, and today you can buy almost any furniture in stores. However, sometimes throwing away old things is also impractical. Often, the restoration of the chest of drawers gives an excellent result, much better than the acquisition of a new thing. It also happens that the need to restore old furniture is dictated by the canons of the style in which the interior is designed. This applies to such style decisions as Country, Provence or the Scandinavian direction. Or maybe you just want to realize your artistic abilities by making a beautiful and functional thing yourself? In any case, the tips from this article will help you restore the appearance of the dresser by spending a minimum of effort, money.
to contents ↑Points for and against"
Many people make the mistake of considering repair and restoration of furniture synonymous. This is not true:
- Repair involves removing peeling paint, sanding, applying a new coat of dye, fixing loose elements.
- Restoring an old chest of drawers is a much deeper concept than redecorating it. Moreover, with skillfully carried out restoration, an updated chest of drawers can become a truly unique, exclusive product, which means more valuable.
to contents ↑Important! Before you carry out the restoration yourself, carefully inspect the thing. It is possible that you own truly valuable antique furniture. In this case, an unprofessional approach can only do much harm. You can invite a specialist who will evaluate the product. Prior to the conclusion of a professional, do-it-yourself repairs or restoration should not be done.
DIY restoration process
So, you decide to restore the thing yourself. This work is not easy, painstaking, almost jewelry, requiring significant time costs. Each stage is very important, so you should not miss anything. Here is a detailed master class on how to restore an old chest of drawers with your own hands.
For work you will need tools:
- Hammer.
- Rubber mallet.
- Set of brushes.
Do not forget to prepare such materials:
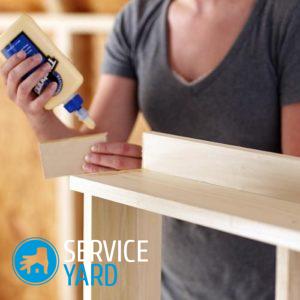
- Adhesive for wood.
- Filling on wood.
- A set of sandpaper with different grit.
- Toothpicks.
- Old toothbrush.
- Tooth powder or special cleaning agent for accessories.
- Lacquer.
- Paint.
Furniture cleaning
This is a very crucial stage. Cleaning must be done so as not to damage the surface of the product and the decor:
- First, wash the product with a soft sponge with a solution of laundry soap.
- If the chest of drawers is decorated with antique carvings, then you can clean small parts with a toothbrush.
- Remove accessories and clean with toothpowder or a special cleaning agent.
- To clean inaccessible places, for example, cracks and corners, a toothpick or thin awl is suitable.
- Sandpaper helps get rid of stubborn dirt. At the same time, it is impossible to put strong pressure on her.
Important! The surface must be thoroughly sanded before painting again.

Preliminary preparation
After the dresser is cleaned of dirt and dried, it is time to replace the damaged parts. This is pretty tricky. You can try to find them in an antique store or contact the carpentry shop with an order.
Professional craftsmen, by the way, can help by attaching decor to furniture.
Check how firmly bolts and screws are fixed for cracks in the tree. Remove loose or rusted bolts. They have to be replaced with new ones. Small cracks can be bonded with a bonding agent, and larger ones can be putty on wood.
Important! It is necessary that the tone of the putty matches the shade of wood in accuracy. If a wood stain is to be treated, a special type of putty should be applied.
Dyeing
Of course, the texture of natural wood is unusually beautiful, but sometimes, in order to organically fit the furniture of the old design into the modern interior, it needs to be painted. The easiest way - coloring in one tone, for example, white:
- Remove from the surface of the dresser the remnants of the old coating. Be careful when doing this. Firstly, there is a risk of damaging the decor. Secondly, it is impossible for coating particles to accumulate in hard-to-reach slots and corners.
- To level the surface, carefully sand it, then fill up all unnecessary holes with putty.
- After the putty has dried, wipe it with sandpaper.
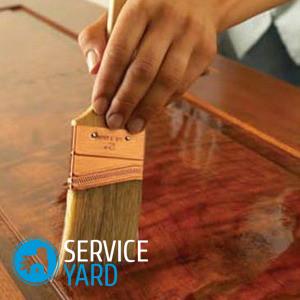
- For coloring use special paint for wood furniture.
Important! Applying varnish on top of the paint makes the surface glossy.
Parts Replacement
First of all, we are talking about pens. Of course, old handles are wonderful, but with updated furniture they look alien. Therefore, it is advisable to purchase a new, fitting style furniture and equip an updated chest of drawers.
to contents ↑Do-it-yourself chest decoupage at home
This art came to us from France. If you do everything carefully, you will get a unique, non-standard and very beautiful thing. So, proceed according to this algorithm:
- Paint the prepared furniture white.
- Wait for the paint to dry completely.
- Cut patterns from paper napkins. Stick them on the surface of the dresser. The composition of PVA is suitable for bonding.
- After the glue has dried, varnish the surface.
to contents ↑Important! In order not to make a mistake in choosing the right glue, read our selection of recommendations onwhich is better to use glue for furniture repair.
Another option for restoration
This option is for the restoration of an old chest of drawers with three drawers: three large and two small.
From tools and materials you will need:
- Composition for removing a layer of old paint.
- Chisel.
- Set of sandpaper.
- Self-tapping screws.
- PVA glue.
- Matte putty.
- Decorative moldings made of foamed polyurethane.
- Paraffin.
- Wallpaper.
- Acrylic dye on water.
- Clear varnish on the water.
- Decorative pens.

Preparatory stage:
- Unscrew the old handles at the chest of drawers.
- Next, using a special composition, free the surface from the layer of the old dye.
Important! If the paint is thick, you can use a chisel.
- Carefully sand the furniture to make the wood texture visible.
- In places where the surface is uneven, putty and smooth. After drying, sand the surface with sandpaper.
Important! Avoid strong pressure so as not to damage the mastic layer. As a result, a perfectly flat surface should be obtained.
- In order for the new handles to fall into place, plaster the old holes, and then, using a drill, drill new ones.
Important! It is very convenient if you have to fasten accessories to special screws. Drilling holes for them is not necessary.
- Dissolve PVA glue with water and treat the surface of the product. You can use any primer instead of PVA.
- After the adhesive solution has dried, you can proceed to decorate the dresser with your own hands.
Decoration:
- First of all, mount the frames for the drawers and sidewalls. Frames can be made of polymer moldings. The main thing is to accurately and accurately make measurements so that the frame looks neat.
- Fasten the frames with screws, and cover the hats with mastic.
- After that, carefully paint the frames with an acrylic compound.For example, coffee, white or beige colors look beautiful.
- Wallpaper the surface inside the frame with a tone.
- The last step is to coat the entire structure with several layers of varnish.
After you have restored your chest of drawers, we recommend that you familiarize yourself with other options for updating furniture:
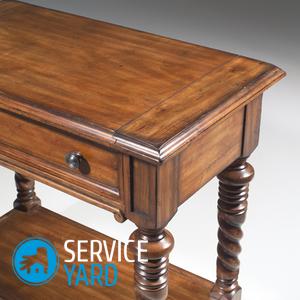
- Table restoration at home.
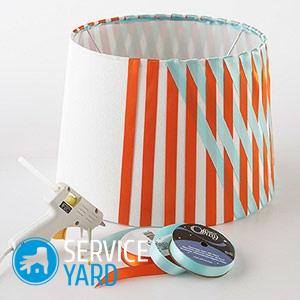
- DIY floor lamp restoration.
- Do-it-yourself restoration of chairs.
- Do-it-yourself sofa restoration.
Stock footage
As you can see, giving a new life to old furniture is not very simple, but quite possible. The result is worth the effort!
 (No ratings yet)