

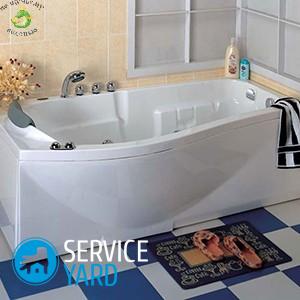
Bath restoration with liquid acrylic
The bathroom is one of the most sought after plumbing accessories. Due to the frequent exposure to it of negative harsh factors, over time, its surface layer becomes untidy. The enamel is peeling, cracking, rusty stains, dirty spots appear on it. But the restoration of baths with liquid acrylic solves the issue of the appearance of this element of home comfort.
Previously, the restoration of the bath surface was carried out by applying a new layer of enamel in various ways. Such repairs were made only by experienced craftsmen, and the surface layer itself was short-lived, after a short period of time it began to collapse. Repair using acrylic in liquid form can solve the reliability problem. The modern technology for applying acrylic is quite simple, so the restoration of the bath can be done on its own. How exactly - we will tell in this article.
to contents ↑Main advantages
Conventional liquid acrylic is a two-component mixture that includes a hardener and a polymer base.
Important! The most popular today are acrylic brands "EcoVan", "Stakril" and "Alfavanna".
According to their characteristics, acrylic and its coating have unique properties:
- Acrylic has a low thermal conductivity, which ensures long-term preservation of the heat of the water that was poured into the bathroom.
Important! For example, the rate of decrease in water temperature in an acrylic-coated container is more than 30 times less than cooling in an ordinary cast-iron bath.
- Acrylic coating has a very high strength and wear resistance. The material is resistant to aggressive chemicals and high temperatures.
- After applying the acrylic coating, the surface of the bathtub becomes less slippery, while its appearance has excellent decorative qualities.
Preparatory work
Preparation before repairing the bath with acrylic is a very important step. All defects that remain from the old coating are able to appear on the new coating, and upon completion of work it will be impossible to eliminate them.
Therefore, you need to complete the preparation in this way:
- Preparatory work should begin with the dismantling of auxiliary elements. It is necessary to remove all the external elements of the overflow and drain systems.
Important! The dismantling method is determined by the type of bath, but, as a rule, this happens with a screwdriver and pliers.
- On the floor of the bathroom under the corresponding holes you need to install dishes for collecting acrylic.
to contents ↑Important! If some elements cannot be dismantled, then they must be insulated with construction tape, and then think about how to decorate their surface so that they do not spoil the general appearance of the restored bath.
Surface preparation
Surface preparation before restoration is a very important stage of all repair work:
- First you need to remove the previous layer of the bath. For these purposes, grinding should be carried out. Careful processing will make it possible to ensure a reliable connection of acrylic with the metal of the bath and the remains of old enamel.
Important! Grinding is best done with a power tool - grinders or drills with the necessary nozzle.
- After thorough grinding, carefully clean the surface from dust and dirt that remains after processing.First, the dirt must be washed off with water, and then the surface should be treated with a solvent to cleanse grease.
Important! Often acetone is used for these purposes, but baking soda, prepared in the form of a thick slurry, may also be suitable.
- Sometimes the old enamel layer is subjected to strong local destruction in the form of chips or deep cracks. Such damage is unlikely to be polished. In these cases, defects are repaired using a car putty with a shorter solidification time. Then the place of processing putty is especially carefully polished with the help of sandpaper.
- Often in inaccessible places of a sanitary ware insoluble pollution is concentrated. Such areas can be cleaned with acid. After all types of processing are finished, hot water is flushed.
Acrylic Preparation
Liquid material for bath restoration with liquid acrylic is obtained by mixing two components - a polymer base and a dehumidifier. For this:
- The thick mixture from the container is carefully poured into the mixing container.
Important! When unpacking the container and pouring it into the container, any dirt should be completely excluded from the mixture.
- The mixture is thoroughly mixed for several minutes using a bar or spatula.
Important! Mixing should occur at a low speed until a homogeneous mass is formed. Using a power tool is undesirable due to the fact that with this method air bubbles can form, which is extremely undesirable.
- A hardener from a separate small container is gradually added to the mass, interfering with the mixture. It is advisable to fill the hardener in several portions. Moreover, after each serving is carried out more thorough mixing for 2-3 minutes.
Important! When mixing the components, it is necessary to strictly observe the proportions that are indicated in the passport of the mixture. Typically, the hardener is 9.5% of the acrylic base.
- After the hardener is added to the mixture, it is thoroughly mixed manually for 10 minutes. The resulting liquid acrylic should settle for about 20 minutes, after which it can be used.
to contents ↑Important! Acrylic color can be for every taste. In order to obtain a mixture of the desired shade, color paste is added to it, and then the mass is thoroughly mixed. It is worth remembering that the color content in the mixture should not exceed 3%.
Coating
After all the preparatory work has been completed, the next step in the restoration of the bathtub with liquid acrylic is coating it. To do this, proceed as follows:
- Divide the composition into two equal parts, because in this case it will not have time to thicken while you are applying the first coat.
- Start to apply the material around the perimeter of the bathroom, carefully lubricating every centimeter of the sanitary ware, while paying particular attention to the drain holes.
Important! Rub the composition thoroughly, taking care not to make the layer too thick.
- After the edges are painted, apply the enamel in the transverse direction from top to bottom.
- After the first part of the composition is used up, do not wait until the first layer is completely dry. Dilute the second part of the composition and apply a second coat of enamel.
- After the enamel dries, check the surface for smudges. If they are found, remove them with light brush movements. Such checks must be carried out several times until completely dry.
to contents ↑Important! The amount and risk of sagging will directly depend on the density of the mixture: the thicker the layer, the greater the likelihood of sagging. But there is another fact that suggests that a thicker layer of enamel guarantees a longer life of the bathroom.
Stock footage
Thus, acrylic bathtub repair is an effective way to give a cast iron bathtub that has lost its presentable appearance, a second life.Subject to process technology, the minimum life of such a coating may be 10 years.
- How to choose a vacuum cleaner taking into account the characteristics of the house and coatings?
- What to look for when choosing a water delivery
- How to quickly create comfort at home - tips for housewives
- How to choose the perfect TV - useful tips
- What to look for when choosing blinds
- What should be running shoes?
- What useful things can you buy in a hardware store
- Iphone 11 pro max review
- Than iPhone is better than Android smartphones
 (No ratings yet)