Computer desk assembly

The computer has long been an integral part of our everyday life. Technological progress is being promoted by scientists, and furniture provides us with convenience when working at a computer. It is worth taking the table selection seriously, because it is this stage that will determine the future conditions of your comfort. But not every user knows how to assemble a computer table, is it possible to do this yourself. In order to simplify the task for many, we will talk about the main points in the assembly procedure.
to contents ↑Location
Before you take up the placement of furniture, it is worth choosing the right place. When choosing this place you need to pursue the following criteria:
- The table should not take up much free space in space. Furniture should not constrain your movements.
- Required availability of outlets. If you are preparing to purchase a table, then provide access to power sources.
- In order to avoid heavy eye strain, you need to choose the room in which there is no shortage of light.
- It is not recommended to place the table near heating devices, since the equipment placed on it may fail in the future due to temperature influences.
- The surface that will be located behind the table should not have any defects or bumps. This enterprise will help you if you want to install additional shelves or a cabinet.
If you are guided by these tips, then the assembly of the computer table will pass without difficulty.
to contents ↑Choosing furniture
The model must meet the following requirements:
- The ratio of area to space occupied. On the table you need to place the largest number of objects, but at the same time it should occupy a minimum of space.
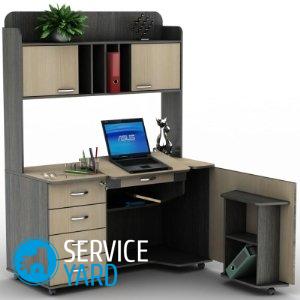
Important! Corner type of furniture is a pretty good option, because it is perfect in any interior and will save precious space.
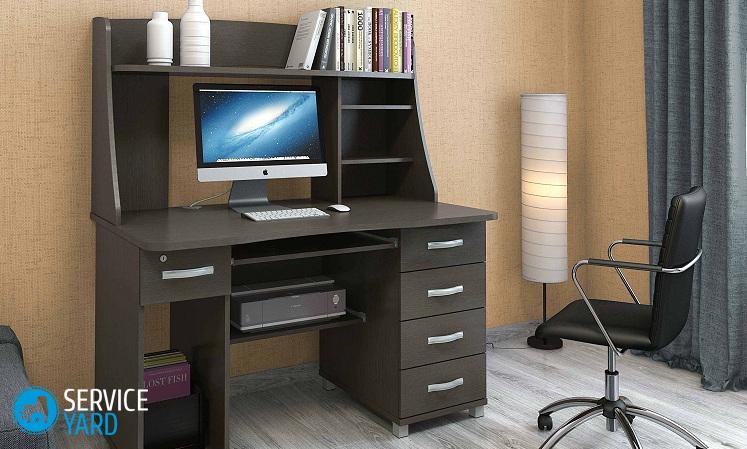
- Choose only the designs that come with the shelves. The latter - will help to keep at hand all the most used items.
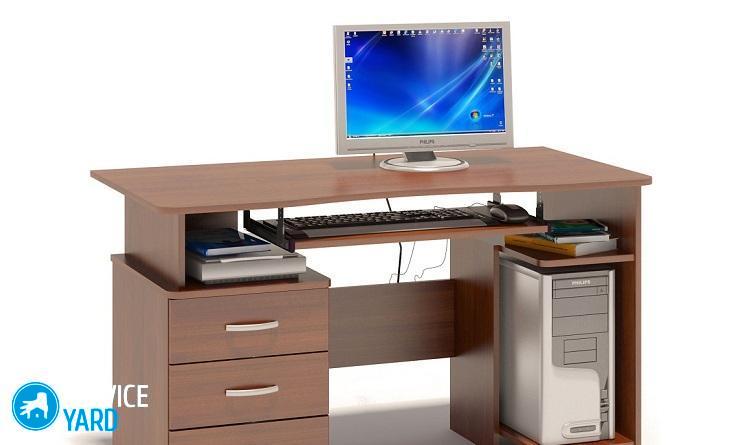
- Since the piece of furniture is needed for the computer, you should make sure that the design has a retractable backing for using the keyboard.
These simple rules will help you provide comfort and coziness when working with a computer device.
How to carry out installation?
For work, you need to get hold of the following tools:
- Flat screwdriver and cross screwdriver.
- Any screwdriver.
- At least a superficial description of the design.
- A few boxes or small cans into which small structural elements can be folded.
Working process:
- First, you will need to arrange the small components in separate boxes. It is recommended to lay them out in accordance with the instructions for the furniture.
- A few details are best placed with the back to the top. This is best done on the floor. In pre-drilled holes, you will need to place metal plates and install mounting screws directly on top of them. In order to fix the screws, you will need to use a screwdriver.
- Next, you will need to connect all the components as described in the instructions.
- It is very important that all parts are firmly fixed. Next, you need to install fasteners from the bottom of the table. Using screws, you can fix the side parts on the surface of the countertop.
- At the bottom of the table, where it is better to place marks in advance, we attach a shelf for keyboard operation. Using a screwdriver, attach the movable element and align it.
Important! It is necessary to make sure that the element moves quietly in two directions.
- Re-make sure that the fixation is carried out qualitatively and that all components do not move or stagger. Each screw and self-tapping screw should stand firmly in the structure.
- If each step was performed correctly, then you can take on the operation of the structure.
This instruction takes place if the table was bought ready-made.
to contents ↑Important! By the way, no one bothers you to assemble the computer table according to your own algorithm, and even with your own details. The only condition is to set the required dimensions of the components and prepare the optimal drawing. The progress of the work remains virtually unchanged.
Own instruction
If you take the lightest furniture options to consider, you can create your own algorithm. To create a similar model, you may need:
- Furniture sheets. The size of one should be 600x1000 cm. Three pieces will be enough to carry out the work.
- Sandpaper.
- Varnish for coating, which you can find in any hardware store.
- Fasteners in the form of screws, plates, self-tapping screws and special movable rollers for the shelf.
To build a computer table with your own hands, you can do the following tools:
- Powerful drill and screwdriver.
- Roulette.
- A simple pencil.
You can begin to work, and the following remains to be done:
- From furniture sheets the table top and side parts are cut in accordance with the selected dimensions.
- Using a piece of sandpaper, the corners that are turned “face to the wall” are cut.
- Next, a durable stand for the location of the system unit and a small shelf for the information input device are cut out.
- With the help of a drill, holes are made in those places that will be intended for connection.
- Each part is well sanded with sandpaper and varnished to increase the life of the finished item.
- It remains only to connect all the elements and fasten them with screws, plates and other parts.
Important! In the end, it is worth checking the design for stability. Your table should never stagger.
If you manage to create your own furniture, then while working at the computer it will be doubly pleasant.
Having made any model of the table with your own hands, you will be pleased. We have fully described the process of assembling the table. Now the turn came to the chair.
to contents ↑Computer chair
What a table without a chair. Rules for assembling a computer chair:
- Having bought a chair under a table for a computer, carefully study the instructions. On it, you need to carefully postpone separately the small parts in the boxes and large components. Only then we gradually assemble the chair from the bottom up.
- The assembly of such a chair begins by inserting the rollers into the base. If something in the database interferes with the insert (small alloys of plastics or metal), then they need to be removed.
- Further according to the instructions: each element is connected in series one after another.
- After assembling the lower and upper parts of the chair (that is, the seat and back), both parts are joined together.
- The build quality is checked again.
After assembly, the chair needs to be adjusted. For this:
- Thanks to the handle C, you can adjust the height of the seat (lowering and raising the seat produces a gas lift).
- The figured screw A allows you to adjust the height of the back. If you loosen the screw, it will lower and rise.
- The figured screw B allows you to set the depth of the back. If the screw is loosened, then the backrest moves back and forth.
- The degree of tilt of the back is adjusted by the handle D.
Stock footage
Thus, you not only assemble the chair yourself, adjust it, but also save money.If you wish, you can do it yourself with your own hands to assemble a computer desk and chair, and, most importantly - this is both saving and pride in your work!
 (No ratings yet)