Sliding wardrobe assembly diagram (2-door)
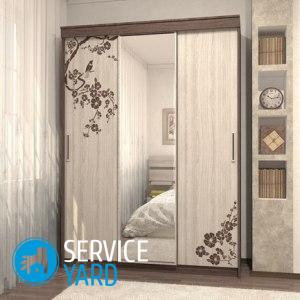
Sliding wardrobes are universal pieces of furniture that allow you to rationally beat the space and save a lot of space in the house. Assembling a wardrobe, of course, requires certain skills. This work cannot be called simple. However, the services of furniture makers are not cheap. We hope that the description and assembly diagram of the sliding wardrobe (2-door - the model discussed in this article) will help you deal with this matter yourself.
to contents ↑How to choose the right place for assembly?
An important requirement for cabinet furniture is an assembly with perfectly right angles. Unfortunately, finding such a place in an apartment is not easy. Therefore, you need to think in advance about the alignment of walls and floors. The most seemingly inconspicuous construction flaws can manifest themselves during assembly and significantly worsen the quality of all work if they do not spoil everything at all.
We will now divide the entire process into separate stages and consider a step-by-step algorithm for executing each of them.
to contents ↑Base mounting
First of all, do not forget to carefully study the instructions with the assembly diagram of the wardrobe. Models with small adjustable legs are good in that they can be installed on an imperfect surface using screw adjusters.
to contents ↑Important! Sometimes the adjustable supports are covered with a special decorative strip. The design looks neater, it makes sense to use a bar if the floor surface is perfectly flat.
Assembly of the body, stiffeners:
- Having fixed the sidewalls with the help of confirmations, do not forget about the stiffeners. They make the whole structure stable.
Important! The back wall also does not need to be nailed, but fixed with screws.
- The reason for the fragility of the wardrobe is that the stiffeners are either completely absent or are not mounted correctly.
Important! Stiffeners are transverse ties associated with the back wall of sheet fiberboard.
- Secure with confirmations the piers located vertically and the roof of the structure.
- Fix cross ties separately in each of sections, and at various levels. This is necessary to give the cabinet stiffness over its entire height.
to contents ↑Important! Center one unifying solid screed.
Shelf mounting
As a rule, this stage is not difficult. It often happens that in different sections of the shelves are located at different levels. If the shelves are axially positioned, install an angled screed to connect the horizontal plane of the shelf to the vertical surface of the intermediate wall.
to contents ↑Door hanging
This is the most important stage of installation, since the appearance of the cabinet depends on how correctly the facade part is mounted. The further assembly sequence of the wardrobe is as follows:
- Glue the mirror to the front of the door leaf. It is advisable to use a special film for this. Even if the mirror breaks, the fragments will not hurt people, as they remain glued to the film.
- Install horizontal and vertical profiles.
- Mount the casters. Fasten the structure using furniture tightening screws.
- At the top of the doors, assemble the door profiles (horizontal and vertical) and install the roller.
- At the bottom, install the roller in a special groove and secure with screws.
- Install the guide rail at the top of the wardrobe, flush with the bulkheads.
- Install the lower rail so that it is slightly recessed deep into the structure. Do not forget to control the correctness of the verticals and horizontals using the building level or spirit level.
- Establish a stopper. Fix the structure to the walls with metal fasteners on the screws.
Stock footage
The assembly procedure for the wardrobe for the corner structure is the same. We hope that now you will successfully cope with the installation. Good luck
 (No ratings yet)