DIY wardrobe
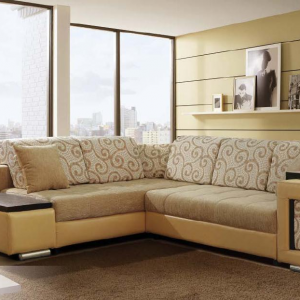
For a long time, sliding wardrobes have been in incredible demand due to their many advantages and useful functions. In fact, they are incredibly roomy, look great in any modern interior. Today, such furniture is found both in luxury apartments, and in small Khrushchev apartments. Their main advantage is the special design of the doors, which move apart in different directions, while the space on the sides and in front of the cabinet remains free. This article is useful to many home craftsmen, because in it we will tell you step by step how to build a built-in wardrobe with your own hands, since it is such designs that are gaining popularity day by day.
to contents ↑Design features of built-in wardrobes
Before getting acquainted with the master class, how to make a built-in closet, the possible locations of such structures, we need to understand how they differ from ordinary closets. In particular, these differences lie in the installation method and the features of their design. Built-in furniture is always designed, and then made for a specific area in the room. Moreover, often it is some parts of the interior that are used as the main components of this furniture, in fact, therefore it is impossible to transfer such a cabinet somewhere. Ordinary cabinets do not have such features.
There are five main ways to integrate wardrobes, depending on their configuration:
- Installation of a wardrobe in a niche. This option is considered the most economical, requires a minimum of effort. In fact, the existing niche is an almost ready-made cabinet, which is enough to equip with doors, shelves, accessories. That is, the lateral bases, the back wall, the bottom, the cover is already there.
Important! Such furniture looks great in the hallway, bedroom.
- Installation of the structure along a blank wall. This method is very similar to the previous one, only part of the room is used instead of a niche to the width of the entire blind wall. It is very popular among owners of small houses, when you need to turn into a wardrobe part of the living area, while not greatly reducing it.
Important! If you still think over the decoration of the doors or decorate them in the original way, you can visually enlarge the room.
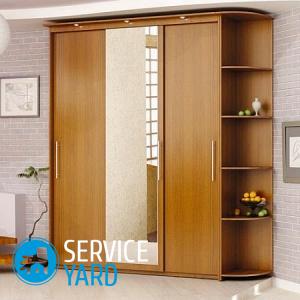
- Corner designs of wardrobes. This is an intermediate option between case and built-in options. That is, they are designed directly under the installation site, they can not be used in another place with minimal alterations. In addition, they have such signs of case “brothers” as the top cover, bottom, walls.
Important! Basically, such furniture is used to equip hallways or rooms where the doorway adjoins a blank wall.
- Storage closet. It is enough to equip the closet with a door with a sliding structure, mount the shelves, and your new dressing room is ready. Naturally, this method is only suitable for apartments with large roomy pantries.
- Exotic options. These are radial sliding wardrobes in which the front side resembles a curved line. Also, inclined models in the horizontal and vertical projection of the plane can be attributed here.Due to the complexity of design, the need to possess special knowledge and skills, today we will not consider such options.
Features of the placement of built-in furniture
Naturally, before you make a built-in wardrobe with your own hands, you will have to decide on its location in the house, because a lot depends on this.
When choosing the most suitable place for him, consider the following nuances:
- Hallway A sliding wardrobe is located here in order to store outer clothing there, which is why a special section must be present in them. It is ideal to make two such compartments - for everyday things by season, for clothes of other seasons. Also, the cabinet should have shelves for gloves, umbrellas, bags. At the bottom there should be a place for shoes. All sections must be closed. It is better to equip one of the doors with a mirror so that you can look at yourself before leaving the house.
- Living room. Such designs also have features. As a rule, they store light things, personal items, documents, dishes, small household appliances. That is why the sliding wardrobe, located here, must have a large number of different shelves, certainly accessories that facilitate storage and access to things. As a rule, the central section in them is made open so that it is easier to install a TV and multimedia equipment there. On the sides of the structures often make open small shelves for storing little things.
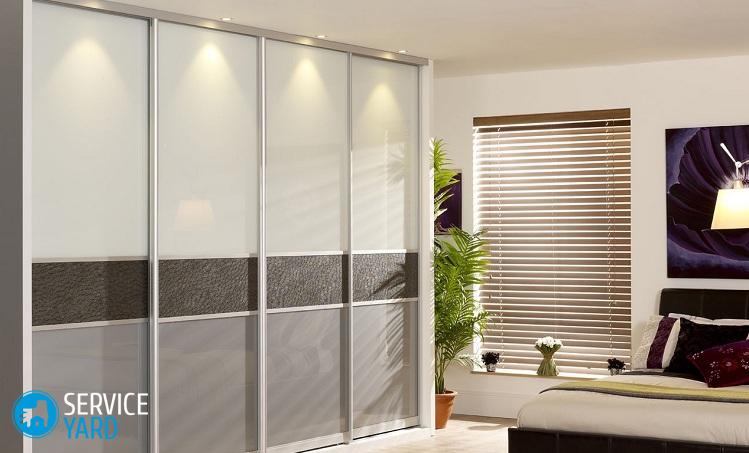
- Bedroom. Bed and underwear are often stored here, so there is no need to design open shelves for such furniture. The door must have a full-length mirror.
- Children’s. Such furniture should be universal so that you can store clothes and at the same time books, toys, other children's things. That is why the cabinet must have the opening section.
to contents ↑Important! The design of the wardrobe makes it possible to maximize its volume in height, because its dimensions are limited only by the distance from the floor to the ceiling.
Designing a wardrobe
After you have determined the location of the wardrobe, you need to take up paper with a pencil and draw up a project.
Design the structure according to the scheme:
- Draw a sketch, taking into account the external dimensions, which should correspond to the dimensions of the niche or the room where the built-in wardrobe will be mounted with your own hands.
- Based on the external dimensions, determine the internal design that would correspond to the features of its operation in the future.
- Display on the sketch the required number of sections and shelves, the location of decorative elements and additional fittings.
- Determine the exact dimensions of the internal partitions, taking into account the thickness of the panels.
- Calculate the size of the doors and the number of leaves, guided by the total dimensions of the cabinet and the number of sections in it.
to contents ↑Important! During operation, the wide flaps easily come off the rails, so it is optimal to make them 600-700 mm wide.
What are wardrobes made of?
Of course, you need to pre-select the material for the wardrobe with your own hands.
More often for this purpose they use the following materials:
- Particleboard, fiberboard, MDF. They are used to assemble all types of furniture. These are practical, universal, durable materials, resistant to the negative effects of external factors, and simple to process. They are produced in the form of sheets of different sizes, due to which cutting occurs with minimal losses. Thanks to the wide color gamut, the sliding wardrobe can easily fit into any design.
Important! It is better to choose a laminated chipboard with a thickness of 16 mm high or medium density.
- Wood. This is not the best option for furniture installation, because it is more difficult to process it, it warps, it easily absorbs moisture.If you give it preference, then you will have to take care of processing wood with special compounds to increase its moisture resistance and the visual appeal of the finished structure.
- Drywall. Some craftsmen prefer to mount built-in drywall cabinets. It should be noted that this material has some advantages, but it is still unsuitable for the design of built-in furniture. Although, if available, use this option.
to contents ↑Important! Doors are best made from laminated particleboard, finished aluminum structures with mirrors, and plastic structures with so-called pseudo-mirrors.
Selection and purchase of component parts
After drawing up the drawing, it is necessary to make a list of parts of the wardrobe, indicating their dimensions. This is done in order to immediately cut them when placing an order with a company that supplies building materials. Of course, you can do everything yourself, but this is difficult work, and the quality of parts made on a special machine is much higher.
While your order will be fulfilled, you can check whether you have all the necessary tools in the following list:
- Screwdriver with hex and cross bits.
- Building level.
- Drill with drills.
- The square.
- Wood hacksaw.
- Angle clamps.
- Rubber or wooden mallet.
- Jig for perpendicular drilling.
Preparation of necessary fasteners and special fittings
Depending on how you assemble the wardrobe with your own hands, prepare the following fasteners:
- Confirmates measuring 5 by 70 mm, plugs for mounting shelves and walls.
- Self-tapping screws or nails for installing the back wall and accessories.
- Construction stapler.
- PVA glue, dowels.
- Furniture metal corners.
- Adjustable or unregulated feet.
- Holders, rods for a coat hanger.
- Roller guides for boxes.
- Castors and rails for mounting sliding doors.
- Handles for drawers and doors.
In our case, it is more appropriate to use special accessories for assembling the sliding wardrobe:
- Drawers are better to buy in the assembly already with the guides, rather than do it yourself.
- Special baskets and nets for storing things.
- Holders for belts, ties, trousers.
- Retractable hangers are best used instead of rods.
- Pantograph.
- Special compartments for storing shoes.
After you have purchased all the materials, fasteners, special elements, accessories, you can safely proceed to the assembly of the structure.
to contents ↑Self-assembly of a built-in wardrobe
Hand-assembled sliding wardrobe will allow you to save useful space, will correspond to your desires, tastes, basic needs. Agree that it is not a pity to spend a little of your time and energy on this. In this case, you will be one hundred percent sure that the furniture is assembled efficiently, reliably, soundly. Next, we will consider stepwise two main mounting options for such structures.
Installing a sliding wardrobe along a blank wall
First, let's focus on the most popular method of assembly, when the structure is placed across the width of a blank wall. If you prefer it, then carefully study how to make a wardrobe, consider the most minor nuances.
Install the cabinet according to the diagram:
- Assemble in a horizontal position the outer walls that will be attached to the bottom and top cover by means of corners and confirmations. Attach the legs to the bottom immediately using self-tapping screws. Install the back wall with a stapler, nails or self-tapping screws.
Important! To ensure the perpendicularity of the walls, it is better to use clamps and a square. Dowels mounted on glue are capable of giving reliability to fasteners.
- Place the base of the structure in the place provided by the project. Check that the installation level is correct with the building level relative to the vertical and horizontal axes.
- Assemble all partitions and shelves using corners or confirmations.
- Attach hardware with self-tapping screws.
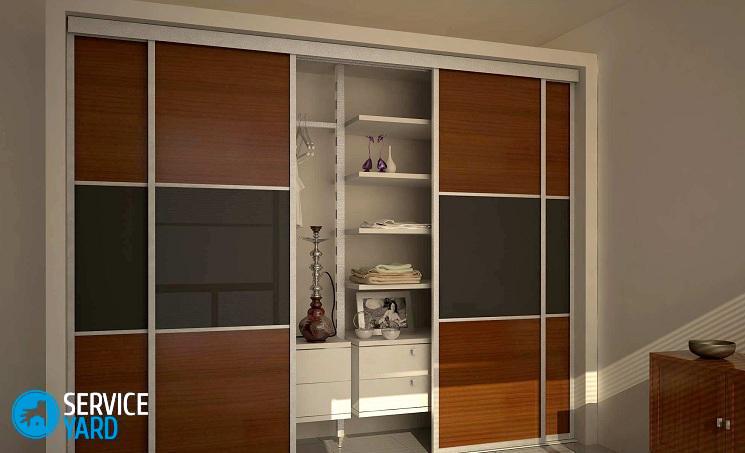
- Install the upper and lower door guides, then hang the doors themselves. If you bought mirrors separately, then glue them with “liquid nails” before hanging.
Installation of a sliding wardrobe in a niche
Now we will consider how to assemble a cabinet built into the wall with your own hands. In this case, the progress of work is slightly changing.
The following manipulations will be required:
- If you decide to install the cabinet in a niche, using the walls as supporting structures, then start the assembly by attaching the vertical partitions with all the transverse shelves to the ceiling, floor, side walls.
- Attach chipboard sheets to the ceiling and walls with dowels or anchor bolts using metal corners. Connect the section details between each other with confirmations.
- Check that the structure is mounted correctly on all axes.
- Assemble the remaining partitions, attach the fittings, install the sliding doors by analogy with the previous version. The only difference is that the doors are installed on the ceiling and floor, and not on the upper and lower planes of the structure.
Stock footage
As it turned out, it’s not difficult to install the built-in closet, you just have to pay maximum attention, take into account all the nuances when choosing materials, components, and direct installation.
 (No ratings yet)